
All categories
Featured selections
Trade Assurance
Buyer Central
Help Center
Get the app
Become a supplier
(15942 products available)


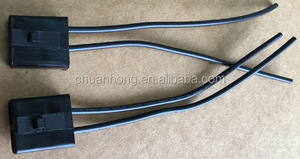


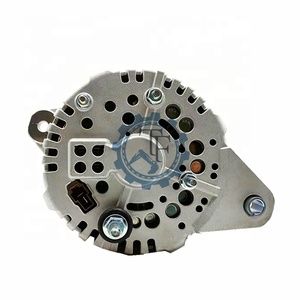
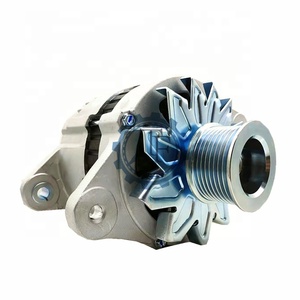
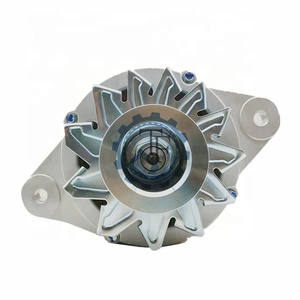


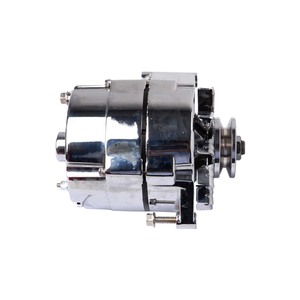


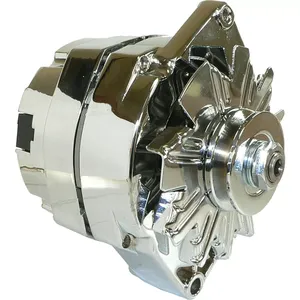

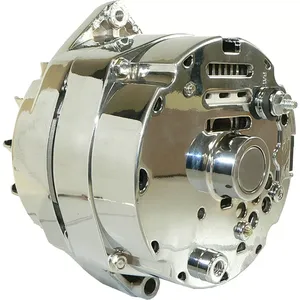

A GM alternator is a type of alternator used in many vehicles. The alternator produces electrical power to charge the battery and run the electrical system when the vehicle is running. The wiring GM alternator consists of various types that are as follows.
1-wire alternator:
The one-wire alternator is simple, easy, and convenient to use. It requires a single wire connected to the battery and a 1-wire GM alternator connected directly to the battery. The 1-wire GM alternator is often used in classic cars and hot rods. It is simple and has a reliable charging system.
3-wire alternator:
The 3-wire alternator is more complicated than the 1-wire alternator. It has three terminals; the three terminals are connected to different places in the electrical system. The 3-wire GM alternator is commonly used in modern vehicles. It is reliable and has a stable charging system.
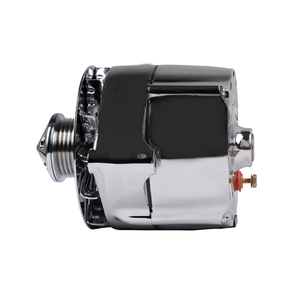
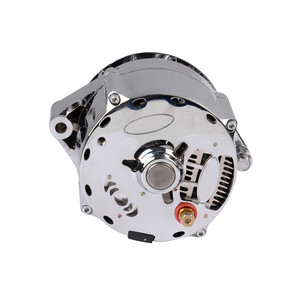
High-output alternator:
The high-output alternator produces a large amount of power. It is suitable for powering high electrical loads, such as audio systems, lighting, and other accessories. The high-output alternator is used in vehicles designed for heavy-duty work, such as trucks and commercial vehicles.
Voltage regulator:
The voltage regulator controls and maintains the voltage produced by the alternator. It ensures that the electrical system operates at a constant and stable voltage. The voltage regulator is an important part of the wiring GM alternator. It protects the electrical system from voltage fluctuations and overcharging.
Internal vs external alternator:
The internal-exciting GM wire alternator has the excitation circuit inside the alternator. The external-exciting GM wire alternator has the excitation circuit outside the alternator. Internal-exciting GM wire alternators are more common and widely used in modern vehicles, while external exciting GM wire alternators are used in older vehicles.
Below are the specifications of Wiring GM Alternator
Output Voltage and Regulation
The alternator's output voltage must be compatible with the battery's voltage to allow proper charging. For a 12-volt system, the output voltage should be around 13.5 to 14.5 volts. Voltage regulation ensures consistent output voltage.
Output Current
The output current indicates the amount of electrical power the alternator can supply. Higher output currents are required for vehicles with additional electrical accessories. The output current is measured in amps.
Speed vs. Output
The alternator's output increases with speed, so lower output at idle requires higher output at higher speeds. This means that the output current is not constant but varies depending on the alternator's speed.
Cooling
The alternator has a cooling system, which is either air-cooled or water-cooled. This cooling system ensures that the alternator does not overheat, which can damage its components. Cooling is important for maintaining alternator performance.
Noise
The alternator should be as quiet as possible. Noise can be annoying, and a noisy alternator can indicate a problem. The alternator is designed to operate with minimal noise.
Size and Weight
The alternator's size and weight affect its performance. A larger, heavier alternator will produce more power than a smaller, lighter one. The size and weight of the alternator are related to its performance.
The following are the maintenance of Wiring GM Alternator:
Inspecting the Wiring Harness
Inspect the wiring GM alternator for signs of wear and damage, such as fraying, cracking, or broken connectors. Loose or damaged wires can cause charging problems. Loose or damaged wires can cause charging problems. Ensure all connections are secure and free of corrosion.
Checking the Output Voltage
Use a multimeter to check the alternator's output voltage while the engine runs at idle and 2000 RPM. The output voltage should be within the specified range. If the output voltage is too high or too low, there may be a problem with the voltage regulator or other alternator components.
Checking the Belt Tension
Check the tension of the belt that drives the alternator. A loose belt can cause alternator charging problems. To check the belt tension, press down on the belt between the alternator and the engine with a force of 10 pounds. The belt should move 1/2 inch. If the belt moves more than 1/2 inch, it is loose and needs adjustment.
Checking the Bearings
Check the alternator bearings for wear and damage. Worn bearings can cause noise and affect alternator performance. To check the bearings, remove the alternator from the vehicle and spin the pulley. The pulley should spin smoothly without noise or resistance. If the bearings are worn, the alternator needs replacement.
Checking the Cooling System
For alternators with a cooling system, check the cooling system for proper operation and coolant level. A faulty cooling system can cause the alternator to overheat, affecting performance and reducing lifespan.
Lubricating the Alternator
Some alternators require periodic lubrication of the bearings and other moving parts. Follow the manufacturer's instructions for the type and frequency of lubrication. Use an appropriate lubricating oil or grease.
Choosing the right GM alternator wiring for a vehicle is crucial for ensuring proper electrical system function and reliability. Here are some key factors to consider when selecting a GM alternator wiring:
Current Output:
The alternator's current output should be compatible with the vehicle's electrical needs. Higher-output alternators (e.g., 150A, 200A, or 250A) are suitable for vehicles with aftermarket installations, such as sound systems, additional lighting, or other power-hungry accessories.
Voltage Regulation:
Voltage regulation is essential for maintaining a stable electrical system. Look for GM alternators with built-in voltage regulators (e.g., internal or external) to ensure consistent output and protect sensitive electronic components from voltage fluctuations.
Wire Gauge:
The alternator's wiring harness should be of sufficient gauge to handle the expected current without excessive voltage drop or heat generation. Thicker wires (lower gauge numbers) are preferable for high-output alternators, as they provide lower resistance and better conductivity.
Connector Compatibility:
Ensure that the alternator connectors and vehicle's electrical system are compatible. Consider the required adapters or conversion pigtails to facilitate a proper and secure connection between the alternator and the wiring harness.
Quality and Durability:
Choose high-quality alternator wiring and components from reputable manufacturers to ensure durability and reliability. Look for materials that are resistant to heat, moisture, and chemical exposure to withstand the demanding engine bay environment.
Installation and Maintenance:
Consider the ease of installation and the availability of maintenance instructions or kits. Some GM alternator wiring harnesses are designed for straightforward installation, while others may require more complex assembly. Choose wiring kits that include detailed instructions and essential components for a hassle-free installation and future maintenance ease.
By considering these factors, one can select the right GM alternator wiring for the specific needs and requirements, ensuring optimal performance, reliability, and long-lasting service.
Before attempting an alternator replacement, it's important to have a basic understanding of car mechanics. If one doesn't feel confident, it might be best to let a professional handle it. However, for those who prefer to take the DIY approach, here are some steps to guide them through the process:
Q1: What is a GM 1-wire alternator?
A1: The GM 1-wire alternator is a self-excited alternator that requires only one wire to connect it to the electrical system. This simplifies the wiring and makes it easier to install and troubleshoot.
Q2: Can the wiring of an alternator be modified for performance gains?
A2: While modifications can be made to optimize the electrical system's performance, it is essential to consult with a professional to ensure that any changes are safe, reliable, and compliant with industry standards.
Q3: What is the difference between a 6-wire and an 8-wire alternator?
A3: The main difference lies in the number of connections available for wiring. A 8-wire alternator offers additional options for more complex electrical systems or specific applications, while a 6-wire alternator is sufficient for most standard setups.
Q4: Can alternator wiring be upgraded to support more electrical accessories?
A4: Yes, upgrading the wiring to a larger gauge can provide additional current capacity and support more electrical accessories without straining the system. This is beneficial for vehicles with added lights, sound systems, or other power-hungry components.
Q5: Is it possible to wire an alternator for dual battery setups?
A5: Yes, alternators can be wired for dual battery setups, ensuring both batteries receive adequate charging. Specific dual battery wiring configurations are available to optimize performance and reliability in such systems.


