


Types of Universal Turbo Kits
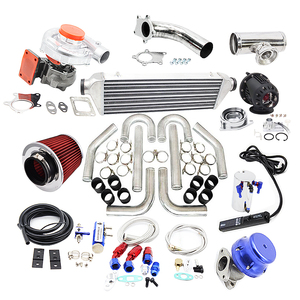
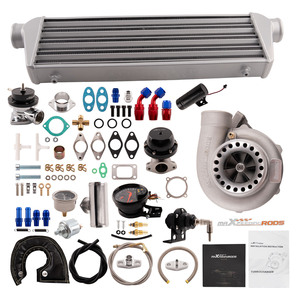
A universal turbo kit is a collection of components designed to install a turbocharger on virtually any internal combustion engine. These kits are engineered to increase airflow into the engine, resulting in significant performance gains. Depending on your power goals and engine specifications, different turbo configurations are available:
Single Turbo Kit
The most popular choice for beginners and enthusiasts looking for a straightforward performance boost. This kit includes one turbocharger along with all necessary components for installation.
Best for: Entry-level modifications, balanced power delivery, simpler installation
Twin-Turbo Kit
Features two turbochargers working in tandem to deliver enhanced power across the entire RPM range. Ideal for high-performance applications where maximum power is desired.
Best for: High-performance engines, consistent power delivery, reduced turbo lag
Variable-Geometry Turbocharger (VGT) Kit
Utilizes adjustable turbine blades to optimize boost pressure throughout the RPM range, providing precise control over engine performance.
Best for: Balance of low-end torque and high-end power, reduced turbo lag
Electric Turbo Compeller (ETC) Kit
An affordable option that electronically forces additional air into the engine intake, improving response and efficiency without the complexity of traditional turbo setups.
Best for: Budget-conscious enthusiasts, mild performance gains, improved fuel efficiency
Expert Tip: When choosing between turbo types, consider not only your power goals but also your driving style. Single turbos offer simplicity and reliability for daily drivers, while twin-turbo setups are better suited for performance-oriented applications requiring quick throttle response and high power outputs.
| Turbo Type | Power Potential | Installation Complexity | Cost Range | Best Application |
|---|---|---|---|---|
| Single Turbo | Moderate to High | Moderate | $1,000-$3,000 | Daily drivers, entry-level performance |
| Twin-Turbo | Very High | Complex | $3,000-$7,000+ | High-performance applications, racing |
| VGT | High | Moderate to Complex | $2,500-$5,000 | Performance vehicles requiring responsive power |
| ETC | Low to Moderate | Simple | $500-$1,500 | Budget builds, mild performance enhancement |
Specifications & Components of Universal Turbo Kits
Understanding the key components and their specifications is essential when sourcing universal turbo kits. Each element plays a critical role in the overall performance and reliability of your turbocharged setup:
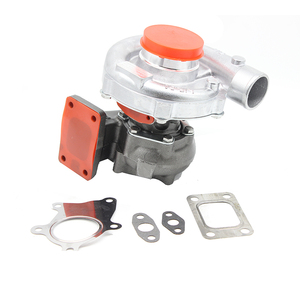
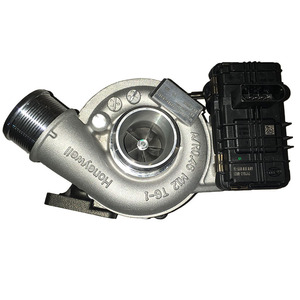
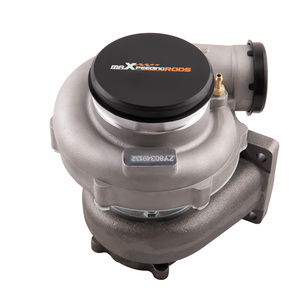
Turbocharger
The heart of any turbo kit, available in various sizes to match different engine displacements and power goals. Key specifications include:
- Compressor and turbine wheel size (measured in mm)
- A/R ratio (smaller ratio = quicker spool, larger ratio = higher top-end power)
- Flow capacity (measured in lb/min or CFM)
- Turbo trim and inducer/exducer dimensions
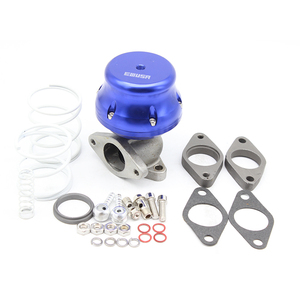
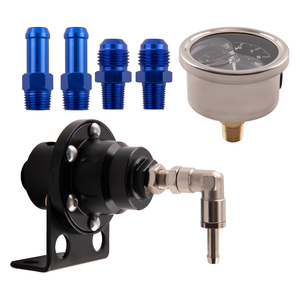
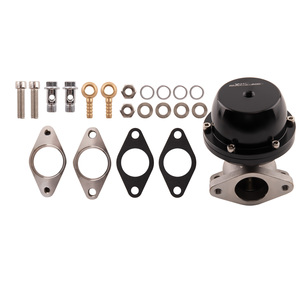
Wastegate
Controls boost pressure by regulating exhaust flow through the turbine. Available as:
- Internal wastegates (integrated into turbo housing)
- External wastegates (separate component for better control)
- Spring pressure ratings (typically 5-26 PSI)
- Actuator types (pneumatic, electronic)
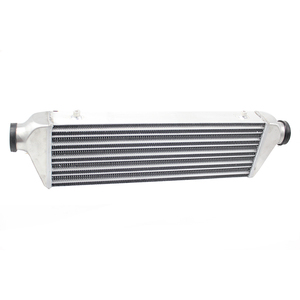
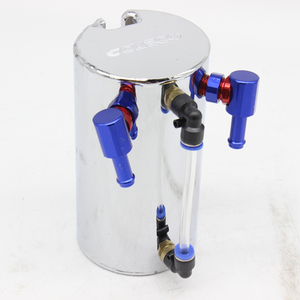
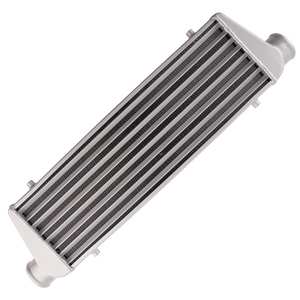
Intercooler
Cools compressed air before it enters the engine, increasing density and reducing detonation risk:
- Air-to-air (uses ambient air for cooling)
- Air-to-liquid (uses coolant for more efficient heat transfer)
- Core size and efficiency ratings
- Pressure drop specifications
Blow-Off Valve (BOV)
Releases pressure when throttle closes to protect turbo and improve response:
- Atmospheric (vents to atmosphere with signature sound)
- Recirculating (returns air to intake)
- Hybrid designs (adjustable between both modes)
- Flow capacity and spring rates
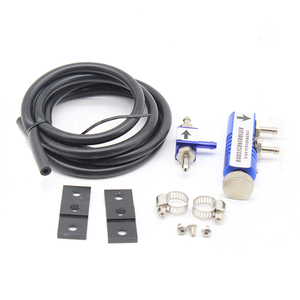
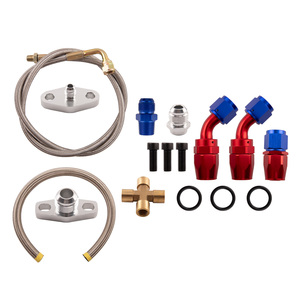
Oil Feed & Drain Lines
Critical for turbo lubrication and cooling:
- Heat-resistant materials (braided stainless steel, high-temp hose)
- Diameter specifications (typically -4AN feed, -10AN drain)
- Fittings and adapters for engine compatibility
- Oil filter relocation options
Flanges & Exhaust Piping
Connect components and route exhaust gases:
- Flange types (T3, T4, V-band, etc.)
- Pipe diameter (2.5" to 3" standard, larger for high-power applications)
- Material quality (304/321 stainless preferred)
- Wall thickness specifications
Pro Tip: When selecting turbo specifications, remember that bigger isn't always better. A properly sized turbo matched to your engine displacement will provide better drivability and throttle response than an oversized unit that produces more lag. Consider your driving habits and performance goals when choosing turbo specifications.
Maintenance of Universal Turbo Kits
Proper maintenance is crucial for the longevity and performance of your turbocharged system. Follow these essential practices to keep your turbo kit performing optimally:
| Maintenance Task | Frequency | Importance | Details |
|---|---|---|---|
| Oil Changes | Every 3,000-5,000 miles | Critical | Use high-quality synthetic oil with proper viscosity rating for turbocharged engines |
| Air Filter Replacement | Every 15,000-25,000 miles | High | Inspect monthly and replace sooner if driving in dusty conditions |
| Cool Down Period | After every drive | Critical | Allow 1-2 minutes of idling before shutdown to prevent oil coking |
| Exhaust System Check | Every 10,000 miles | Medium | Inspect for leaks, cracks, and proper connections |
| Oil Line Inspection | Every 15,000 miles | High | Check for leaks, restrictions, and heat damage |
| Intercooler Cleaning | Every 20,000 miles | Medium | Remove debris and clean fins to maintain cooling efficiency |
| Wastegate/BOV Function Test | Every 15,000 miles | Medium | Verify proper operation and adjustment |
Warning: Neglecting turbo maintenance can lead to catastrophic failure. Oil starvation is the #1 cause of turbocharger failure. Always ensure proper oil pressure and quality, and never drive aggressively until the engine reaches operating temperature.
Maintenance Tip: Use a turbo timer or manual cool-down procedure after high-performance driving. This allows the turbocharger to cool properly while maintaining oil circulation, significantly extending turbo life and preventing oil coking on the bearings.
How to Choose the Right Universal Turbo Kit
Selecting the ideal universal turbo kit requires careful consideration of multiple factors to ensure compatibility, performance, and reliability. Follow this comprehensive selection guide:
Engine Compatibility
The foundation of your turbo selection decision. Consider:
- Engine displacement and internal components
- Compression ratio (lower is better for turbocharging)
- Fuel system capacity and upgrades needed
- ECU compatibility with turbo applications
Quality & Reliability
Critical factors for long-term satisfaction:
- Manufacturer reputation and warranty
- Material quality (stainless components preferred)
- Bearing type (ball bearing vs. journal bearing)
- Machining precision and component fitment
Budget & Intended Use
Balance cost with performance requirements:
- Daily driver vs. track/competition use
- Power goals and drivability expectations
- Total budget including supporting modifications
- Long-term cost considerations (maintenance)
Future Maintenance
Consider long-term ownership factors:
- Parts availability and cost
- Service interval requirements
- DIY serviceability vs. specialist requirements
- Upgrade path potential
Selection Tip: Don't overlook supporting modifications when budgeting for a turbo kit. Depending on your power goals, you may need upgraded injectors, fuel pump, engine management, clutch, and other components to safely handle the increased power output.
| Power Goal | Recommended Turbo Size | Supporting Mods Needed | Typical Budget Range |
|---|---|---|---|
| 50-100 HP Gain | Small (GT15-GT25) | Basic tune, intake, exhaust | $1,500-$3,000 |
| 100-200 HP Gain | Medium (GT28-GT30) | Upgraded injectors, fuel pump, clutch | $3,000-$5,000 |
| 200-300+ HP Gain | Large (GT35-GT42) | Engine internals, standalone ECU, full drivetrain | $5,000-$10,000+ |
DIY Installation of Universal Turbo Kits
Installing a universal turbo kit is a complex but rewarding project for experienced DIY mechanics. Follow this step-by-step guide to ensure proper installation:
Safety Warning: Turbo installation involves working with exhaust components, electrical systems, and fuel systems. Ensure proper safety equipment is used, including gloves, eye protection, and adequate ventilation. If you're unsure about any step, consult a professional.
Preparation
Before beginning installation, thoroughly read the instruction manual and gather all necessary tools and components. Disconnect the battery and elevate the vehicle securely on jack stands. Create a clean, organized workspace and allow sufficient time (typically 1-2 full days) for the installation.
Remove Factory Components
Remove the factory exhaust manifold, downpipe, and any components that will be replaced by the turbo kit. Depending on your vehicle, this may include the intake system, exhaust components, and heat shields. Label all connections and take photos for reference during reassembly.
Install Oil Feed and Return Lines
Mount the oil feed line adapter to the engine block or oil filter housing, ensuring proper placement for optimal oil pressure. Install the oil return line to the oil pan using the provided fittings, making sure it has a proper downward slope to allow gravity return of oil from the turbo.
Mount the Turbo and Exhaust Manifold
Install the turbo manifold to the cylinder head using new gaskets and hardware. Carefully mount the turbocharger to the manifold, ensuring proper alignment and clearance from surrounding components. Tighten all fasteners to manufacturer specifications using a torque wrench.
Connect Oil and Coolant Lines
Attach the oil feed and return lines to the turbocharger. If your turbo is water-cooled, connect the coolant lines to the appropriate ports on the engine's cooling system. Ensure all connections are secure and leak-free, using thread sealant where appropriate.
Install Downpipe and Exhaust
Connect the downpipe to the turbo outlet, then route and secure the exhaust system. Ensure proper clearance from heat-sensitive components and the vehicle's chassis. Install heat shields as necessary to protect surrounding components.
Install Intercooler and Piping
Mount the intercooler in the desired location (typically in front of the radiator for air-to-air units). Connect the intercooler piping from the turbo compressor outlet to the intercooler, and from the intercooler to the throttle body or intake manifold. Secure all connections with high-quality clamps.
Install Blow-Off Valve and Wastegate Actuator
If using an external wastegate, mount it securely to the designated port on the exhaust manifold. Install the blow-off valve on the appropriate intercooler pipe. Connect the necessary vacuum/pressure lines to both components, ensuring they're routed away from heat sources.
Final Connections and ECU Setup
Connect any remaining sensors, vacuum lines, and electrical components. Install a boost gauge and any other monitoring equipment. If required, install and configure an aftermarket ECU or piggyback system to properly manage the increased airflow and fuel requirements.
Initial Startup and Testing
Double-check all connections, fill fluids, and reconnect the battery. Start the engine and check for leaks, unusual noises, or warning lights. Allow the engine to run at idle to build oil pressure before revving or driving. After confirming proper operation, take the vehicle for a gentle test drive, gradually introducing boost as components break in.
Installation Tip: Pre-oil the turbocharger before starting the engine by disconnecting the oil feed line near the turbo and manually adding oil until it flows from the drain. This ensures proper lubrication during the critical first startup and prevents premature bearing wear.
Frequently Asked Questions
Compatibility depends on several factors, including engine type, available space, and existing modifications. Check the manufacturer's specifications for compatibility information, focusing on:
- Engine displacement and configuration (inline, V-configuration, etc.)
- Exhaust manifold bolt pattern and flange type
- Oil pressure specifications and connection points
- Space constraints in your engine bay
- Existing engine modifications that might affect compatibility
When in doubt, contact the manufacturer directly or consult with a performance shop familiar with your specific vehicle model.
The typical break-in period for a new turbocharger is approximately 1,000 miles. During this critical time:
- Avoid high boost pressure and aggressive acceleration
- Allow the engine to warm up completely before driving
- Let the engine idle for 1-2 minutes before shutdown
- Change the oil and filter after the first 500 miles
- Gradually increase boost pressure as components seat properly
Following these guidelines ensures proper bearing break-in and extends the life of your turbocharger system.
Self-installation is possible for experienced mechanics with proper tools and knowledge, but professional installation has distinct advantages:
DIY Installation
Pros:
- Cost savings on labor
- Deep understanding of your system
- Personal satisfaction
Cons:
- Risk of improper installation
- Time-consuming (typically 2-4 days)
- May void warranty if mistakes occur
Professional Installation
Pros:
- Expert workmanship and tuning
- Faster completion (typically 1-2 days)
- Possible warranty on installation
Cons:
- Additional labor costs ($800-$2,000+)
- Scheduling and shop availability
- Less hands-on knowledge of your system
If you're new to turbocharging or have a complex vehicle system, professional installation is highly recommended.
Proper tuning is essential for performance, reliability, and safety. The best approaches include:
- Professional Dyno Tuning: Most reliable method with real-time adjustments based on actual performance metrics
- Aftermarket ECU: Standalone systems like Haltech, AEM, or EcuTek offer comprehensive tuning capabilities
- Piggyback Systems: Less invasive options like Cobb AccessPort or APEXi Power FC for mild to moderate builds
- Wideband O2 Monitoring: Essential for monitoring air-fuel ratios during the tuning process
A proper tune should optimize ignition timing, fuel delivery, boost control, and rev limits to prevent engine damage while maximizing performance.
Turbo lag is common but can be minimized through several approaches:
- Check Turbo Sizing: Ensure your turbo isn't oversized for your engine displacement
- Optimize Wastegate Settings: Adjust spring pressure or controller settings for earlier spool
- Improve Exhaust Flow: Larger downpipe, less restrictive exhaust, and proper manifold design
- Anti-Lag Tuning: Advanced ECU strategies to maintain turbo speed during throttle closure
- Boost Controllers: Electronic boost controllers can help manage spool characteristics
- Consider Ball-Bearing Turbos: They spool faster than traditional journal bearing units
Remember that some turbo lag is inherent to the turbocharging process. Finding the right balance between lag and power output is key to a satisfying driving experience.