
All categories
Featured selections
Trade Assurance
Buyer Central
Help Center
Get the app
Become a supplier
(1375 products available)


 Ready to Ship


 Ready to Ship


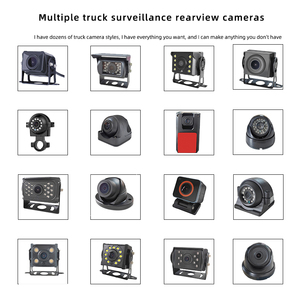
Truck backsight cameras come in three main types, each of which has its own set of features and benefits to consider. Here are some of those types:
As the name suggests, this camera is integrated into the rearview mirror, replacing the typical glass mirror. It provides a wider field of view behind the truck and can be used as a traditional mirror. The rearview mirror truck camera for trucks has the advantage of being easy to install and is often more affordable than other options. On the other hand, the camera's placement at the front of the truck limits its ability to see the entire rear area.
These systems have several cameras placed in various critical areas of the truck, such as the front, sides, and back. They offer a complete 360-degree view of the truck's surroundings, eliminating blind spots. Multi-camera systems are particularly useful for larger trucks and those that frequently travel crowded areas. Installing and maintaining these systems can be challenging and costly, which is a disadvantage.
These cameras are easy to install and are often used for backtracking. The video feed is sent wirelessly to a display monitored by the driver, which eliminates the need for complex cable connections. These cameras are more affordable than wired cameras and can be used in various types of vehicles, making them quite versatile.
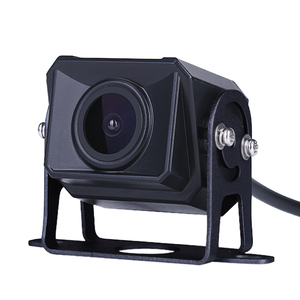
These are the most common types of truck cameras. The camera is installed at the truck's back and connected to a monitor at the dashboard using wires. They offer high-quality video feeds and are more reliable than wireless cameras. However, installing wired cameras can be challenging and often requires the expertise of a professional.
Like any other piece of equipment, a truck camera system has specifications and needs maintenance so it can function properly. Below are the specifications of a typical truck camera and its maintenance requirements.
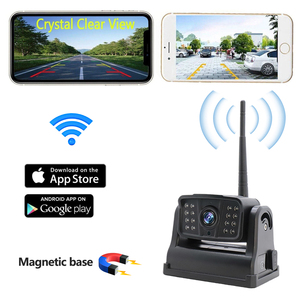
When choosing truck cameras to buy, all these factors have to be considered. First, consider the resolution of the camera. The camera resolution determines the quality of the video it records. A higher resolution camera provides a clearer, more detailed image. This makes it easier to see important details.
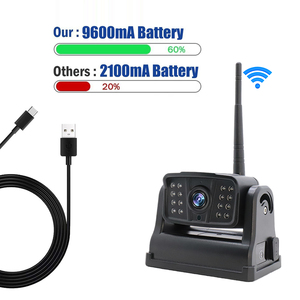
On the other hand, a low-resolution camera is the opposite. It provides a blurry image that is difficult to see. Therefore, it is advisable to get a camera with a higher resolution to get clear images and details. The storage capacity of the camera is another important feature. It is advisable to get a camera with a large storage capacity so they can store more recordings.
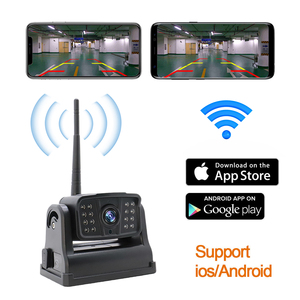
Consider the camera angle of view. Different truck cameras have different angle views. Some have wide-angle views that provide a larger view of the surroundings. This helps in monitoring the truck and the surroundings. The blind spots are also minimized with a wide-angle view. However, cameras with narrow-angle views have reduced capabilities in monitoring the truck and the surroundings. Consider the connectivity of the camera. Some truck cameras can be connected to other devices such as smartphones, while others cannot be connected. It is advisable to get a camera that can be connected so that the recorded videos can be accessed easily.
Consider the reliability of the camera. Some cameras have features that ensure they function properly at all times. They have features such as a waterproof exterior, a dust resistant exterior, and a shockproof exterior. These features make the camera resistant to harsh weather conditions and physical damage, making it more reliable. The price of the camera should also be considered. The budget of the buyer should guide them into getting a camera they can afford. However, they should be cautious about cameras with low prices as they may lack important features.
Consider the installation process. Some truck cameras are easy to install, while others are difficult and require professional help. It is advisable to get a camera that is easy to install to save on time and money. The maintenance requirements of the camera also need to be considered. Some cameras require regular maintenance to function properly, while others do not. It is advisable to get a camera that does not require regular maintenance.
Here are step-by-step guides for installing a truck camera;
1. Select a proper and well-lit work area, ideally under a shelter to allow for a smooth camera installation process.
2. Collect all essential tools and installation materials. This includes the appropriate wiring harness, the selected truck rear camera for truck kit, electrical tape, wire connectors, mounting hardware, a power drill, and screwdrivers of varying sizes.
3. Ensure the truck is turned off, and the keys are off the ignition.
4. Ensure all the tools and materials are within reach.
1. Detach the negative terminal of the truck battery and yet attach it to avoid electrical hazards during the installation process.
2. Choose the camera mounting point. Decide where the camera will be mounted and how it will be mounted. The camera can be mounted on the bumper or the tailgate. It can also be mounted on the license plate or a special bracket attached to the truck.
3. Drill holes for wiring and mounting. Drill a small hole through the body of the truck to allow the camera wiring to pass through the truck's interior from the camera to the monitor. Also, drill holes for the mounting hardware to secure the camera to the mounting location.
4. Mount the camera. Fix the camera using the mounting hardware and ensure it is tightly secured.
5. Camera wiring connection. Connect the camera wiring to the wiring harness that came with the camera kit. Strip the ends of the wires and twist them together. Use the wire connectors to ensure a secure connection. Cover the connection with electrical tape to prevent short circuits.
6. Run the camera wiring. Run the camera wiring along the truck's interior, ensuring it is concealed and protected from potential damage.
7. Connect the wiring harness to the truck's electrical system. Locate the fuse box and identify a fuse that only gets power when the truck is on. Connect the wiring harness to the fuse box using an Add-a-Circuit fuse tap. Ensure the connections are secure.
8. Test the camera system. Reattach the negative terminal of the truck's battery, and then turn on the ignition. Test the camera by shifting to reverse and confirming that the image appears on the monitor.
9. Adjust camera angles if necessary. Once the camera is live, adjust the camera angle to the desired view.
10. Secure loose wires and tidy up the installation area. Ensure all wiring is properly secured and protected to avoid potential damage from the road debris.
Q1: What's the best way to install a truck camera?
A1: It's good to adhere to the installation guide provided by the manufacturer since it varies depending on the camera. However, it is normally installed on the tailgate handle, using the existing holes. In case it is not possible to mount the camera in the desired location, consider consulting a professional installer.
Q2: Do all truck cameras have night vision?
A2: No, not all truck cameras have night vision. While many modern truck cameras are equipped with night vision capabilities using infrared LEDs, some entry-level models may not have this feature.
Q3: What is the purpose of a truck camera system?
A3: A truck camera system is designed to improve safety and visibility around the vehicle. It is particularly useful for parking and reversing, helping to avoid accidents and property damage.
Q4: How long is the warranty for a truck camera?
A4: The warranty period for the truck camera will vary depending on the manufacturer and the camera's quality. Normally, it ranges from 6 months to 1 year. Some high-end cameras have a longer warranty period.


