All categories
Featured selections
Trade Assurance
Buyer Central
Help Center
Get the app
Become a supplier
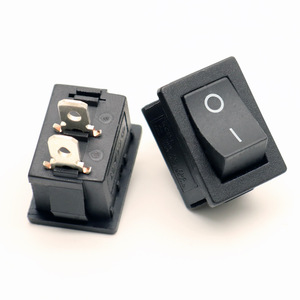
COMBINED
SWITCH
, SWITCHGROUP
ASSY
for XY300UTV,Xinyang,MSU300, MSU600, BMX, LPI UTV, ROKETA UTV, YAMAZUKI UTV, BNX, XY, CHIRONEX
$45 - 50
Min. Order: 1 piece
Alibaba
Vehicle Parts & Accessories
Auto Electrical Systems
Auto Switches
Switch assy combination
(710 products available)
Previous slide
Next slide
COMBINED
SWITCH
, SWITCHGROUP
ASSY
for XY300UTV,Xinyang,MSU300, MSU600, BMX, LPI UTV, ROKETA UTV, YAMAZUKI UTV, BNX, XY, CHIRONEX
$45-50
Min. Order: 1 piece
Previous slide
Next slide
New Original JL320A 2930M 24G PoE+ 1-slot
Switch
$1,200
Min. Order: 1 piece
Previous slide
Next slide
Spot Wholesale Rocker
Switch
Red Boat Shape
Switch
3pin 2pin On Off Round Rocker
Switch
$0.04-0.12
Min. Order: 100 pieces
Previous slide
Next slide
Customized KCD1-A Rocker
Switch
Black 2Pins ON-OFF 8A 250V AC 16A 125V AC RS606 Rocker
Switches
$0.14-0.25
Min. Order: 100 pieces
Previous slide
Next slide
KLS (KAILES) Multifunctional Switchboard 480Y/277V 3PH Low Voltage Distribution Switchgear 3000A Electrical Switchboard Panel
$34,500-35,000
Min. Order: 5 pieces
Previous slide
Next slide
OEM 84540-B1020
Combination
Switch
Assy
Neutral Start New Condition
$9.50
Min. Order: 15 pieces
Previous slide
Next slide
Hubei July DFAC Truck Part 37DN14-74010
Combination
Switch
Assy
$8.60-20
Min. Order: 10 pieces
Previous slide
Next slide
Lixiang Headlight
Switch
Combination
.Steeringwindshield Wiper
Switch
Assy
.Accessories for Lixiang L7.Lixiang L8 Spare Parts
$40.50-42.50
Min. Order: 1 piece
1
2
3
4
5
More pages
18
Top categories
Wheels, Tires & Accessories
Auto Performance Parts
Universal Parts
Auto Body Systems
Interior Systems
Marine Parts & Accessories
Auto Lighting Systems
Auto Engine Systems
Motorcycle Parts & Accessories
Auto Electrical Systems
Auto Brake Systems
Train Parts & Accessories
Railway Parts & Accessories
New Energy Vehicle Parts & Accessories
Cooling System
Auto Transmission Systems
Previous slide
Next slide
Related Searches:
switch assy
switch assy honda
switch assy supplier
cg125 switch assy
engine switch assy
switch assy for honda
neutral start switch assy
suzuki switch assy
main switch assy
magnetic switch assy
komatsu switch assy
auto switch assy
power switch assy
high quality car switch assy
chevrolet auto switch assy