All categories
Featured selections
Trade Assurance
Buyer Central
Help Center
Get the app
Become a supplier
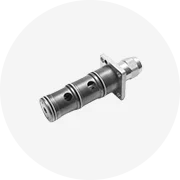
Power
Steering
Rack
Oil
Seal
49297-27N25 49297-27N01 4929727N25 4929727N01
$1 - 3
Min. Order: 50 pieces
Alibaba
Tools & Hardware
Hardware
Seals
Steering rack seal replacement
(1066 products available)
Previous slide
Next slide
Power
Steering
Rack
Oil
Seal
49297-27N25 49297-27N01 4929727N25 4929727N01
$1-3
Min. Order: 50 pieces
Previous slide
Next slide
STEERING
GEAR
RACK
OEM 56500-1E700 For HYUNDAI VERNA III ACCENT III I10
$40-60
Shipping per piece: $92.84
Min. Order: 20 pieces
Previous slide
Next slide
SNAK Factory Power
Steering
Oil
Seal
CNBW11 25*44.5*8.5 For GRJ120
Steering
Rack
Seal
Kits Provider For Automobiles
$0.19-0.26
Shipping per piece: $2,051.34
Min. Order: 200 pieces
Previous slide
Next slide
Wholesale Excavator Hydraulic Pump
Seal
Kit Swing Slew
Seal
Rotary Center Joint Shaft Oil
Seal
Kit ZAX200 ZAX230 ZAX240 ZX240
$9.90-17.90
Min. Order: 10 pieces
Previous slide
Next slide
SNAK Customized OEM BP6152E
Rack
Seal
Replacement
19*29*7/8 Power
Steering
Oil
Seal
For TOYOTA
$0.19-0.28
Min. Order: 500 pieces
Previous slide
Next slide
Steering
Rack
Seal
LR041413-1 LR052324-1 LR089135-1 LR088700-1 LR039246-1 LR140515-1 GL3543 for Range Rover Evoque 2011-2019
$20-50
Shipping per piece: $26.87
Min. Order: 20 sets
Previous slide
Next slide
WS-
SEALS
19*32*6/7
Steering
Rack
Seal
for Auto Parts
$0.25-0.35
Min. Order: 100 pieces
Previous slide
Next slide
SNAK High Pressure Power
Steering
Oil
Seal
NBR 27*44*8.5
Rack
Seal
for TOYOTA OEM 90311-27006 Rubber Oil
Seals
$0.20-0.35
Min. Order: 100 pieces
1
2
3
4
5
More pages
27
Top categories
Hand Tools
Other Tools
Garden Tools
Power Tools
Welding & Soldering Supplies
Pumps & Parts
Tool Storage
Fasteners
Pneumatic Tools
Hardware
Valves
Abrasives
Hydraulic Tools
Machining
Tool Parts
Power Tool Accessories
Previous slide
Next slide