All categories
Featured selections
Trade Assurance
Buyer Central
Help Center
Get the app
Become a supplier

(10864 products available)


Rockwell hardness test
The Rockwell steel hardness tester is the most widely used instrument because of its simplicity and precision. It evaluates hardness by subjecting a material to differing loads while measuring the depth of permanent indentation. Various Rockwell scales employ distinctive penetration balls or cones, facilitating industry application.
Brinell hardness test
The Brinell test applies a spherical steel ball to a material's surface under a preset load. It then assesses the diameter of the resulting indentation through a microscope. This technique is particularly suitable for analysing materials with coarse structures, such as castings or forgings. Large-scale hardness measurements are favoured by industries for the BP's clear and comprehensive readings.
Wolfe hardness test
The sclerometer, commonly referred to as the Wolfe hardness tester, is distinct for its originality. Rather than applying a weight, it assesses linearity by sliding a fine tip on a material's surface. The hardness value results from correlating the scratch depth to the metal's quality. This portable device is excellent for lightweight usage, producing valuable relative hardness data.
Vickers hardness test
The Vickers test is a small, pyramidal diamond indenter approach that measures the indentation area under various loads. Due to its flexibility, micro- and macro-Vickers tests are perfect for thin materials, coating evaluation, and samples with differing hardness levels. The Vickers tester offers precise readings that make it a prerequisite for industries that require demanding quality control.
Knoop hardness test
A sharp, asymmetrical pyramid indenter is used in the Knoop test to assess the hardness of brittle materials. It is ideal for thin layers or small samples due to its unequal faces, as it exerts minimal force. The Knoop tester shines in materials like glasses and composites, where precision is paramount in ensuring adherence to stringent specifications.
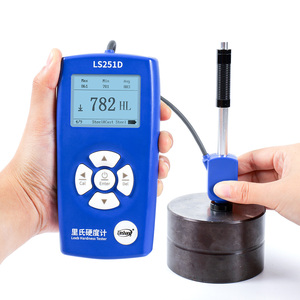
Hardness gauges are fundamental to managerial and production levels across various commercial and steel manufacturing areas. Key uses and values are explained in detail below:
Steel hardness testing assures a production entity that its products meet stipulated quality standards. Companies can find when materials do not conform to required hardness properties by performing hardness tests. Such identification helps to minimise defective products, enhancing performance and customer reliabilities.
Various kinds of steel have distinctive hardness levels, making it vital to efficiently select materials for specific applications. Hardness test values drive engineering team choices on material selection for crucial areas, such as automotive, aerospace, and construction. This selection leads to products that are better performing and durable and minimizes cases of material failure.
Companies can save costs when properly assessing steel hardness. For one, they avoid the expenses tied up in steel with improper hardness utilisation, such as breakdowns, equipment failure, or safety issues. Secondly, these companies optimise their production process by preventing these problems and ensuring that the right materials are used.
Lastly, hardness testing can help a company differentiate itself in the market. Customers prefer consistent products with quality and performance. A brand that stresses its dedication to quality will gain more market shares by showing transparency in its hardness test results.
Many industries work under strict international standards, which include the requirement for hardness testing. Steel hardness testing proves compliance in these sectors and avoids legal consequences responsible for weakening the tests.
In summary, given that hardness testing is cheap, widely accessible, and important for several commercial uses and standards, it presents ideal options for quality assurance in steel structure and component production.
Some common features found amongst steel hardness testers include:
To install the steel hardness tester, follow the steps below:
Several hardness testers can be used in these recommended settings with effective results:
Manufacturing industry
Many manufacturers generally perform hardness tests on steel materials during the selection stage and after processing. They do this to ensure their end products have the right properties. They do this by doing routine hardness checks. They use the findings to improve production line processes and assure product consistency.
Quality assurance laboratories
In these laboratories, hardness test instruments measure steel samples and validate material integrity for research and development purposes. They subsequently certify conformity to industry and government standards. These test results provide essential feedback during the development phase and help in developing future innovative products.
Steel industry
For this industry, hardness testing is crucial for assessing heat-treated steels. The tests determine optimal heat treatment processes. This practice improves the steel's performance in demanding applications, such as aerospace and automotive components.
Field testing
Field engineers and retainers responsible for repairing have portable hardness testers in their toolboxes. They use them to evaluate the hardness of existing structures. Among the structures are steel beams and supports. They do these evaluations to determine if proposed replacements should be made in the units or not.
Research and development
In R&D, hardness testing instruments measure steel experimental samples to discover innovative alloys and material compositions. They use the test results to compare performance and aid the development of advanced hardening. These advanced materials will drive the growth of many industries.
Preparing the steel
Gather the required steel sample. The sample should be levelled and cleaned, with no visible debris, rust, or grease.
Selecting the method
Pick a Brinell, Rockwell, Vickers, or Knoop hardness test. The choice depends on the required hardness sample size and test load.
Setting up the testing machine
Power the testing machine and select the hardness scale for the chosen procedure. If the hardness test machine has different loads, set the appropriate load level.
Indentation creation
According to the method picked, smoothly bring the indenter in contact with the steel surface. Apply the needed load for time specified by the manufacturer.
Indentation measurement
Reduce the load after indent creation is over. If using a microscope, measure the indentation to find the indentation diagonal length.
Hardness calculation
Use the conventional hardness formula for the chosen method. Thus, for example, in the Rockwell test, hardness value equals the difference between the major depth indentation and minor depth indentation.
Result recording
Ultimately, record the calculated values for future references.
Causes of this faulty condition include improperly calibrated hardness testers, dirty indentors, and unlevelled material surfaces. Fixes include cleaning the indenter, calibrating the device, and ensuring the material surface is even.
If too much load is applied for several minutes, the indenter permanently deforms. Don't let excessive load go unchecked. Follow the manufacturer's guidelines on the maximum load for hardness testing.
If too much heat impacts the sampled steel during tests, its microstructure is adversely altered. That creates variable hardness distribution. Avoid this by using proper technique and tools to reduce the amount of heat that comes into contact with the sample.
Due to constant use, the tester indentor chips or wears out. This condition leads to inaccurate hardness results. Solve this by inspecting the indenter before usage. Replace it if worn out.
Recording errors happen when notes are jotted down manually using outdated tools. Avoid this recording error by using digital hardness testers. They immediately record results.
A1. Manufacturing, construction, and auto industries regularly evaluate steel hardness. They do this because steel is the most preferred material, given its strength, resilience, and great flexibility for various industrial applications. Steel hardness testing, therefore, is vital to keeping quality standards to ensure the optimum performance of machinery and structural components within diverse industries.
A2. The diverse steel hardness testing techniques exist due to the varying steel applications. These techniques allow the measurement of hardness at different depths of indentation. It subsequently offers a comprehensive understanding of a material's resistance to permanent deformation in varied industrial settings.
A3. The primary difference between static and dynamic hardness testing methods is that dynamic methods measure the hardness of steel under the conditions of actual steel usage. On the other hand, static methods measure the resistance offered by an indentation under steady conditions of application. The choice of a method depends on project needs and conditions impact on the steel.
A4. Yes, hardness testers grade hardness values of composite steel alloys and single-metric steel. The applied method will offer a comparison of the materials' performances. Thus, results obtained provide useful insights when selecting the right material for specific purposes.
A5. No, various steel grades do not necessarily require hardness testing to be performed by different techniques. Instead, the chosen technique solely depends on project significance and the thickness of the steel being employed. Thus, the most practical hardness test method is predicated upon these factors, irrespective of the steel grade.