


Types of Snap-on Car Lifts
A Snap-on car lift is a professional vehicle hoisting solution designed to elevate cars and trucks for maintenance, repair, and inspection tasks. These lifts are widely used in automotive shops due to their durability, precision engineering, and ease of operation. Snap-on offers a variety of lift types tailored to different workshop requirements, from compact garages to large commercial facilities.
Two-Post Lifts
The most common type of Snap-on car lift, featuring two vertical support columns positioned on either side of the vehicle. These lifts provide excellent accessibility and versatility for general service work.
Advantages
- Excellent undercar access
- Cost-effective for small to medium workshops
- Easy to maintain mechanical systems
- Available in symmetric and asymmetric configurations
Limitations
- Requires more floor space than other models
- Not ideal for heavy-duty commercial use
- May require additional jacks for certain repairs
Best for: General auto repair shops, independent mechanics, mid-sized vehicles
Four-Post Lifts
Designed with four vertical supports at each corner, these lifts offer exceptional stability and weight capacity. They function more like elevated parking platforms, allowing complete access to the vehicle's underside.
Advantages
- High load-bearing capacity (ideal for trucks/SUVs)
- Allows full vehicle drive-through capability
- Perfect for tire changes and alignment work
- Open design versions provide 360-degree access
Limitations
- Larger footprint requires more workshop space
- Higher initial investment cost
- Less portable than smaller lift designs
Best for: Commercial garages, fleet maintenance centers, heavy-duty vehicles
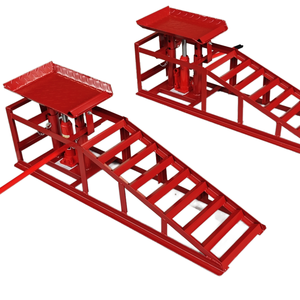
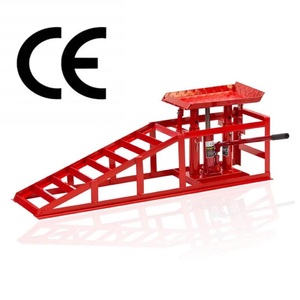
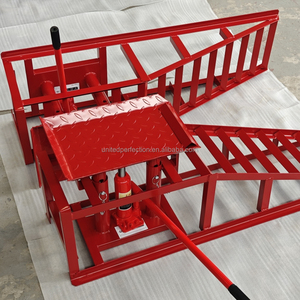
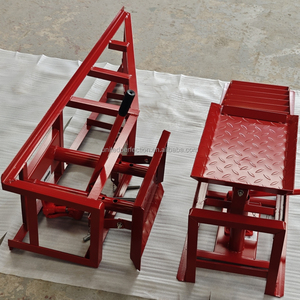
Scissor Lifts
Compact lifting solutions that utilize a scissor-like mechanism to raise vehicles from a low-profile platform. Available in both mobile and stationary versions, these lifts are perfect for tight spaces.
Advantages
- Space-saving, low-profile design
- Quick setup and takedown times
- Portable options available for flexible use
- Easy to store when not in use
Limitations
- Lower lifting height compared to post lifts
- More limited undercar access
- Typically lower weight capacity ratings
Best for: Small repair bays, tire shops, quick-service locations
In-Ground Lifts
Built into the workshop floor, these lifts provide a completely unobstructed workspace by hiding all mechanical components below ground level. They're known for their sleek appearance and professional functionality.
Advantages
- Clean, clutter-free workshop layout
- Maximum undercar access
- Available with piston or screw drive mechanisms
- Durable construction for long-term use
Limitations
- Expensive installation costs
- Requires specialized foundation preparation
- Difficult to relocate once installed
Best for: High-end service centers, performance shops, permanent installations
Portable Lifts
Mechanically engineered for mobility, these lifts can be moved between workstations as needed. Powered by either hydraulic or electric systems, they offer flexibility across different vehicle types and service applications.
Advantages
- Highly versatile and repositionable
- Can service multiple vehicles simultaneously
- Available in various lifting capacities
- Great for multi-use facilities
Limitations
- May require additional anchoring for safety
- Typically slower lifting speeds
- Regular maintenance required for moving parts
Best for: Mobile repair services, temporary setups, multi-vehicle environments
| Type | Ideal Use Case | Weight Capacity | Footprint | Installation Complexity |
|---|---|---|---|---|
| Two-Post Lifts | General auto repair | Moderate | Medium | Low to moderate |
| Four-Post Lifts | Heavy-duty vehicles & fleet maintenance | High | Large | Moderate |
| Scissor Lifts | Quick service & tight spaces | Moderate | Small | Low |
| In-Ground Lifts | Premium service centers | Very high | Medium | High |
| Portable Lifts | Multipurpose & mobile operations | Varies | Compact | Low |
Expert Tip: When selecting a Snap-on car lift, always consider your shop's ceiling height, available floor space, and the typical vehicle types you service. For optimal safety and longevity, follow Snap-on's recommended maintenance schedule and ensure proper installation by certified technicians.
Specifications and Maintenance of Snap-on Car Lifts
Key Specifications to Consider
Snap-on car lifts are essential tools in automotive repair environments, offering reliable lifting capabilities for a wide range of vehicles. Understanding their specifications ensures safe operation and proper selection for your workshop's needs.
Lifting Capacity
The lifting capacity is one of the most critical specifications of any Snap-on car lift. It defines the maximum weight the lift can safely support, ranging from 6,000 pounds for lighter-duty models to 30,000 pounds for heavy-duty commercial units.
Selecting a lift with appropriate capacity depends on the types of vehicles you service. Light trucks, SUVs, and passenger cars typically require lifts rated at 10,000–12,000 lbs, while larger commercial vehicles may need higher-capacity models.
Lift Height
Lift height determines how high a vehicle can be raised above the ground, which affects accessibility and workspace usability. Snap-on car lifts offer lift heights between 40 inches (for compact garages) and up to 80 inches, providing ample clearance for technicians to work comfortably underneath vehicles.
Higher lift heights are especially beneficial when performing undercarriage repairs or exhaust system maintenance. Always ensure that your garage ceiling height accommodates the maximum lift height plus additional clearance for safety.
Platform Size
Platform size refers to the surface area where the vehicle rests during lifting. For Snap-on car lifts, platform dimensions typically range from 16 inches to 26 inches in width, ensuring compatibility with various tire widths and vehicle types.
Adequate platform size enhances stability and prevents tire slippage during lifting. Wider platforms are preferred for heavier vehicles or when lifting vehicles with wider tracks, such as large trucks and SUVs.
Overall Dimensions
The overall dimensions of a Snap-on car lift include its height, width, and length when fully closed. These dimensions typically range from 60 to 80 inches in height, around 60 inches in width, and approximately 80 inches in length.
Understanding these measurements helps in planning your garage layout and ensuring the lift fits within your available space without obstructing other equipment or pathways.
| Specification | Range | Considerations |
|---|---|---|
| Lifting Capacity | 6,000 – 30,000 lbs | Choose based on typical vehicle weight in your shop; allow buffer for future needs. |
| Lift Height | 40 – 80 inches | Ensure sufficient overhead clearance; consider technician comfort. |
| Platform Size | 16 – 26 inches | Wider platforms provide better stability for wider tires and heavier vehicles. |
| Power Supply | 110V or 220V | Match power requirements to available electrical infrastructure in your facility. |
Essential Maintenance Practices
Proper maintenance is crucial for maximizing the lifespan and performance of your Snap-on car lift. Regular upkeep ensures safety, reduces downtime, and maintains compliance with industry standards.
Important: Always follow the manufacturer’s maintenance schedule and safety guidelines. Skipping routine checks or using improper replacement parts can void warranties and create hazardous working conditions.
How to Choose a Snap-on Car Lift
Selecting the right Snap-on car lift involves more than just picking a model from a catalog. It requires careful evaluation of your workshop's needs, safety requirements, and operational efficiency. Whether you're working on passenger vehicles or commercial trucks, choosing the appropriate lift ensures safe operation, maximizes productivity, and provides long-term value.
Lift Capacity and Load Requirements
The weight capacity of a car lift is arguably the most critical factor in selection. Exceeding the maximum load rating can lead to equipment failure, serious injury, or costly damage to vehicles and infrastructure.
- Light-duty lifts typically handle up to 10,000 lbs (ideal for compact cars)
- Medium-duty lifts support 10,000–15,000 lbs (suitable for SUVs and light trucks)
- Heavy-duty models exceed 15,000 lbs (required for large commercial vehicles)
Expert tip: Always choose a lift with at least 20% more capacity than your heaviest vehicle to account for dynamic loading during lifting operations.
Garage Dimensions and Clearance
Proper fit within your workspace is essential for both functionality and safety. Consider both vertical and horizontal dimensions when evaluating lift options.
- Measure ceiling height with HVAC ducts, lighting fixtures, and sprinkler systems in mind
- Verify door clearance for entering vehicles and lifted heights
- Calculate floor space including required service aisles around the lift
Design consideration: Low-rise lifts offer excellent accessibility but may limit under-vehicle access compared to two-post or four-post designs.
Safety Standards and Certifications
Safety should never be compromised when selecting lifting equipment. Snap-on lifts meet rigorous industry standards, but understanding these certifications helps ensure proper application.
- Look for ALI (Automotive Lift Institute) certification for compliance with ANSI safety standards
- Check for mechanical and hydraulic safety locks that engage automatically at set intervals
- Verify overload protection features and emergency descent mechanisms
Critical feature: All personnel should receive proper training on specific lift models before use.
Installation Complexity and Maintenance Needs
Consider both initial setup and long-term maintenance requirements when selecting your lift. These factors impact total cost of ownership and equipment uptime.
- Hydraulic lifts require regular fluid checks and filter replacements
- Electric lifts need proper voltage supply and circuit protection
- Concrete foundation specifications vary by lift type and capacity
Maintenance advantage: Some Snap-on models feature centralized lubrication points and digital diagnostic systems for easier servicing.
Vehicle Compatibility and Versatility
Different vehicle types demand different lifting solutions. The versatility of your Snap-on lift determines how many applications it can effectively serve.
- Race cars benefit from low-profile lifts with precise height control
- Commercial trucks often require heavy-duty in-ground or runway lifts
- Classic cars may need specialized adapters to protect original frames
Adaptability note: Look for lifts with interchangeable arms and adjustable mounting points for maximum flexibility.
Types of Snap-on Lifts Compared
Snap-on offers various lift configurations designed for specific applications. Understanding their strengths helps match the right tool to your workflow.
| Lift Type | Best For | Pros | Cons |
|---|---|---|---|
| Two-post lifts | General repair shops | Good under-vehicle access, moderate footprint | Requires arm adjustments for different vehicles |
| Four-post lifts | Drive-on applications | Easy drive-on capability, storage underneath | Larger footprint, limited side access |
| Scissor lifts | Quick service bays | Fast cycle times, low profile | Less under-vehicle clearance, fixed pad positions |
| In-ground lifts | High-end facilities | Clean floor space, smooth operation | Higher installation cost, requires excavation |
Professional Recommendation: When purchasing a Snap-on lift, consider not only your current needs but also potential future requirements. Investing in a slightly larger lift than immediately necessary can provide years of additional service as your business grows or your clientele changes. Consult with authorized dealers to explore customization options that match your unique workflow patterns.
DIY Replacement Guide for Snap-on Car Lifts
Replacing parts on a Snap-on car lift is a task that can be accomplished by skilled DIY mechanics with proper preparation, tools, and safety awareness. This comprehensive guide walks you through the entire replacement process while emphasizing critical safety measures and best practices to ensure successful installation.
Safety Warning: Snap-on lifts are industrial-grade equipment involving hydraulics, heavy components, and electrical systems. Always wear appropriate personal protective equipment (PPE), work in a well-ventilated space, and never attempt repairs under pressure or stress. Improper handling could result in serious injury or equipment damage.
Detailed Step-by-Step Replacement Procedure
- Step 1: Review the Official Manual Thoroughly
- Locate your specific Snap-on lift model number (usually found on a serial plate attached to the unit)
- Download or obtain the official service manual from Snap-on’s website or customer support
- Study all diagrams, torque specifications, and safety precautions relevant to your lift type (e.g., two-post, four-post, scissor lift)
- Note any model-specific instructions, such as lockout-tagout procedures or hydraulic system depressurization steps
- Step 2: Identify the Faulty Component
- Inspect the lift visually and compare against manual diagrams to pinpoint the exact component needing replacement
- Common replacements include hydraulic cylinders, lifting arms, safety locks, control valves, or structural bolts
- Take clear photos of the current setup before disassembly to aid reinstallation
- Order OEM (Original Equipment Manufacturer) parts directly from Snap-on or authorized dealers for guaranteed compatibility
- Step 3: Assemble Required Tools and Materials
- Basic hand tools: wrench sets, socket sets, screwdrivers
- Lifting equipment: floor jack, jack stands, chain hoist if needed
- Specialty tools: torque wrench, Allen keys, snap-ring pliers, hydraulic fluid catch pan
- Replacement parts, lubricants, thread locker, and sealants as specified in the manual
- Step 4: Prepare the Work Environment
- Clean the area around the lift to prevent debris contamination
- Ensure adequate lighting and ventilation in the workspace
- Clear surrounding obstructions to allow full access to the lift structure
- Keep fire extinguishers and first-aid kits readily available
- Step 5: Implement Safety Protocols
- Wear safety glasses, gloves, steel-toed boots, and hearing protection where applicable
- Ensure the lift is fully lowered and locked in place using mechanical safety locks
- Verify that power is disconnected and properly labeled during electrical or hydraulic work
- If working alone, inform someone nearby of your activities and estimated completion time
- Step 6: Disconnect Power and Hydraulic Systems
- Turn off and lock out the main power switch at the circuit breaker
- Depressurize the hydraulic system following manufacturer guidelines
- Drain hydraulic fluid into an approved container and label it for disposal or reuse
- Cap or plug all open hydraulic lines to prevent contamination and leaks
- Step 7: Remove the Old Component
- Loosen fasteners gradually, especially when removing load-bearing parts
- Support heavy components with jacks or hoists before final removal
- Document any unusual wear patterns or signs of prior damage for future reference
- Label and organize removed hardware for easy retrieval during reassembly
- Step 8: Install the New Component
- Compare the new part with the old one to confirm fitment and orientation
- Apply anti-seize compound to threaded fasteners where recommended
- Tighten all bolts to the specified torque values using a calibrated torque wrench
- Replace seals, gaskets, or O-rings if they were disturbed during disassembly
- Step 9: Reconnect Power and Hydraulic Lines
- Reinstall hydraulic hoses and fittings with clean, dry connections
- Use new crush washers or sealing rings where required
- Restore electrical connections ensuring proper polarity and secure terminals
- Double-check that all guards, covers, and shields are replaced before testing
- Step 10: Conduct System Testing
- Refill the hydraulic reservoir with the correct type and amount of fluid
- Check for leaks with the lift in a low position before raising any vehicle
- Operate the lift slowly through its range of motion while observing performance
- Test emergency stop functions and mechanical safety locks
- Perform a full operational check with a light load before placing heavier vehicles on the lift
| Phase | Key Actions | Potential Risks | Recommended Tools |
|---|---|---|---|
| Preparation | Review manual, gather tools, inspect lift condition | Mismatched parts, missing tools, incomplete documentation | Service manual, camera, flashlight |
| Disassembly | Disconnect power/hydraulics, remove old parts | Fluid spills, damaged threads, unsecured components | Ratchet set, torque wrench, drain pan |
| Installation | Install new parts, apply correct torque specs | Over-tightening, misalignment, improper sealing | Calibrated torque wrench, alignment tools |
| Reconnection | Hydraulic/electrical reattachment | Leaks, incorrect wiring, cross-threading | Hose clamps, multimeter, Teflon tape |
| Testing | Leak checks, functional operation, load tests | Undetected faults, unsafe lifting conditions | Load test weights, pressure gauge |
DIY Tip: Keep a dedicated maintenance log for your Snap-on lift where you record each repair date, parts used, and observations. This helps track wear trends and ensures timely servicing. Also, consider labeling hydraulic lines and electrical connectors with color-coded tags for easier future diagnostics and repairs.
Pro Tip: If this is your first major lift repair, consider having a certified technician review your work before full operation. Even experienced DIYers benefit from a second pair of eyes when dealing with safety-critical equipment like automotive lifts.
Frequently Asked Questions About Snap-on Lifts
Snap-on lifts are available through a variety of official and authorized distribution channels to ensure quality, support, and warranty protection. The primary sources include:
- Official Snap-on Dealerships: Certified dealers offer expert consultation, installation services, and genuine parts.
- Authorized Resellers: These are vetted distributors who carry the full range of Snap-on equipment and often provide local delivery and servicing.
- Snap-on Industrial Website: Buyers can browse product catalogs, compare models, and purchase directly from the company's official website.
For optimal customer service and authenticity, it’s recommended to verify that the seller is officially recognized by Snap-on before making a purchase.
Snap-on offers a diverse lineup of vehicle lifts, some of which are specifically engineered to handle the demands of heavy-duty trucks. However, not all lift models are appropriate for such applications. Key considerations include:
- Lifting Capacity: Heavy-duty trucks often require lifts with capacities of 14,000 lbs or more. Snap-on has models like the in-ground lifts and certain two-post and four-post configurations rated for these loads.
- Structural Integrity: Lifts designed for commercial use feature reinforced frames, durable hydraulic systems, and robust safety mechanisms.
- Intended Use: For frequent or industrial-level maintenance on large vehicles, selecting a lift built for continuous heavy usage is essential.
Always check the technical specifications and consult with a Snap-on representative to ensure you're choosing the correct model for your specific truck type and service requirements.
While Snap-on primarily designs its lifts for indoor use in controlled environments such as workshops and garages, there are certain scenarios where outdoor operation may be feasible. Consider the following factors:
- Weather Conditions: Prolonged exposure to rain, snow, extreme heat, or freezing temperatures can degrade mechanical components, electronics, and hydraulic systems over time.
- Surface Stability: Outdoor installations must have a level, stable concrete foundation to ensure safe and reliable operation.
- Lighting and Visibility: Proper lighting is crucial for both operator safety and precision during vehicle lifting tasks.
- Dust and Debris: Environmental contaminants can interfere with moving parts and reduce the lifespan of the lift if not properly maintained.
If outdoor use is necessary, protective measures such as weather covers, enclosures, or climate-controlled tents should be considered to preserve the lift's performance and longevity.