All categories
Featured selections
Trade Assurance
Buyer Central
Help Center
Get the app
Become a supplier
(178918 products available)


 Ready to Ship


 Ready to Ship


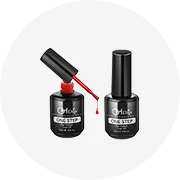
Halloween is the perfect time to express one’s creativity and embrace spooky-inspired nail art. Red black Halloween nails offer a captivating blend of elegance and eerie allure. These nail designs combine the classic red and black color scheme with Halloween-themed elements to create striking and festive nail art that celebrates the spirit of the season. Below are some of the most popular types:
Gothic Glam:
This style combines elegance with a dark, gothic twist. Nails are usually long and pointed, painted in a deep, glossy black. The tips of the nails are painted in a bright, glossy red for a dramatic French manicure look. To embellish, tiny silver skulls or blood-like drip designs can be added to the nails. This style is bold and striking, perfect for those who want a sophisticated yet edgy look for Halloween.
Spooky Glitter Gradient:
This nail design features a dark and sparkly gradient effect. The base of the nails is painted in a deep black color, and then a bright red glitter polish is sponged onto the tips, creating a shimmering gradient that sparkles with every movement. A coat of shiny topcoat smooths out the gradient and gives it a glassy finish. This design is easy to do and perfect for those who like a little bling on Halloween but still want a look that's not too over-the-top.
Webbed Wonders:
This nail art incorporates spiderwebs onto elegantly pointed or almond-shaped nails. The base is a sleek black, with red accents like a solid red nail or red-ombre glitter. A fine brush paints delicate white webs across the black nails, often with a tiny black or red spider for detail. A glossy top coat finishes it. This design is striking and perfect for Halloween, blending elegance and a classic spooky theme.
Bloody Ombre Nails:
In this design, nails gradually transition from deep black at the base to bright blood-red tips, resembling a spooky ombre effect. To make them stand out, a glossy top coat adds shine to the nails. For extra spookiness, black nail stickers in the shape of bats or dripping blood can be added. This look is trendy and not too overwhelming for those who want a subtle yet striking Halloween nail design.
Haunted Glitter Nails:
In this design, nails are painted a deep, shiny black as a base color. Then, a glittery red polish—often with a spooky theme like blood red—is applied over the black base to create a dark, sparkly look. For added effect, a shiny top coat is applied to make the nails shine even more. This look is simple and quick to create, making it perfect for those who want festive nails that are easy to do and don’t require a lot of time to get ready for Halloween.
Taking care of and using nail art effectively can enhance its beauty and longevity. Here are some tips on how to use them:
Prepare the Nails
Start with clean, shaped, and well-prepared nails. Gently push back cuticles and buff the nail surface for a smooth canvas. This ensures the design pops and lasts longer.
Use a Base Coat
Apply a thin layer of protective base coat. This not only helps the colors adhere better but also protects the nails from potential staining and damage. Choose a base coat that caters to specific needs, like strengthening or nourishing, for added benefit.
Even Layering
Apply the red and black colors in thin, even layers. Allow each layer to dry slightly before applying the next to prevent smudging. Two to three coats bring out the color's richness and achieve a smooth finish.
Precision in Design
For intricate Halloween designs, use a fine-tipped brush or nail art tools. Be patient and precise when painting details like spider webs, pumpkins, or ghosts. Let each design element dry before moving on to the next to avoid smudging.
Cleanup and Shine
Use a small brush dipped in remover to clean around the cuticles and nail edges for a polished look. Apply a glossy top coat to seal in the design, add depth, and protect it from chips. Refresh the top coat every few days to maintain shine and longevity.
Safety is a priority when it comes to nail art. Here are some crucial aspects to consider:
Quality Assurance
Products are made with high-quality ingredients that meet stringent safety standards. Each formulation is crafted to ensure not only beauty but also the well-being of the nails.
Non-Toxic Formulations
Nail art sets are free from toxic chemicals like formaldehyde, toluene, and dibutyl phthalate. These harmful substances are often found in many nail products. This makes them safe for regular use.
Dermatologist and Allergy Tested
All products undergo rigorous testing to ensure they are suitable for sensitive skin. The tests are done to ensure that these formulations cause no irritation or allergic reactions, providing peace of mind for users.
User-Friendly Formulas
These nail art products have a smooth consistency for easy application. This reduces the risk of accidents or frustration during the nail art process, making it accessible for beginners and experienced users.
Long-Lasting Wear
Nail art sets are designed to resist chipping and fading. This increases the safety factor by reducing the need for frequent touch-ups and minimizing exposure to chemicals.
These red black Halloween nails have a classic color combination that can be used for many purposes. Here are some of their main functions:
Nail art for Halloween
Nail art using these colors can create many spooky images. They can feature skulls, spiders, pumpkins, witches, and ghosts.
Self-expression
These nails can be used to show one's love for Halloween. A special design can show how one feels about this holiday.
Fashion statement
These nails can also be worn at any time of the year. They can be used to make a bold fashion statement.
Durability
These nails are made with a formula that makes them long-lasting. They will not chip or fade easily.
Easy application
These nails are designed for easy application. They come with easy-to-follow instructions.
Many designs
There are many designs of these red and black Halloween nails. They range from simple to elaborate.
Glossy finish
These nails have a glossy finish that makes them look professional. There are also matte finishes for those who prefer this look.
Matte
These nails have a matte finish. They are black with red designs. They have a non-glossy finish that makes them look unique.
Glitter
These nails have a glittery look. They have red and black glitter polish with different nail arts.
French tip
This classic design features red and black colors. The tips are painted black, while the rest of the nail is a nude color.
Geometric shapes
These nails have geometric shapes painted in red and black. They have lines, triangles, dots, and circles.
Floral
These nails have flowers painted in red and black. They have different flower designs with dark and spooky vibes.
Q1: How long do red black Halloween nails last?
A1: Generally, these red-black Halloween nails can last up to two weeks or more. The manicure's quality, the style's intricacy, and the wearer's daily habits all affect how long it lasts. Nails with gel polish or acrylic enhancements can last even longer with proper care.
Q2: Are there any trends for red black Halloween nails?
A2: Yes, various trends combine the classic red and black colors with seasonal themes. These trends include matte finishes with glossy tips, 3D embellishments like studs or bats, and gradient ombres incorporating deep burgundy shades to provide a modern twist to traditional designs.
Q3: Can red black Halloween nails be customized?
A3: Yes. Red black Halloween nails can be customized to suit individual preferences. One can choose to have specific designs, like favorite Halloween symbols or textures. Furthermore, one can request nails in different lengths and shapes to suit personal style and comfort.
Q4: How can one get rid of red black Halloween nails without damaging natural nails?
A4: To remove these nails safely, use a nail polish remover that doesn't dry out the nails. Dip the cotton pad into the remover and gently swipe it off the nail. If artificial enhancements are used, gently lift them off using a removal kit. Finish by washing the hands, moisturizing the nails, and applying cuticle oil.