


Types of Rear Shock Absorber Tools
Proper rear shock maintenance requires specialized tools designed for specific functions. Understanding the different types available helps mechanics and DIY enthusiasts select the right equipment for the job.
Shock Absorber Spanner Wrench
The most common rear shock absorber tool, used to adjust preload collars that control spring stiffness. These wrenches come in various designs:
- L-shaped for better leverage
- C-shaped for tight spaces
- Adjustable models for multiple shock sizes
Best for: Suspension adjustment and fine-tuning
Shock Absorber Socket Set
Specialized deep sockets designed to fit over shock absorber shafts for removal and installation of mounting hardware. Key features include:
- Deep design to reach recessed fasteners
- Available in standard and metric sizes
- Often includes specialty sockets for OEM applications
Best for: Removal and installation of shock components
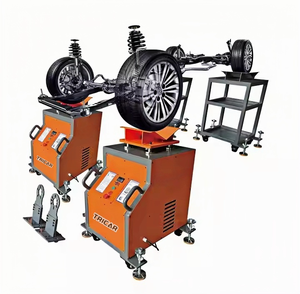
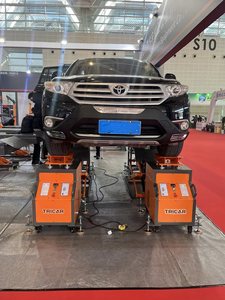
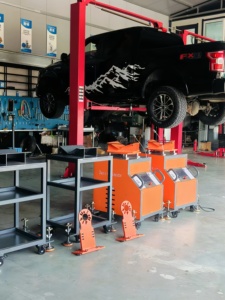
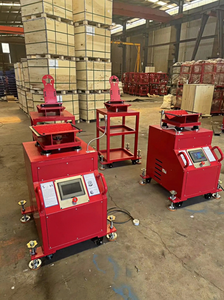
Strut Spring Compressor
Safety-critical tool that compresses coil springs during strut disassembly. Available as:
- Manual types with threaded rods
- Hydraulic versions for easier operation
- Wall-mounted shop models for professional use
Best for: Safe disassembly of strut assemblies
Shock Absorber Installation Tool
Specialized tool that holds shocks in extended or compressed positions during installation, featuring:
- Adjustable locking mechanisms
- Quick-release functionality
- Compatible with various shock designs
Best for: Quick and precise alignment during installation
Torque Wrench
Precision tool ensuring proper tightening of shock absorber fasteners:
- Click-type for audible confirmation
- Beam-type for visual indication
- Digital models for highest precision
Best for: Meeting manufacturer torque specifications
Shock Absorber Oil
Hydraulic fluid for refilling or bleeding shock absorbers:
- Various viscosity ratings for different applications
- Temperature-resistant formulations
- Synthetic options for performance applications
Best for: Maintaining proper damping performance
Pro Tip: Always match the tool to the specific shock absorber design. Using improvised tools can damage components and compromise safety. Quality shock absorber tools are an investment in both vehicle performance and personal safety.
| Tool Type | Primary Function | Skill Level Required | Typical Price Range |
|---|---|---|---|
| Spanner Wrench | Adjusting preload | Beginner | $15-50 |
| Socket Set | Component removal/installation | Beginner | $25-100 |
| Spring Compressor | Coil spring compression | Intermediate to Advanced | $50-300 |
| Installation Tool | Alignment during installation | Intermediate | $30-80 |
| Torque Wrench | Precise fastener tightening | Beginner | $40-200 |
| Shock Oil | Internal fluid replacement | Advanced | $10-50 |
Specifications and Maintenance of Rear Shock Absorber Tools
Quality rear shock absorber tools must meet specific requirements to ensure safety, effectiveness, and durability. Understanding these specifications helps users make informed decisions and properly maintain their equipment.
Key Specifications
- Size and Weight: Affects portability and usability. Compact tools are ideal for field work, while heavier tools often provide greater stability for shop use.
- Material Composition: Chrome-vanadium steel, carbon steel, aluminum, and reinforced polymers offer different combinations of strength, weight, and corrosion resistance.
- Load Capacity: Particularly important for spring compressors and installation tools that must safely handle significant forces.
- Ergonomics: Proper handle design, grip materials, and control placement reduce fatigue and improve precision during extended use.
- Versatility: Multi-vehicle compatibility reduces the need for multiple specialized tools and improves cost-effectiveness.
Maintenance Requirements
- Cleaning Protocol: Remove dirt, grease, and metal particles after each use with appropriate solvents and soft brushes.
- Lubrication Schedule: Apply manufacturer-recommended lubricants to moving parts monthly or after heavy use to maintain smooth operation.
- Inspection Routine: Check for wear, cracks, or deformation before each use, with special attention to load-bearing components.
- Storage Conditions: Store in dry, temperature-controlled environments, preferably in purpose-designed cases or tool organizers.
- Calibration Requirements: Torque wrenches should be recalibrated annually or after approximately 5,000 uses to maintain accuracy.
Safety Warning: Always inspect spring compressors and high-load tools for structural integrity before each use. These tools handle significant forces, and component failure can result in serious injury.
| Tool Component | Common Issue | Maintenance Solution | Replacement Indicator |
|---|---|---|---|
| Spanner Pins/Hooks | Bending or wear | Not repairable - replace when worn | Visible deformation or slipping |
| Socket Drive Ends | Rounding or stripping | Clean thoroughly after use | Visible rounding or slipping |
| Spring Compressor Threads | Dirt accumulation, galling | Clean and lubricate with moly grease | Thread resistance or visible damage |
| Torque Wrench Mechanism | Calibration drift | Professional recalibration | Failed calibration check |
| Tool Handles | Grip deterioration | Replace grip material if possible | Cracking or separation |
How to Choose Rear Shock Absorber Tools
Selecting the right rear shock absorber tools requires careful consideration of your specific needs, vehicle specifications, and quality requirements. This guide will help you make informed decisions when purchasing these specialized tools.
Vehicle Compatibility Factors
Different vehicles require specific tools based on their design and suspension system:
- Vehicle Type: Trucks and SUVs typically require larger, stronger tools than sedans and compact cars
- Suspension Design: MacPherson struts, multi-link, and solid-axle suspensions all require different specialized tools
- OEM vs. Aftermarket: Aftermarket performance suspensions may require unique tool specifications
- Age and Region: Older vehicles or those from different global markets may use non-standard fastener sizes
Quality and Durability Considerations
Investing in quality tools saves money and ensures safety in the long term:
- Material Quality: Look for chrome-vanadium steel, hardened carbon steel, or aircraft-grade aluminum
- Manufacturing Standards: Tools meeting ANSI, ISO, or DIN specifications ensure consistent quality
- Warranty Coverage: Longer warranties typically indicate manufacturer confidence in their product
- Brand Reputation: Established tool manufacturers maintain quality standards for professional use
Expert Advice: Consider purchasing a comprehensive rear shock tool kit rather than individual pieces if you plan to perform complete shock replacement. Complete kits ensure all components are designed to work together and typically offer better value than purchasing tools separately.
Budget Considerations
Tools for rear shock absorbers are available across various price points, with important differences in quality and functionality:
| Price Range | Expected Quality | Best For | Limitations |
|---|---|---|---|
| Budget ($20-100) | Basic functionality, limited durability | Occasional DIY use on standard vehicles | May wear quickly, limited vehicle compatibility |
| Mid-Range ($100-300) | Good quality, respectable durability | Regular DIY enthusiasts, small shops | May lack specialty features for exotic vehicles |
| Professional ($300-1000+) | Premium materials, precision engineering | Professional mechanics, performance shops | Significant investment, may require training |
Important: Never compromise on quality when selecting spring compressors or other safety-critical tools. The small price difference between budget and quality options is insignificant compared to the potential safety risks of tool failure.
How to DIY and Replace Rear Shock Absorbers
Replacing rear shock absorbers is a manageable DIY project with the right tools and approach. Follow this step-by-step guide to safely and effectively replace your vehicle's rear shock absorbers.
Required Tools and Materials
- Jack and jack stands
- Lug wrench
- Socket set and extensions
- Torque wrench
- Penetrating oil
- Wire brush
- New rear shock absorbers
- Replacement mounting hardware (if necessary)
Step-by-Step Replacement Process
-
Prepare the vehicle
Park on a level surface, engage the parking brake, and chock the front wheels. Loosen the rear wheel lug nuts before jacking up the vehicle. Raise the vehicle and secure it on jack stands. Never rely solely on a jack to support the vehicle during work.
-
Remove the rear wheels
Once the vehicle is securely supported, remove the lug nuts completely and take off the rear wheels. Set them aside in a safe location.
-
Locate and inspect the shock absorbers
Identify the shock absorbers mounted near each wheel. Inspect them for obvious damage like oil leaks, dents, or damaged mounts that confirm replacement is necessary.
-
Remove the old shock absorbers
Using your socket set, remove the upper and lower mounting bolts that secure the shock absorber. You may need to spray penetrating oil on rusted fasteners and allow it to work before attempting removal. Support the suspension components as needed during this process.
-
Prepare the new shock absorbers
Compare the new shocks to the old ones to verify correct sizing. Some new shocks come compressed and secured with a plastic strap that should be removed only after installation to prevent premature extension.
-
Install the new shock absorbers
Position the new shock absorber in the mounting locations, aligning it correctly with the mounting points. Insert the mounting bolts and start them by hand before tightening to prevent cross-threading. Tighten the bolts to the manufacturer's torque specifications using a torque wrench.
-
Reinstall the wheels and finalize
Reinstall the wheels and hand-tighten the lug nuts. Lower the vehicle to the ground and tighten the lug nuts in a star pattern to the specified torque. Test drive the vehicle to ensure proper handling and functionality.
DIY Tip: When replacing rear shock absorbers, it's recommended to replace them in pairs (both left and right sides) even if only one appears damaged. This ensures balanced handling and consistent performance.
Safety Notice: If you encounter excessive resistance or are uncertain about any step in the process, consult a professional mechanic. Improperly installed shock absorbers can compromise vehicle safety and handling.
Frequently Asked Questions
Rear shock absorbers typically last between 50,000 and 100,000 miles (3-5 years) under normal driving conditions. However, their lifespan can be significantly reduced by several factors:
- Frequent driving on rough or unpaved roads
- Regular heavy loading of the vehicle
- Continuous towing of trailers or other heavy loads
- Extreme climate conditions (very hot or cold environments)
- Performance or off-road driving styles
Regular inspection of shock absorbers every 12,000 miles can help identify early signs of wear before performance is significantly affected.
Several symptoms indicate failing rear shock absorbers:
| Symptom | Description | Severity Level |
|---|---|---|
| Excessive Bouncing | Vehicle continues to bounce after hitting bumps or during braking/acceleration | Moderate to Severe |
| Body Shake | Vehicle body shakes or shimmies when going over bumps | Moderate |
| Uneven Tire Wear | Cupping or scalloping pattern on tire tread | Moderate |
| Fluid Leaks | Visible oil stains or wetness on shock absorber body | Severe |
| Poor Handling | Vehicle leans excessively in turns or feels unstable | Severe |
| Nose Diving | Front of vehicle dips dramatically during braking | Moderate to Severe |
A simple test: Push down firmly on each corner of your vehicle and release. If the vehicle bounces more than once before settling, the shock absorber is likely worn.
In most cases, modern rear shock absorbers cannot be repaired and must be replaced when damaged. This is because:
- They are sealed units designed for one-time assembly at the factory
- Specialized equipment is required to properly pressurize and seal rebuilt units
- The cost of professional rebuilding often exceeds replacement cost
- Rebuilt shocks rarely match the performance specifications of new units
Some exceptions exist for high-end performance shocks and classic vehicle applications, where specialty shops may offer rebuilding services. However, for standard passenger vehicles, complete replacement with new shock absorbers is the recommended solution when failure occurs.
Replacing rear shock absorbers is considered a moderate-difficulty DIY project. With the right tools and careful attention to safety procedures, most home mechanics can successfully complete this repair. The difficulty level depends on:
- Vehicle design and accessibility of mounting points
- Age of the vehicle and condition of fasteners (rust/corrosion)
- Whether special tools are required for your specific vehicle model
- Your experience level with suspension work
Most rear shock replacements can be completed in 1-3 hours per pair. Always consult a vehicle-specific repair manual before beginning work, and don't hesitate to seek professional help if you encounter significant challenges.