


Types of Rear Camera Parking Sensors
Rear camera parking sensors are essential safety devices designed to assist drivers in avoiding obstacles when reversing. These systems use different technologies to detect objects behind the vehicle and provide timely audio or visual alerts to prevent collisions.
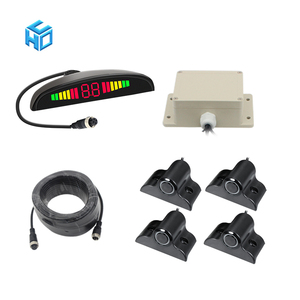
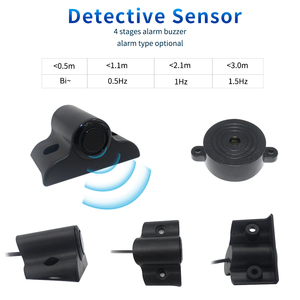
Ultrasonic Sensors
The most popular type of rear parking sensors, utilizing sound waves to detect objects.
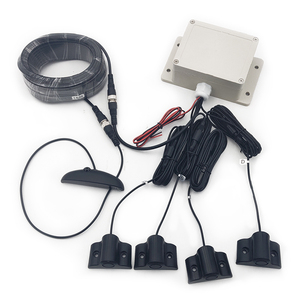
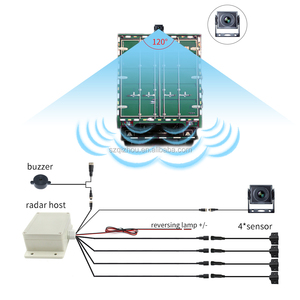
- Multiple sensors mounted on rear bumper
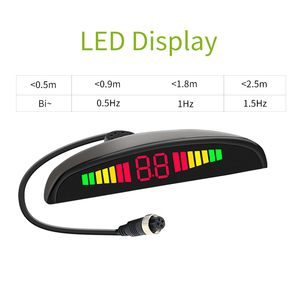
- Increasing frequency alerts as vehicle approaches objects
- Can detect various objects including pedestrians and small vehicles
Advantages:
- Wide detection range
- Affordable and reliable
- Industry standard technology
Limitations:
- Effectiveness reduced by rain, snow, or ice
- Sound waves can be muffled in extreme conditions
Electromagnetic Sensors
Uses electromagnetic fields to detect objects behind the vehicle.
- Can be mounted inside the bumper
- Creates detection field around rear of vehicle
- Triggers alarm when field is disrupted
Advantages:
- Easier and cheaper installation
- Effective in bad weather conditions
- No visible sensors on bumper
Limitations:
- May not be as accurate as ultrasonic
- Potential for false alarms from large nearby objects
Radar-based Systems
Advanced systems often found in luxury vehicles using radar waves for detection.
- Measures time for radar waves to return from objects
- Can determine distance, speed, and size of objects
- Highly reliable in adverse weather conditions
Advantages:
- Superior performance in rain and fog
- Can detect moving objects from the side
- Greater range than other systems
Limitations:
- More expensive than basic systems
- Complex installation requirements
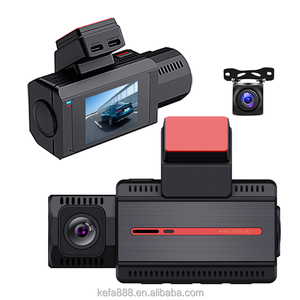
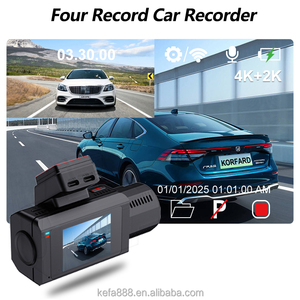
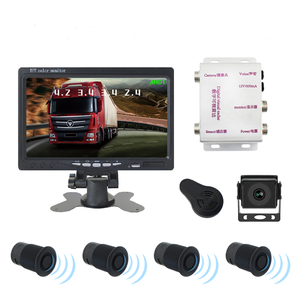
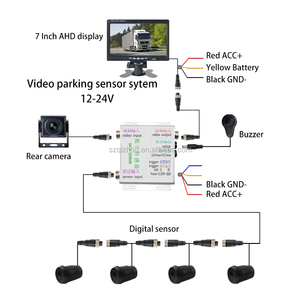
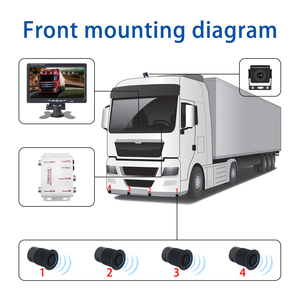
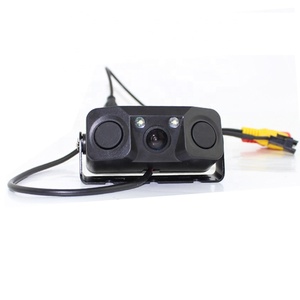
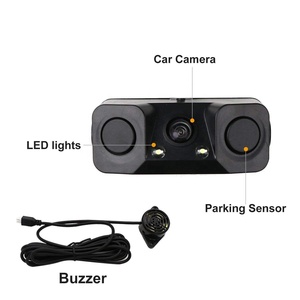
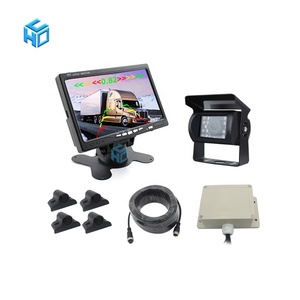
Camera-based Systems
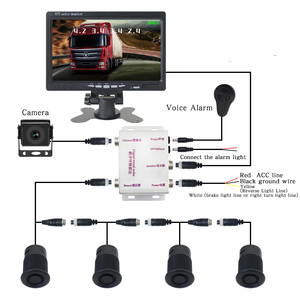
Combines traditional sensor technology with cameras for comprehensive coverage.
- Provides live video feed on display screen
- Often includes guidance lines for parking assistance
- Some include object recognition technology
Advantages:
- Visual confirmation of obstacles
- Easier identification of small objects
- Enhanced situational awareness
Limitations:
- Camera effectiveness reduced in low light
- Lens can get dirty or obscured
| Sensor Type | Detection Method | Weather Performance | Installation Difficulty | Relative Cost |
|---|---|---|---|---|
| Ultrasonic | Sound waves | Moderate | Medium | Low to Medium |
| Electromagnetic | Electromagnetic field | Good | Easy | Low |
| Radar-based | Radar waves | Excellent | Complex | High |
| Camera-based | Video + sensors | Variable | Complex | Medium to High |
Expert Tip: For optimal safety, consider a system that combines multiple technologies. A camera with ultrasonic sensors provides both visual feedback and precise distance measurement, significantly reducing the risk of collisions.
Specifications of Rear Camera Parking Sensors
Understanding the technical specifications of parking sensors is crucial for selecting a system that meets your specific needs. Key specifications vary depending on the system and vehicle model:
| Specification | Details | Importance |
|---|---|---|
| Sensor Type | Ultrasonic, electromagnetic, radar, or camera-based | Determines detection method and reliability in different conditions |
| Number of Sensors | Typically 2-6 sensors | More sensors provide better coverage and detection accuracy |
| Detection Range | 1-2 meters (standard), up to 5 meters (advanced) | Determines how early warnings are provided |
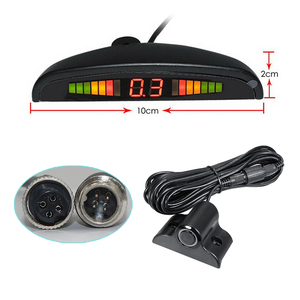
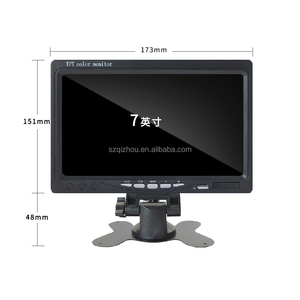
| Display Type | LED indicators, LCD screen, or integrated dashboard display | Affects how information is presented to the driver |
| Warning System | Audible beeps, visual alerts, or haptic feedback | Different warning methods suit different driver preferences |
| Camera Resolution | 480p, 720p, or 1080p (for camera systems) | Higher resolution provides clearer image quality |
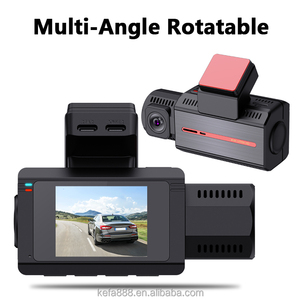
| Viewing Angle | 120° to 180° (for camera systems) | Wider angle provides better coverage behind vehicle |
| Night Vision | Available in some camera systems | Essential for effective operation in low light conditions |
| IP Rating | IP67 or IP68 recommended for outdoor components | Indicates dust and water resistance level |
Important: When selecting a parking sensor system, verify compatibility with your vehicle's make and model. Some vehicles require specific adapters or may have electrical system requirements that limit your options.
Maintenance of Rear Camera Parking Sensors
Regular maintenance ensures your parking sensor system functions reliably over time. Follow these essential maintenance practices:
Routine Cleaning
- Clean sensors with mild soap and water
- Avoid harsh chemicals that may damage sensor components
- For cameras, clean lens carefully with microfiber cloth
- Remove dirt, snow, and debris promptly
- Frequency: Weekly or after driving in muddy conditions
System Checks
- Test system functionality in safe environment
- Verify correct sensor alignment
- Check for consistent performance in different conditions
- Listen for unusual sounds or erratic warnings
- Frequency: Monthly or when performance changes noticed
Wiring Inspection
- Inspect all connections for corrosion
- Check for loose wires or damaged insulation
- Ensure waterproof seals remain intact
- Replace damaged components immediately
- Frequency: Every 6 months
Professional Maintenance
- Schedule professional diagnostic checks
- Have system recalibrated after bumper repairs
- Update system software when available
- Address persistent false warnings professionally
- Frequency: Annually or after collision repairs
Maintenance Tip: Extreme temperature changes can affect sensor performance. In winter, ensure sensors are free of ice before driving. In summer, check for expansion-related alignment issues during extremely hot weather.
How to Choose Rear Camera Parking Sensors
Selecting the right rear camera parking sensor system requires careful consideration of several factors. This guide will help you make an informed decision based on your specific needs:
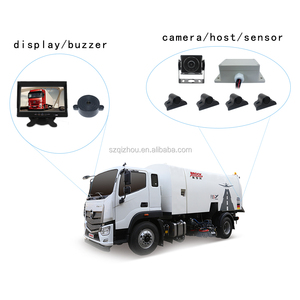
Vehicle Compatibility
Different vehicles require different sensor configurations:
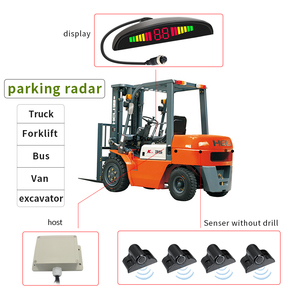
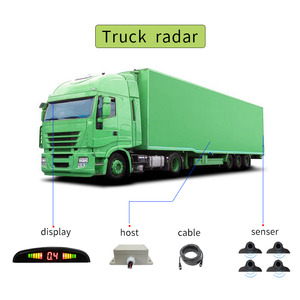
- Large vehicles (trucks, buses, RVs): Need wider coverage sensors with greater range
- Compact cars: Benefit from adjustable sensitivity and compact design
- Luxury vehicles: Often compatible with integrated systems that connect to existing displays
Key consideration: Check manufacturer's vehicle compatibility list before purchase
Environmental Factors
Consider the typical weather and driving conditions:
- Rainy climates: Opt for radar-based or electromagnetic systems
- Cold regions: Choose sensors with de-icing capabilities
- Dusty environments: Look for IP67 or higher waterproof/dustproof ratings
Key consideration: Weather resistance should match your local climate
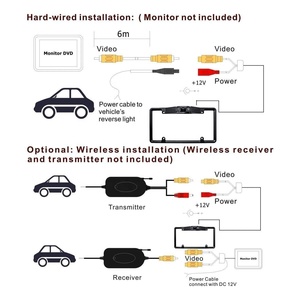
Installation Requirements
Consider your installation preferences:
- DIY installation: Look for wireless systems or kits with comprehensive instructions
- Professional installation: Complex systems may require professional expertise
- Non-invasive options: Some systems require no drilling or permanent modifications
Key consideration: Balance installation complexity with system capabilities
Features and Technology
Determine which features are essential for your needs:
- Visual displays: Choose between digital distance indicators or full camera views
- Audio alerts: Consider adjustable volume and tone preferences
- Advanced features: Cross-traffic alerts, object recognition, parking guidance lines
Key consideration: More features typically mean higher cost
| Budget Level | Typical Features Available | Recommended For |
|---|---|---|
| Entry-level ($30-$100) | Basic ultrasonic or electromagnetic sensors, simple LED or beep alerts | Occasional drivers, small vehicles, basic safety needs |
| Mid-range ($100-$250) | Combined camera/sensor systems, decent resolution, basic display integration | Regular drivers, family vehicles, enhanced safety needs |
| Premium ($250-$500+) | HD cameras, multiple viewing angles, radar technology, smartphone integration | Professional drivers, luxury vehicles, maximum safety assurance |
Selection Tip: Don't automatically choose the most expensive option. Assess your specific parking challenges (parallel parking, backing into tight spots, etc.) and select a system that addresses those specific needs.
DIY Installation of Rear Camera Parking Sensors
While professional installation is recommended for optimal results, DIY enthusiasts can install rear camera parking sensors with careful planning and the right tools. Follow this step-by-step guide:
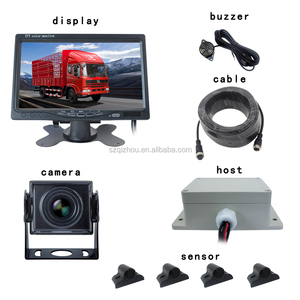
Required Tools and Materials
- Complete parking sensor kit with camera
- Drill with appropriate sized bits
- Screwdriver set (Phillips and flathead)
- Wire cutters and strippers
- Electrical tape and zip ties
- Safety glasses and gloves
- Multimeter (for testing connections)
- Panel removal tools (for interior disassembly)
- Manufacturer's manual and instructions
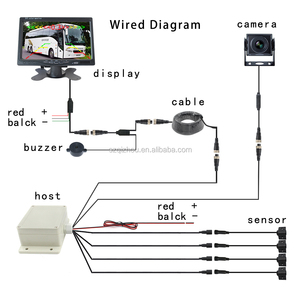
Installation Process
- Preparation
Thoroughly read the manufacturer's instructions. Disconnect the vehicle's battery before beginning any electrical work to prevent shorts or damage to vehicle electronics. - Sensor Location Planning
Mark locations on the rear bumper for sensor installation. Optimal positioning is typically 16-20 inches apart and 18-30 inches above ground level. Ensure positions are symmetrical and aligned with the vehicle's centerline. - Drilling Mounting Holes
Using the appropriate sized drill bit (usually specified in the kit), carefully drill holes for each sensor. Start with a smaller pilot hole and gradually increase to the required size. - Sensor Installation
Feed each sensor's wiring harness through the drilled holes from the outside in. Secure sensors in place according to the kit instructions, ensuring they sit flush with the bumper surface. - Camera Mounting
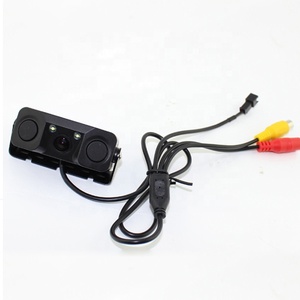
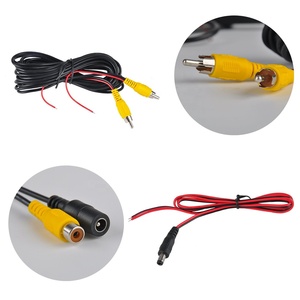
For camera systems, mount the camera in the designated location (typically above the license plate). Secure it firmly and adjust to the optimal viewing angle. - Wiring Installation
Route all wiring along the vehicle's edge, securing with zip ties to prevent rattling or damage. Avoid hot components, moving parts, and sharp edges that could damage wires. - Power Connection
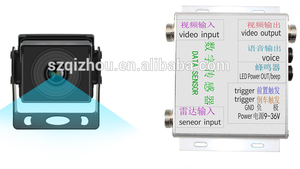
Connect the system's power wire to the reverse light circuit. This ensures the system activates automatically when the vehicle is in reverse. Use a multimeter to verify the correct wire before making connections. - Control Unit Installation
Mount the system's control unit in an accessible location inside the vehicle, following manufacturer specifications. Connect all sensor and camera wires to the appropriate terminals. - Display Installation
For systems with a separate display, mount it in a location that's easily visible without obstructing the driver's view. Route display cables discretely through the vehicle interior. - Testing and Calibration
Reconnect the vehicle battery and test the system by placing objects at various distances behind the vehicle while in reverse. Adjust sensitivity settings if available.
Warning: Improper installation can damage vehicle electronics or create safety hazards. If you're uncomfortable with any aspect of the installation process, consult a professional. Many auto shops offer reasonably priced installation services.
Installation Tip: Take photos of each step during disassembly to make reassembly easier. Label all wires and connections before disconnecting them to prevent confusion during reconnection.
Frequently Asked Questions
While most vehicles can accommodate aftermarket parking sensor systems, compatibility varies by make and model. Modern vehicles with complex electronic systems may require specific adapters or professional installation. Always check the manufacturer's compatibility list before purchasing. For older vehicles with simpler electrical systems, universal kits are generally suitable. Some vehicles may require additional brackets or mounting hardware for proper installation.
False warnings can be caused by several factors:
- Dirty sensors: Clean sensors with mild soap and water
- Sensor misalignment: Check that sensors are properly positioned and aligned
- Moisture or condensation: Allow sensors to dry completely
- Electrical interference: Check for loose connections or damaged wiring
- Sensitivity settings: Adjust sensitivity if your system allows
If problems persist after troubleshooting, consult the user manual or contact a professional technician for system diagnostics.
No, rear camera parking sensors complement but do not replace side mirrors. They are designed to work together with your vehicle's mirrors to provide comprehensive awareness of your surroundings. Side mirrors remain essential for lane changes and monitoring traffic alongside your vehicle. Parking sensors primarily assist with detecting objects in your blind spots, particularly those low to the ground or directly behind your vehicle that mirrors cannot show. For complete situational awareness, drivers should use a combination of mirrors, cameras, sensors, and direct visual checks.
While rear camera parking sensors significantly reduce the risk of collisions, they cannot prevent all types of accidents. Limitations include:
- Detection range limitations (typically 1-2 meters)
- Small or low-profile objects may be missed by some sensors
- Weather conditions can impair ultrasonic sensor performance
- Fast-moving objects may not be detected in time
- System malfunctions or failures are possible
Drivers should always maintain visual awareness and use parking sensors as an aid rather than relying on them exclusively.
Occasional false warnings in seemingly empty spaces can be normal under certain circumstances:
- Environmental factors: Wind-blown objects (leaves, small debris) can trigger sensors
- Ground irregularities: Steep inclines or uneven surfaces may be detected
- Weather conditions: Heavy rain or snow can cause false readings
- High sensitivity settings: Some systems can be overly sensitive by default
- Electromagnetic interference: Nearby equipment can affect some sensor types
If false warnings become frequent, check your system's sensitivity settings or consult with a professional to ensure proper calibration.
With proper maintenance, most quality parking sensor systems can last 5-10 years. Camera components typically have a shorter lifespan than ultrasonic or electromagnetic sensors due to their more complex electronics. Factors affecting longevity include quality of installation, exposure to extreme weather, frequency of use, and regular maintenance. Systems with better IP (Ingress Protection) ratings tend to last longer in harsh environments. Warranty periods typically range from 1-3 years depending on the manufacturer.