


Types of Portlights for Boats
Portlights for boats are essential components that serve multiple functions including illumination, ventilation, aesthetic appeal, and safety. Choosing the right type of portlight depends on your boat's design, usage, and personal preferences. Below is a comprehensive overview of the most common types of portlights found on modern and traditional vessels.
Hatch Windows
Also known as skylights, hatch windows are typically mounted on the deck or cabin top. They provide vertical access to the interior from above, allowing natural light and fresh air into confined spaces. These windows are especially valuable in enclosed areas like galleys and cabins where headroom may be limited.
Advantages
- Excellent natural lighting
- Enhanced ventilation
- Emergency escape route
- Watertight design prevents leaks
Limitations
- May restrict standing room
- Exposed to weather conditions
- Higher risk of condensation buildup
Best for: Interior decks, cabins, galleys, and areas needing vertical access
Portholes
Classic round windows traditionally associated with vintage ships and yachts, portholes are mounted directly into the hull. They offer structural reinforcement while providing visibility and natural light. Portholes are available in various materials such as acrylic, glass, and stainless steel, ensuring durability and resistance to corrosion.
Advantages
- Iconic, timeless appearance
- Structural integrity addition
- Versatile material options
- Effective water protection
Limitations
- Limited viewing area due to circular shape
- Typically non-opening or fixed designs
- More expensive than standard ports
Best for: Classic boats, sailing yachts, luxury cruisers
Side Windows
Installed along the sides of the boat, these windows offer panoramic views, improved visibility, and enhanced aesthetics. Available in fixed, sliding, or opening configurations, side windows contribute significantly to the overall comfort and usability of living and navigation spaces onboard.
Advantages
- Wide field of view
- Multiple opening mechanisms
- Improved ventilation options
- Modern design integration
Limitations
- Increased exposure to weather elements
- May require frequent maintenance
- Can add weight depending on size
Best for: Motor yachts, cruisers, and open-plan interiors
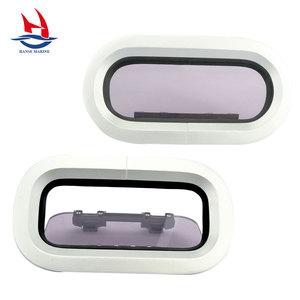
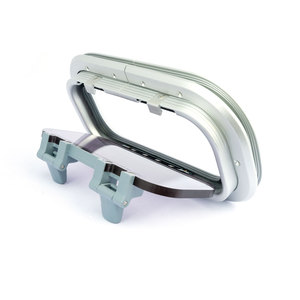
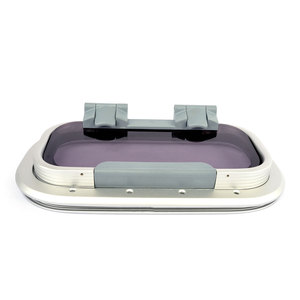
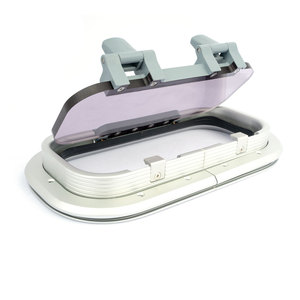
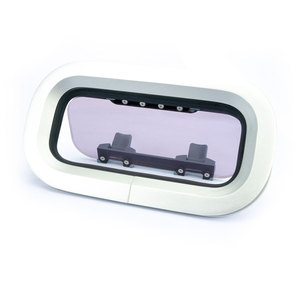
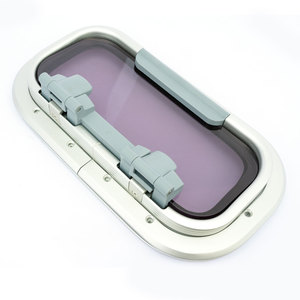
Port Lights
Smaller windows installed within cabin walls, port lights primarily allow light and airflow into enclosed spaces. These can be fixed or operable, depending on their location and intended function. Port lights help reduce the feeling of confinement and create a more inviting atmosphere inside the boat’s interior.
Advantages
- Compact and unobtrusive
- Improves interior ambiance
- Easy installation and replacement
- Available in multiple shapes and sizes
Limitations
- Limited visibility outside
- Less effective for large-scale ventilation
- May not be suitable for high-traffic areas
Best for: Cabins, bathrooms, storage compartments
Bulbous Bow Windows
Located at the front section of certain larger vessels, bulbous bow windows serve both functional and aesthetic purposes. These specialized portlights enhance hydrodynamic efficiency by reducing drag while allowing natural light into lower sections of the vessel, creating a unique and inviting environment.
Advantages
- Improves fuel efficiency
- Unique visual appeal
- Enhances forward visibility
- Contributes to modern styling
Limitations
- Only applicable to specific hull designs
- High cost of installation
- Requires professional maintenance
Best for: Luxury yachts, superyachts, and commercial vessels
Emergency Escape Hatches
These critical safety features provide an alternate means of exit during emergencies such as fire, flooding, or capsizing. Typically located in cabins, engine rooms, or other enclosed spaces, emergency escape hatches are designed to be quickly opened from the inside while remaining watertight under normal conditions.
Advantages
- Life-saving feature in emergencies
- Watertight and secure when closed
- Can double as ventilation sources
- Complies with maritime safety regulations
Limitations
- Not frequently used in everyday boating
- Requires regular inspection and testing
- Installation may alter interior layout
Best for: Safety-focused builds, liveaboard vessels, long-range cruisers
Sliding Doors
Designed to connect indoor and outdoor spaces seamlessly, sliding doors are commonly installed between the cockpit and saloon. Some models feature multi-panel systems or folding designs that open entirely to create expansive openings, enhancing airflow and accessibility between different areas of the boat.
Advantages
- Creates open-air living space
- Enhances social interaction
- Easy to operate and maintain
- Weather-sealed when closed
Limitations
- Large units can be heavy
- Tracks may accumulate debris
- Higher initial investment
Best for: Day cruisers, entertainment-focused yachts, flybridge areas
Ventilation Ports
Dedicated openings designed to promote airflow while minimizing water ingress, ventilation ports are strategically placed throughout the boat to ensure proper circulation and humidity control. These are particularly useful in engine rooms, bilge areas, and below-deck cabins where stagnant air can become problematic.
Advantages
- Prevents mold and mildew growth
- Maintains healthy air quality
- Reduces condensation issues
- Minimal maintenance required
Limitations
- Limited visibility through vents
- May allow minor water intrusion in rough seas
- Not aesthetically prominent
Best for: Engine rooms, bilges, storage lockers, and utility spaces
| Type | Primary Function | Visibility | Ventilation | Safety Contribution |
|---|---|---|---|---|
| Hatch Windows | Natural light & vertical access | Good | Excellent | High (emergency exit) |
| Portholes | Traditional look & moderate light | Fair | Fair | Moderate |
| Side Windows | Panoramic views & access | Excellent | Good | Moderate |
| Port Lights | Interior illumination | Fair | Good | Low |
| Bulbous Bow Windows | Hydrodynamic improvement & aesthetics | Good | Fair | Low |
| Emergency Escape Hatches | Evacuation & egress | Varies | Good | Very High |
| Sliding Doors | Space connectivity & transition | Excellent | Excellent | Moderate |
| Ventilation Ports | Air circulation & moisture control | Poor | Excellent | Low |
Expert Tip: When selecting portlights, consider the climate you'll most often sail in—boats in tropical regions benefit from increased ventilation features, while those in colder climates should prioritize insulation and condensation control.
Specifications and Maintenance of Portlights for Boats
Key Specifications to Consider
When selecting portlights for your boat, it's essential to understand the critical specifications that influence performance, durability, and aesthetics. Choosing the right portlight ensures optimal visibility, ventilation, and weather resistance for your vessel.
Size
The size of a portlight is typically measured by the diameter of the glass opening and directly impacts both functionality and design. Larger portlights allow more natural light and airflow into the cabin, improving comfort during long voyages. Smaller portlights, on the other hand, provide a streamlined appearance and may be preferred in compact or traditionally styled boats where minimalism is key.
Common sizes range from 6 inches to 18 inches in diameter, with popular options like 8-inch, 10-inch, and 12-inch models balancing utility and aesthetics effectively.
Material
Portlights are constructed using marine-grade materials designed to withstand saltwater exposure and harsh environmental conditions. The most common materials include:
- Stainless Steel: Offers excellent corrosion resistance and strength, making it ideal for heavy-duty applications and open-sea vessels.
- Brass: Known for its classic, polished appearance, brass requires regular maintenance to prevent tarnishing but remains a popular choice for vintage or luxury boats.
- Aluminum: Lightweight and cost-effective, aluminum portlights are suitable for recreational boats and smaller vessels, though they may require protective coatings to resist corrosion.
Glass Type
The type of glass used in portlights significantly affects safety, clarity, and durability. Marine-approved glass options include:
- Tempered Glass: Heat-treated for increased strength and shatter-resistance, tempered glass is commonly used in modern portlights due to its ability to withstand impact without breaking into sharp fragments.
- Laminated Glass: Composed of two glass layers bonded with a plastic interlayer, laminated glass offers superior safety as it holds together even when cracked, preventing water ingress and injury.
Sealant Quality
A high-performance marine sealant is crucial for ensuring a watertight fit between the portlight and the hull. Most manufacturers use vulcanized rubber gaskets or silicone-based sealants specifically formulated to resist UV exposure, temperature fluctuations, and prolonged contact with seawater.
Proper sealing not only prevents leaks but also enhances the longevity of the installation by reducing stress on surrounding structures.
Opening Mechanism
Portlights can feature various mechanisms that affect usability and accessibility. Common types include:
- Hinged: Opens outward or inward like a door, allowing full access for cleaning and ventilation.
- Sliding: Moves horizontally, useful in tight spaces where swing-out clearance isn’t available.
- Rotating: Turns on a central axis for easy opening, often found in round portlights.
Mounting Method
The way a portlight is installed affects both the aesthetic and structural integrity of the boat’s hull. The two primary mounting methods are:
- Flush Mounting: Installed so the outer frame sits level with the hull surface, offering a clean look and reduced wind resistance.
- Surface Mounting: Mounted over the hull opening, creating a slight protrusion but simplifying installation and maintenance.
| Specification | Importance | Selection Tips |
|---|---|---|
| Diameter | High | Select based on cabin size and desired light/ventilation; 10–12 inch recommended for standard cabins |
| Material Type | High | Choose stainless steel for durability, brass for aesthetics, or aluminum for budget-friendly options |
| Glass Safety Rating | High | Opt for tempered or laminated glass meeting ASTM marine standards |
| Weatherproofing Grade | Medium | Look for IP66 rating or higher for storm protection and leak prevention |
| Opening Style | Medium | Hinged best for frequent access, sliding for limited space, rotating for traditional style |
Essential Maintenance Practices
To maximize the lifespan and performance of your boat portlights, consistent maintenance is necessary. Proper care helps prevent costly repairs and maintains the structural integrity of your vessel.
Important: When replacing one portlight or its components, consider inspecting and servicing all portlights simultaneously. Uneven wear or mismatched materials can lead to inconsistent performance and premature failure of newer components.
How to Choose Portlights for Boats
Selecting the right portlights for your boat is more than just a matter of aesthetics—it's about optimizing natural light, ventilation, durability, and overall functionality. A well-chosen portlight enhances both comfort and safety aboard while complementing the vessel’s design.
Boat Size and Type
The size and type of your boat are primary considerations when choosing portlights. Larger vessels such as yachts or cruisers often benefit from larger portlights that allow ample natural light into interior spaces like cabins and saloons. Smaller boats, such as day sailers or fishing boats, may require compact designs that don't compromise structural integrity or available space.
- Large cruising yachts can accommodate oversized rectangular or round portlights
- Smaller sailboats typically use smaller, round or oval-shaped models
- Motoryachts might prefer fixed portlights with minimal opening mechanisms for streamlined appearance
Key consideration: Always check clearance requirements and ensure the portlight does not interfere with internal layout or furniture placement.
Material Compatibility
Portlights come in various materials such as acrylic, polycarbonate, glass, and even stainless steel frames. The choice should align with your boat's construction material to ensure proper installation and longevity.
- Fiberglass hulls work well with most standard portlights
- Wooden boats may require custom framing solutions
- Aluminum or steel-hulled vessels need corrosion-resistant hardware and gaskets
Installation tip: Use marine-grade sealants and stainless steel fasteners for long-term leak protection.
Ventilation Requirements
Different boating environments demand varying levels of airflow. If you frequently navigate warm or humid climates, prioritize portlights with built-in hatches or opening mechanisms to facilitate cross-ventilation and reduce condensation buildup.
- Hatch-style portlights offer superior airflow control
- Fixed portlights provide maximum light without ventilation
- Sliding ports combine light and moderate ventilation
Climate advice: In tropical regions, opt for portlights with insect screens and rain guards.
Location and Usage
The intended location of each portlight on the boat affects its size, shape, and function. For example, sleeping quarters may benefit from frosted or tinted glass for privacy, while social areas like the saloon might prioritize clear visibility and brightness.
- Cabins: Privacy features and dimmable options recommended
- Saloons: Clear glass for panoramic views and daylight
- Kitchens and heads: Durable, easy-to-clean surfaces preferred
Design note: Consider how the portlight interacts with interior lighting and headroom height.
Environmental Durability
Marine environments are harsh, exposing portlights to saltwater spray, UV radiation, wind pressure, and temperature fluctuations. Choosing UV-stabilized, corrosion-resistant materials ensures long-term performance and clarity.
- Polymer-based lenses resist yellowing and cracking under UV exposure
- Stainless steel and bronze frames offer excellent saltwater resistance
- Gaskets made from neoprene or EPDM last longer in wet conditions
Longevity tip: Avoid painted or coated finishes that may peel or corrode over time.
Functionality and Ease of Use
High-quality portlights should be user-friendly, especially in rough seas or high-wind situations. Look for smooth opening mechanisms, secure locking systems, and ergonomic handles that allow operation with one hand if needed.
- Spring-loaded hinges for quick closing during sudden weather changes
- Locking latches to prevent accidental opening
- Easy-access cleaning for exterior-facing panes
Safety reminder: Ensure all moving parts are securely fastened and tested for water tightness.
Selection Advice: When in doubt, choose a slightly larger portlight than initially planned—larger openings improve both natural light and airflow significantly. However, always verify that the structural modifications required will not weaken the hull or deck integrity. Consulting a marine technician before installation is highly recommended for major replacements.
| Usage Type | Recommended Style | Material | Special Features |
|---|---|---|---|
| Interior lighting focus | Fixed portlight | Tempered glass or UV-treated acrylic | Clear finish, optional tint |
| Ventilation priority | Hatch-style or sliding portlight | Polycarbonate or aluminum frame | Weatherproof seals, screen inserts |
| Privacy requirement | Frosted or porthole-style | Acrylic or glass with opaque finish | Lockable mechanism, small aperture |
| Harsh environment (coastal) | Corrosion-resistant model | Bronze, stainless steel, marine-grade polymer | Saltwater-resistant gaskets, durable frame |
Aesthetic and Customization Options
Portlights contribute to both the exterior profile and interior ambiance of a boat. Modern manufacturers offer a range of shapes, sizes, and finishes—from classic round portholes to sleek rectangular units—that can match traditional or contemporary boat styles.
- Round and oval designs suit classic wooden or sailboat builds
- Rectangular or square models complement modern motor yachts
- Custom cutouts and frame colors allow personalization
Style suggestion: Coordinate portlight color and shape with other deck fittings like hatches and handrails for a cohesive look.
Budget and Value Considerations
While budget is an important factor, investing in higher-quality portlights often pays off through better performance, longevity, and reduced maintenance. Entry-level models may save money upfront but could lead to frequent replacements or leaks down the line.
- Entry-level: Basic acrylic models with plastic frames
- Mid-range: Polycarbonate with aluminum frames
- Premium: Bronze or stainless steel with tempered glass
Value insight: Factor in installation costs, sealing materials, and potential future upgrades when evaluating price points.
DIY Guide to Replacing Boat Portlights
Replacing portlights on your boat is a practical DIY project that can significantly improve both the appearance and functionality of your vessel. Whether you're upgrading old, fogged, or damaged portlights, this detailed guide will walk you through each step of the process with clear instructions, tools needed, and expert tips to ensure a watertight seal and long-lasting installation.
Safety Warning: Always wear protective gloves and safety glasses when removing old portlights, especially if glass or sharp edges are involved. Work in a well-lit, stable environment to avoid accidents.
Tools and Materials Required
- New portlight frames and glass (ensure correct size and style for your boat)
- Marine-grade silicone adhesive sealant (UV-resistant and waterproof)
- Caulking gun
- Putty knife or adhesive remover
- Drill and appropriate drill bits
- Screwdriver or screw gun
- Trim knife or small saw (for cutting through hardened sealant)
- Measuring tape or ruler
- Isopropyl alcohol or solvent cleaner for surface prep
- Rags or paper towels
- Clamps or temporary fasteners (optional, for holding the new frame in place)
Step-by-Step Replacement Process
- Remove the Old Portlight
- Begin by unscrewing any visible fasteners securing the portlight to the hull or cabin wall.
- If the portlight is sealed with adhesive rather than screws, use a putty knife or adhesive remover to carefully separate it from the mounting surface.
- In cases where the sealant has hardened over time, gently use a trim knife or small saw to cut through the adhesive without damaging the surrounding material.
- Clean the Mounting Surface
- Once the old portlight is removed, thoroughly clean the opening and surrounding area.
- Scrape away any remaining adhesive or old sealant using a putty knife.
- Wipe the surface down with isopropyl alcohol or a suitable solvent to remove oils, dirt, and residue, ensuring a clean bonding surface.
- Allow the area to dry completely before proceeding.
- Prepare the New Portlight
- Before installation, inspect the new portlight to ensure it fits properly into the opening.
- Apply a continuous bead of marine-grade silicone sealant around the edge of the portlight frame. This will act as both an adhesive and a waterproof barrier.
- Position and Secure the New Portlight
- Align the new portlight carefully within the opening, ensuring it is centered and level.
- Gently press the portlight into place, applying even pressure to create a firm bond with the sealant.
- If your portlight includes screw holes, mark the corresponding locations on the hull or cabin wall.
- Drill pilot holes at these marks to prevent cracking or splitting the surrounding material.
- Secure the portlight using the provided screws, tightening them gradually and evenly to avoid warping the frame or cracking the glass.
- Apply Exterior Sealant
- Run a second bead of marine-grade silicone sealant around the exterior perimeter of the portlight frame.
- Use a caulking tool or your finger (dipped in soapy water) to smooth the sealant into a neat, continuous bead.
- This outer layer ensures a watertight seal and protects against weather exposure.
- Allow Curing Time
- Refer to the manufacturer's instructions for curing time—typically 24–48 hours for full bond strength.
- Avoid exposing the new portlight to heavy rain or high-pressure water during this period.
- Test and Adjust
- After the sealant has cured, test the portlight’s operation if it opens or vents.
- Ensure it seals tightly when closed and makes full contact with the gasket or sealing surface.
- Tighten any screws slightly if needed, but be cautious not to overtighten.
- Reinstall Interior Trim (if applicable)
- Replace any interior panels, covers, or decorative trim pieces that were removed to access the portlight.
- Ensure all fasteners are secure and finishes match the original appearance.
| Stage | Key Considerations | Common Pitfalls | Recommended Products |
|---|---|---|---|
| Removal | Work slowly to avoid damaging surrounding surfaces; take photos for reference | Forcing removal, which may crack the hull or surrounding material | Adhesive remover, trim knife, soft mallet |
| Cleaning | Thoroughly remove old sealant and debris for proper adhesion | Residual adhesive causing poor bonding or leaks | Plastic scraper, rubbing alcohol, degreaser |
| Installation | Proper alignment and even pressure are critical | Misalignment leading to improper sealing or visibility issues | Level, clamps, measuring tape |
| Sealing | Use marine-grade sealant and apply a consistent bead | Poor application leading to water ingress or cosmetic flaws | 3M Marine Adhesive Sealant 5200, caulking gun, smoothing tool |
| Testing | Verify function and watertight integrity after cure time | Testing too soon or missing subtle leaks | Water spray bottle, flashlight for inspection |
Expert Tip: When replacing multiple portlights, work on one at a time to maintain structural integrity and minimize exposure to the elements. Label parts and keep a log of steps taken for consistency across installations.
Frequently Asked Questions About Boat Portlights
Proper maintenance of boat portlights is essential to ensure their functionality, longevity, and the watertight integrity of your vessel. Here’s a detailed approach to maintaining them:
- Regular Cleaning: Clean the glass or acrylic surfaces with mild soap and fresh water to remove salt deposits, algae, dirt, and grime. Avoid using abrasive cleaners that can scratch transparent materials.
- Inspection for Leaks: Periodically check around the portlight frame for signs of moisture intrusion or staining on the interior cabin walls or trim. Use a flashlight during inspections to better spot small leaks.
- Seal Maintenance: Examine rubber gaskets, seals, and bedding compounds for wear, cracking, or compression. Replace them if they appear brittle or damaged. Rebedding may be necessary every few years depending on exposure and conditions.
- Check Opening Mechanisms: For opening portlights (such as hinged or sliding types), ensure hinges, latches, or locking mechanisms operate smoothly. Lubricate moving parts with marine-grade grease to prevent corrosion and sticking.
- Monitor Glass/Acrylic Condition: Inspect for scratches, cracks, clouding, or yellowing. Acrylic lenses may be polished to restore clarity, but severe damage requires replacement to maintain visibility and safety.
It's recommended to perform these checks at least twice a year or before and after long voyages, especially in saltwater environments where corrosion accelerates wear.
Yes, boat portlights can absolutely be replaced, whether due to damage, aging seals, or upgrading aesthetics and performance. The process involves several key considerations:
- Measure Accurately: Measure the existing portlight dimensions precisely—both the outer frame and the cutout in the hull or deck. Standard shapes include round, rectangular, oval, and trapezoidal, so matching the shape ensures a proper fit.
- Choose Compatible Replacement: Select a new portlight made from durable marine-grade materials such as tempered glass, UV-resistant acrylic, or polycarbonate. Ensure it has appropriate sealing features like flanges, mounting holes, and compatible gasket styles.
- Use Proper Sealing Materials: When installing, use marine-grade sealants such as polysulfide, polyurethane, or silicone-based products designed for underwater applications. These create a waterproof barrier and prevent osmosis-related issues.
- Follow Installation Best Practices: Remove the old portlight carefully without damaging surrounding structures. Clean the area thoroughly before applying new bedding compound. Secure the new unit with stainless steel fasteners and reseal all edges properly.
For complex installations or structural portlights, consulting a professional boatyard or marine technician is advisable to ensure safe and watertight installation.
Yes, most modern boat portlights are designed to be user-friendly and easy to operate, though the ease of use depends on the type and condition of the mechanism. Here’s how different designs perform:
- Hinged Portlights: Feature a swing-out design that opens outward or inward. They typically have lever or latch closures that allow quick access while ensuring a tight seal when closed. Regular lubrication of hinges and latches maintains smooth operation.
- Sliding Portlights: Commonly found on larger vessels, these slide open horizontally and usually have minimal hardware. Their mechanisms should glide smoothly along tracks, which must be kept clean and free of debris.
- Portholes with Fixed Covers: Some models feature removable covers or storm covers instead of opening mechanisms. While not technically "opened," these offer protection against heavy seas while allowing light entry when removed.
- Traditional Designs: Older or classic-style portlights may use simpler mechanisms such as screw-in bolts or wing nuts. Though still functional, these may require more effort to open and close compared to modern systems.
Regardless of style, regular maintenance including cleaning, lubricating, and checking alignment ensures continued ease of operation and reliable sealing performance under various sea conditions.