


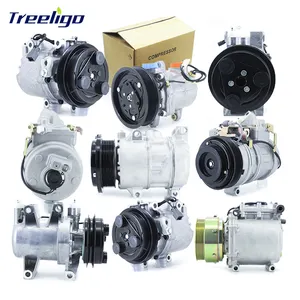


Types of Nissan Maxima Compressors
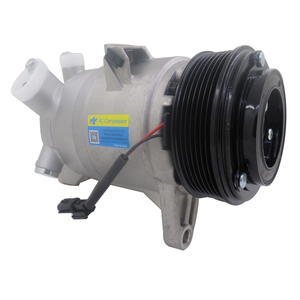
A Nissan Maxima compressor plays a vital role in the vehicle's air conditioning system by managing the refrigerant flow to maintain cabin comfort. The type of compressor used can vary based on model year and performance specifications. Understanding the different types helps you choose the right replacement or upgrade for optimal cooling efficiency and reliability.
Variable Displacement Compressor
This is the most advanced type found in modern Nissan Maxima models. It dynamically adjusts the amount of refrigerant pumped based on real-time cooling demand, which enhances fuel economy and ensures consistent climate control.
Advantages
- Energy-efficient operation
- Reduces engine load
- Maintains consistent cabin temperature
- Improves fuel economy
Limitations
- More complex internal design
- Higher repair costs
- Requires precise diagnostics for issues
Best for: Newer model years (2009+), fuel-conscious drivers, all-season use
Fixed Displacement Compressor
This older style of compressor operates at a constant rate, delivering the same volume of refrigerant per revolution regardless of cooling demand. While less efficient, it remains reliable and easier to service.
Advantages
- Simpler mechanical design
- Easier to diagnose and repair
- Lower initial cost
- Widely available replacements
Limitations
- Inefficient under low-demand conditions
- Increased fuel consumption
- Can cause temperature fluctuations
Best for: Older Maxima models (pre-2009), budget repairs, basic cooling needs
Rotary Compressor
Known for its simplicity and durability, the rotary compressor was commonly used in earlier generations of the Nissan Maxima. It uses rotating vanes to compress refrigerant and provides dependable performance with minimal maintenance.
Advantages
- Reliable and long-lasting
- Simple design with fewer moving parts
- Cost-effective to replace
- Easy to source used parts
Limitations
- Limited efficiency compared to newer types
- Noisier operation at high RPM
- Less effective in extreme heat
Best for: Classic or vintage Maxima models, restoration projects, mild climates
Scroll Compressor
The scroll compressor uses two interleaved spiral-shaped scrolls to compress refrigerant efficiently and smoothly. This design offers superior cooling performance and is often found in late-model Nissan Maxima vehicles seeking improved HVAC output.
Advantages
- High-efficiency cooling
- Smooth and quiet operation
- Excellent cold-start performance
- Durable with proper maintenance
Limitations
- Higher manufacturing cost
- Complex internal structure
- Expensive to replace
Best for: High-performance variants, hot climate regions, drivers seeking fast cabin cooling
| Type | Cooling Efficiency | Fuel Economy Impact | Complexity | Recommended Use |
|---|---|---|---|---|
| Variable Displacement | Excellent | Low | High | Newer models, daily driving |
| Fixed Displacement | Good | Medium | Low | Budget replacements, older models |
| Rotary | Fair | Medium | Low | Vintage cars, moderate climates |
| Scroll | Excellent | Low | High | Modern luxury models, rapid cooling |
Expert Tip: When replacing your Nissan Maxima compressor, always check the condition of the receiver/drier or accumulator, as well as the refrigerant oil level. Contaminants from a failed compressor can damage the new unit if not properly flushed from the system.
DIY Replacement Guide for USB EPROM Programmers
Replacing a USB EPROM programmer is a moderately technical task that requires attention to detail and some familiarity with electronics. The process involves working directly with the internal components of a device, specifically targeting the EPROM (Erasable Programmable Read-Only Memory) chip connected to the USB interface. This guide will walk you through each step to safely replace your USB EPROM programmer while minimizing the risk of damage to sensitive circuitry.
Safety Warning: Always ensure the device is completely powered off and unplugged before beginning any internal work. Static electricity can damage sensitive electronic components—consider using an anti-static wrist strap and working on a non-conductive surface.
Step-by-Step Replacement Process
- Preparation and Safety Measures
- Ensure the device is powered down and disconnected from all power sources and peripherals.
- Gather necessary tools such as a precision screwdriver set, anti-static wrist strap, and possibly a chip puller if the EPROM is socketed.
- Work in a clean, dry, and well-lit environment to avoid losing small components or damaging the board.
- Opening the Device Case
- Locate and remove all screws securing the device's outer casing. Some devices may use tamper-proof or specialized screws like Torx or pentalobe.
- Use appropriate tools to carefully separate the case halves without applying excessive force to avoid breaking plastic clips or hinges.
- Keep track of all screws and hardware by placing them in a labeled container or magnetic tray.
- Accessing and Removing the Old EPROM Chip
- Identify the location of the EPROM chip on the circuit board. It’s often labeled with part numbers indicating its function.
- If the chip is in a socket, gently pry it out using a chip puller or small flathead screwdriver placed evenly on both sides. Avoid bending pins or lifting the socket from the board.
- If the chip is soldered directly onto the board, use a desoldering pump or wick to carefully remove the solder from each pin. Take care not to overheat the board or lift copper traces.
- Installing the New EPROM Programmer Chip
- Verify that the replacement chip is compatible with your device and has been programmed correctly with the required firmware or data.
- Align the notch or dot on the new chip with the corresponding mark on the socket or printed circuit board (PCB).
- Gently press the chip into place. Ensure all pins are seated evenly and avoid forcing the chip to prevent bending or breaking pins.
- If soldering, reattach each pin carefully, ensuring good contact without creating solder bridges between adjacent pins.
- Closing Up and Testing the Device
- Reassemble the device case, making sure all components are securely fastened and no wires or connectors are pinched.
- Plug the device back into the power source and connect it via USB to test the functionality of the new EPROM chip.
- Monitor for any unusual behavior such as unexpected reboots, error messages, or overheating. If issues arise, power off immediately and double-check connections.
| Replacement Phase | Critical Tasks | Common Mistakes | Tools Required |
|---|---|---|---|
| Preparation | Device shutdown, tool gathering, workspace setup | Forgetting to unplug the device, missing essential tools | Anti-static wrist strap, screwdrivers, lighting |
| Case Removal | Proper disassembly, hardware tracking | Damaged clips, lost screws | Precision screwdriver set, magnetic tray |
| Chip Removal | Safe extraction of old EPROM | Bent pins, lifted traces | Chip puller, desoldering iron/wick |
| Installation | Correct orientation, secure fit | Misalignment, improper seating | New EPROM, tweezers, magnifying glass |
| Testing | Functionality verification | Rushing the process, skipping checks | USB cable, power supply, testing software |
DIY Tip: Before installing the new EPROM chip, double-check that it has been properly programmed and verified. A small investment in programming verification tools can save time and prevent unnecessary troubleshooting after installation.
Troubleshooting Common Issues After Installation
If the device does not function correctly after replacing the EPROM chip, consider the following checks:
- Ensure the chip is oriented correctly and fully inserted into the socket.
- Check for loose connections or damaged solder joints on the board.
- Verify that the programming file used was correct and up-to-date for your device model.
- Test the device with different cables and ports to rule out external connection issues.
Expert Note: If this is your first time handling EPROM chips or working inside electronics, practice proper ESD (electrostatic discharge) precautions and consider consulting online tutorials or community forums specific to your device model for additional guidance.
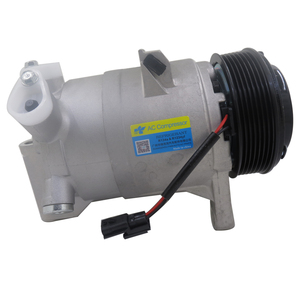
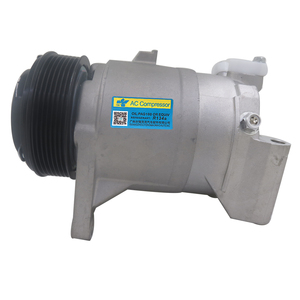
How to Choose Nissan Maxima Compressors
Selecting the right compressor for your Nissan Maxima is essential to ensure optimal air conditioning performance and longevity of your vehicle’s cooling system. The AC compressor plays a critical role in circulating refrigerant and maintaining comfortable cabin temperatures, especially during hot weather. Here's a comprehensive guide to help you make an informed decision.
Vehicle Compatibility
The first and most important factor when selecting a compressor is ensuring it matches your specific Nissan Maxima model year. Each generation of the Maxima may feature slightly different engine layouts, mounting points, and AC system configurations.
- Consult your vehicle owner’s manual or VIN decoder for precise specifications
- Verify compatibility with the exact model year (e.g., 2015 vs. 2019)
- Confirm the correct belt drive system type (serpentine or multi-rib)
Pro Tip: Use online part lookup tools or contact dealerships to verify fitment before purchasing.
OEM vs. Aftermarket Options
When choosing between Original Equipment Manufacturer (OEM) and aftermarket compressors, consider both cost and long-term reliability.
- OEM compressors are engineered to match factory specifications exactly
- Aftermarket units can offer cost savings but vary in quality
- Some premium aftermarket brands provide improved durability over OEM
Quality Advice: Look for parts with certifications like ISO 9001 or those that meet SAE standards.
Compressor Type and Technology
Nissan Maxima models typically use variable displacement compressors, which adjust output based on cooling demand. This design improves fuel efficiency and maintains consistent cabin temperatures without cycling on and off.
- Variable displacement units offer smoother operation and less wear
- Fixed displacement compressors are simpler but less efficient
- Check if your system uses a thermal expansion valve or orifice tube
Technical Insight: Variable compressors require proper oil circulation and pressure control to function correctly.
Build Quality and Warranty
A high-quality compressor should come with a clear warranty policy and be built from durable materials that resist corrosion and wear.
- Look for compressors with sealed bearings and reinforced housing
- Warranties of 1–2 years are common for quality units
- Clutch kits and seals should also be included or available separately
Investment Tip: A slightly more expensive compressor with a better warranty can save money in the long run.
Budget Planning: While price is an important consideration, remember that the compressor is just one component of the entire AC system. Factor in potential costs for refrigerant, oil, dryer replacements, and labor if professional installation is needed. Investing in a higher-quality unit often results in fewer repairs and longer service intervals.
Installation Considerations
Some compressors are easier to install than others depending on your mechanical experience and tool availability.
- Choose a compressor that includes all necessary brackets and hardware
- Verify access to mounting bolts and belt tensioners
- Ensure wiring harnesses and connectors are compatible
DIY Note: Always refer to the service manual and follow proper refrigerant handling procedures.
User Reviews and Community Feedback
Researching real-world experiences from other Nissan Maxima owners can provide valuable insights into product performance and reliability.
- Read reviews on trusted automotive forums and marketplaces
- Check for recurring complaints about noise, leakage, or failure rates
- Consider brand reputation and customer support responsiveness
Community Tip: Join Maxima-specific forums or Facebook groups for firsthand recommendations.
| Type | Pros | Cons | Average Price Range |
|---|---|---|---|
| OEM Compressor | Precise fit, reliable performance, full warranty | Higher cost, limited upgrade potential | $300 - $500 |
| Premium Aftermarket | Cost-effective, sometimes improved design | Fit may require modification, variable quality | $200 - $400 |
| Entry-Level Aftermarket | Low upfront cost | Shorter lifespan, potential reliability issues | $100 - $250 |
| Reconditioned/Used | Most economical option | No warranty, unknown wear history | $80 - $200 |
Final Recommendation: For most Nissan Maxima owners, investing in a reputable OEM or premium aftermarket compressor provides the best balance of performance, reliability, and value. Always replace related components like the receiver drier and flush the system when installing a new compressor to prevent contamination and premature failure.
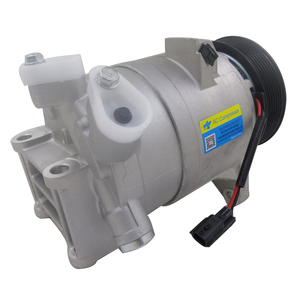
DIY Guide to Replace the AC Compressor in a Nissan Maxima
Replacing the air conditioning (AC) compressor in your Nissan Maxima can restore cooling performance and prevent costly repairs if addressed early. This step-by-step guide provides detailed instructions for safely replacing the AC compressor on your own, with an emphasis on preparation, safety, and best practices.
Safety Warning: Handling refrigerants and working around engine components poses risks. Always wear protective gloves and goggles, work in a well-ventilated area, and ensure the battery is disconnected before starting any work. Refrigerant must be handled by certified professionals.
Step-by-Step Replacement Process
- Prepare the Vehicle
Begin by turning off the Nissan Maxima and engaging the parking brake to prevent accidental movement. Open the hood and locate the plastic engine cover over the top of the engine bay. Remove this cover by unscrewing all 10mm bolts securing it in place. Set the bolts aside in a safe location where they won’t roll away or get lost.
TIP: Taking photos during disassembly can help you remember how everything was connected.
- Disconnect the Battery
Using a 10mm wrench or socket, loosen the nut on the negative battery terminal. Carefully slide the cable off the post and secure it away from the battery to avoid accidental reconnection. This step is crucial to prevent electrical shorts while working near the AC system and other sensitive components.
- Drain the Refrigerant
Before removing the AC compressor, the refrigerant must be completely removed from the system. By law, only certified technicians using approved recovery equipment can handle refrigerant. Take your vehicle to a qualified mechanic or service center to have the refrigerant safely extracted and stored. Attempting to release or drain refrigerant yourself is dangerous and illegal in many jurisdictions.
- Remove the Drive Belt
Locate the drive belt tensioner pulley, typically positioned near the front of the engine. Using a 10mm wrench, rotate the tensioner to relieve pressure on the belt. Once loose, carefully slip the belt off the pulleys and set it aside in a clean area. If the belt shows signs of wear, consider replacing it at the same time.
- Disconnect Electrical Connectors
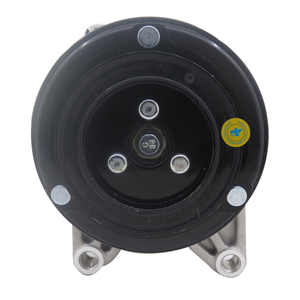
Find the electrical connector(s) attached to the AC compressor. These are usually located on the side or top of the unit. Gently press the release tab and pull the connector free. Label each connector with tape or a marker to make reinstallation easier and avoid confusion later.
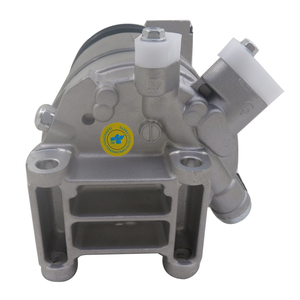
- Remove the AC Lines
Identify the high and low-pressure lines connected to the compressor. Use the appropriate tools to loosen the bolts securing these lines to the compressor. Be cautious—some residual refrigerant may remain in the system, so work slowly and allow any remaining gas to dissipate safely. Once disconnected, cap or seal the ends of the lines to keep debris out.
- Remove the Old Compressor
Locate and remove all mounting bolts that secure the compressor to the engine block. Depending on your model year, there may be two or three bolts. Support the weight of the compressor as you remove the last bolt and carefully lift it out of the engine bay. Due to its weight and position, it may require some maneuvering to extract it without damaging surrounding components.
- Install the New Compressor
Position the new AC compressor into place and align it with the mounting holes. Insert and hand-tighten the mounting bolts before fully tightening them to the manufacturer's specifications. Reconnect the AC lines first, making sure they’re seated properly and tightened securely. Then, reconnect the electrical connectors following your labels.
Pro Tip: Apply a small amount of refrigerant oil to the O-rings before installation to ensure a proper seal.
- Refill the Refrigerant
Once the new compressor is installed, return to a certified mechanic or AC shop to have the system evacuated and refilled with the correct type and amount of refrigerant. Proper charging ensures optimal performance and prevents damage to the new compressor. The technician will also test the system for leaks and verify that the compressor engages correctly.
| Phase | Key Tasks | Potential Issues | Tools Needed |
|---|---|---|---|
| Preparation | Vehicle secured, engine cover removed | Misplacing bolts or not labeling connections | 10mm socket/wrench, screwdriver, camera |
| Battery Disconnection | Negative terminal removed | Short circuit due to incomplete disconnection | 10mm wrench, gloves |
| Refrigerant Removal | System drained by certified technician | Improper handling or environmental violation | None – done by professional |
| Drive Belt Removal | Tension released, belt removed | Damaged tensioner or misalignment upon reinstallation | 10mm wrench |
| Compressor Installation | New unit mounted and connected | Cross-threaded bolts or leaking connections | Ratchet set, torque wrench, O-ring grease |
| Recharging System | System evacuated and charged professionally | Overfilling or underfilling refrigerant | None – done by professional |
Expert Tip: Before reinstalling the engine cover, double-check all connections and fasteners. A small oversight like a loose wire or improperly sealed line can lead to major issues down the road.
Final Checks and Testing
- Reconnect the battery and start the engine
- Turn on the AC system and listen for normal operation
- Check for unusual noises or vibrations coming from the compressor
- Inspect all connections for leaks or loose fittings
- Verify that cold air begins to blow within a few minutes of running the AC
If everything operates smoothly, your DIY Nissan Maxima AC compressor replacement was successful!
Nissan Maxima AC Compressor FAQ
A faulty AC compressor in your Nissan Maxima can significantly impact cabin comfort, especially during warmer months. Here are the most common symptoms to watch for:
- No Cold Air: The most obvious sign is when your air conditioning system fails to blow cold air, even though it turns on.
- Unusual Noises: If you hear rattling, grinding, or squealing sounds when the AC is running, this could indicate internal mechanical failure within the compressor unit.
- Visible Leaks: A refrigerant leak may appear as wet spots or oil streaks under your vehicle near the engine area. Refrigerant leaks often look oily due to the presence of compressor oil.
- Inconsistent Cooling: Intermittent cooling where the AC alternates between blowing cold and warm air can point to a failing compressor clutch or internal wear.
- Compressor Not Engaging: When the AC is turned on, you should hear the compressor click or engage. If it doesn’t activate at all, the compressor or its electrical components may be malfunctioning.
If you experience any combination of these issues, it’s advisable to have your AC system inspected by a qualified technician to confirm the root cause.
Replacing an AC compressor at a certified Nissan dealership typically costs between $1,800 and $2,300, depending on several factors including:
- Model Year: Newer models may require more expensive parts and labor due to updated systems and design complexity.
- Engine Type: VQ vs. VR engines can affect part compatibility and labor time.
- Additional Repairs: Often, the AC system will need recharging with refrigerant after replacement, and other related components like the condenser or dryer may also need to be replaced if contaminated.
This cost includes both OEM (Original Equipment Manufacturer) parts and labor performed by factory-trained technicians using specialized tools. While dealerships offer genuine parts and warranties, independent shops may provide lower rates using quality aftermarket parts while still delivering reliable service.
Technically, yes—you can continue driving your Nissan Maxima with a faulty AC compressor as long as it doesn’t interfere with the engine's operation. However, there are some important considerations:
- Possible Belt Damage: If the compressor pulley is seized or wobbling, it can damage the serpentine belt or other components driven by the same belt, such as the alternator or power steering pump.
- Increased Repair Costs: A failing compressor can contaminate the entire AC system with debris or oil sludge, potentially requiring additional repairs to the condenser, evaporator, or expansion valve.
- Reduced Comfort: Especially in hot climates, a non-functional AC can make driving uncomfortable and even unsafe for vulnerable passengers like children or elderly individuals.
If you choose to delay repair, regularly monitor the condition of your belts and listen for worsening noises. However, timely replacement is generally recommended to avoid compounding problems.
Yes, replacing the AC compressor is possible as a DIY project—if you have the right tools, mechanical knowledge, and understanding of AC system fundamentals. However, it is not a beginner-level task and requires attention to safety and proper procedures.
Here’s what you’ll need to consider:
- Refrigerant Recovery: Before removing the old compressor, the AC system must be evacuated by a certified technician or with proper recovery equipment, as releasing refrigerant into the atmosphere is illegal in many areas.
- Specialized Tools: You'll likely need a set of metric wrenches, socket set, AC manifold gauges, vacuum pump, and possibly a torque wrench for proper installation.
- System Flushing: If the old compressor failed internally, flushing the system to remove debris is crucial to prevent future failures.
- Oil Refill: Adding the correct amount and type of AC compressor oil is essential for lubrication and proper function.
- Vacuum & Recharge: After installing the new compressor, the system must be evacuated under vacuum to remove moisture before recharging with refrigerant.
If you're confident in your mechanical abilities and willing to invest the time and effort, DIY replacement can save hundreds of dollars. Otherwise, professional installation is highly recommended to ensure proper function and avoid costly mistakes.