


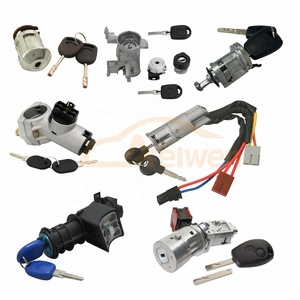


Types of Mini Ignition Switch
A mini ignition switch is an electric switch that activates the main electrical systems in a mini vehicle. It is generally combined with an ignition lock cylinder and is typically installed on the dashboard of a car. The switch can be activated in various positions, including ACC (accessories), ON, and Start positions, which will turn on the accessory circuits and the car's engine. Modern ignition switches are manufactured from high-quality materials such as brass, copper, and other metals, with some components made of durable plastic.
Key Mini Ignition Switch
This is the standard, traditional ignition switch that requires a physical key for operation. Available in various configurations from simple 2-position (On/Off) to more complex 4-position switches (Acc/Off/On/Start).
Best for: Basic functionality, reliable operation, cost-effectiveness
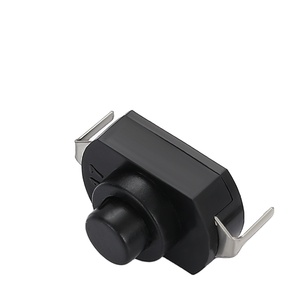
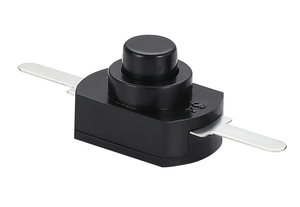
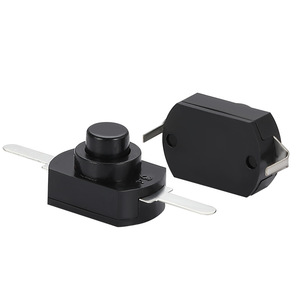
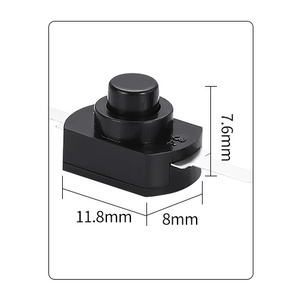
Push-Button Start Switch
A modern alternative that features a push-button to start the vehicle instead of turning a key. Often integrated with key fobs for keyless entry systems, these are becoming increasingly common in newer models.
Best for: High-end vehicles, convenience, modern aesthetics
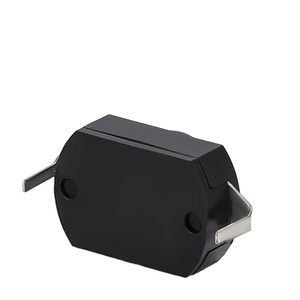
Toggle Switch Ignition
A less common type featuring a toggle or lever switch that is flipped to start the vehicle. Offers a compact design and is popular for racing or custom vehicles where space is at a premium.
Best for: Racing applications, custom builds, space constraints
Electronic Coded Ignition Switch
An advanced system that utilizes electronic or computerized codes for enhanced security. Only operates when the correct code is transmitted from a key fob or transponder key to the vehicle's computer system.
Best for: Security-conscious owners, theft prevention, modern vehicles
Master Mini Ignition Switch
Controls power distribution to other switches on the power panel. Typically found in marine and aviation applications, these are critical safety components in case of electrical faults.
Best for: Marine applications, complex electrical systems, safety-critical operations
Expert Tip: When selecting a mini ignition switch type, consider not only your current vehicle's specifications but also your security needs and usage patterns. For vehicles frequently used in high-theft areas, an Electronic Coded Ignition Switch offers significant advantages in deterring theft.
Popularity of Ignition Switch Types
Specifications and Maintenance of Mini Ignition Switch
When sourcing or replacing a mini cooper ignition switch, several critical specifications must be considered to ensure proper fit and functionality. Understanding these specifications helps prevent compatibility issues and ensures optimal performance.
| Specification | Description | Typical Range | Importance |
|---|---|---|---|
| Current Rating | Maximum current the switch can handle without damage | 10A - 30A | Critical |
| Number of Positions | Available settings for the ignition switch | 2 - 4 positions | High |
| Terminal Type | Connection points for electrical integration | Blade, screw, or pin | Medium |
| Material | Construction materials affecting durability | Copper, zinc, brass, plastic | High |
| Key Type | Design and style of operating keys | Standard, transponder, coded | Medium |
Maintenance Essentials
Regular maintenance of mini ignition switches is crucial for ensuring reliable operation and extending service life. Following these maintenance practices can prevent common issues and costly repairs:
Regular Lubrication
The key barrel should be lubricated with light machine oil every 6 months. Insert the key and turn it through all positions several times to distribute the lubricant evenly throughout the mechanism.
Position Testing
Test the switch regularly in all positions to identify early signs of wear or electrical issues. Any hesitation or resistance during operation may indicate impending failure.
Wiring Inspection
Check and tighten any loose connections at least annually. Loose wiring is a common cause of intermittent operation and can lead to short circuits or complete failure.
Warning: Always disconnect the vehicle's battery before performing any maintenance or inspection on the ignition switch to prevent electrical shock or accidental system activation.
Preventive Maintenance Tip: Clean any corrosion around the ignition switch terminals using a wire brush and electrical contact cleaner. This simple maintenance step can significantly extend the life of your ignition switch and prevent electrical resistance issues.
How to Choose Mini Ignition Switches
Selecting the right ignition switch mini cooper requires careful consideration of several factors. This comprehensive guide will help you make an informed decision based on your specific requirements and vehicle compatibility.
Key Selection Criteria
Type Selection
Consider the specific application requirements when choosing between keyless push start buttons, key lock cylinders, and combination switches:
- Keyless push start buttons offer convenience but may require more complex installation
- Key lock cylinders provide better security and are more widely compatible
- Combination switches integrate multiple functions into a single unit, saving space
Best choice: Key lock cylinders for security-conscious applications
Material Considerations
The material significantly impacts durability, performance, and cost:
- Brass switches offer excellent durability and corrosion resistance
- Copper switches provide superior electrical conductivity at a lower cost
- Aluminum switches are lightweight and offer good value for lighter applications
Best choice: Brass for heavy-duty applications, aluminum for lightweight use
| Selection Factor | Considerations | Recommendation |
|---|---|---|
| Electrical Ratings | Always check current and voltage ratings against your vehicle's requirements | Choose switches rated at least 20% higher than your system requirements |
| Vehicle Compatibility | Ensure the switch is compatible with your specific vehicle model and year | OEM or direct-fit replacements provide the best compatibility |
| Security Features | Consider additional security features like tamper-proof seals and coding | Electronic coded switches offer the best theft protection |
| Installation Complexity | Assess your technical skills against the installation requirements | Direct replacements are easier for DIY installation |
Pro Selection Tip: When possible, choose a mini ignition switch from the same manufacturer as your original equipment. This ensures the best fit, proper electrical characteristics, and often results in longer service life compared to generic replacements.
How to DIY and Replace Mini Ignition Switches
Replacing a 2005 mini cooper ignition switch or similar models is a task that most car owners can handle with basic tools and mechanical knowledge. Follow this comprehensive step-by-step guide for a successful ignition switch replacement.
Safety Warning: Always disconnect the vehicle's battery before beginning any electrical work to prevent short circuits, electrical shock, or inadvertent airbag deployment.
Required Tools
- Screwdriver set (flathead and Phillips)
- Socket wrench set with various sizes
- Adjustable wrench
- Needle-nose pliers
- Electrical tape
- Replacement ignition switch (ensure correct model compatibility)
Step-by-Step Replacement Guide
Disconnect the Battery
Locate your vehicle's battery and disconnect the negative (black) terminal first to prevent electrical shock or system damage during the replacement process.
Access the Lower Dashboard Panel
Use a screwdriver to carefully remove the screws and clips securing the lower dashboard panel. Gently pull the panel away, being careful not to damage any attached wiring.
Locate the Ignition Switch
The ignition switch is typically located near the steering column - look for a small box with multiple wires connected to it. In some models, you may need to remove additional trim pieces to access it fully.
Disconnect the Wiring Harness
Carefully disconnect the wiring harness from the ignition switch. Take a photo or make a diagram of the wiring connections before removal to ensure correct reinstallation.
Remove Mounting Hardware
Use the appropriate socket wrench to remove the mounting nuts or screws securing the ignition switch to the steering column or dashboard.
Install the New Ignition Switch
Position the new ignition switch in the same orientation as the old one and secure it with the mounting hardware, being careful not to overtighten.
Reconnect the Wiring
Reconnect the wiring harness to the new ignition switch, ensuring each connector is fully seated and secured. Reference your photo or diagram to verify correct connections.
Reassemble Dashboard Components
Reinstall all dashboard panels and trim pieces that were removed, securing them with the original hardware.
Reconnect the Battery
Reconnect the negative battery terminal, ensuring it is securely fastened.
Test the New Switch
Insert the key and test all positions of the ignition switch to ensure proper operation before considering the job complete.
Installation Tip: If your vehicle uses a transponder key, you may need to program the new ignition switch to recognize your key. Some vehicles require specialized equipment for this process, which might necessitate a visit to a dealership or automotive locksmith.
Frequently Asked Questions
Yes, replacing an ignition switch is generally a DIY-friendly task for those with basic mechanical experience. Most replacements require common tools like screwdrivers and socket wrenches. However, the complexity varies by vehicle model - newer vehicles with integrated security systems may require professional programming after installation. If you're comfortable working with basic automotive electrical systems and have the correct replacement part, you can likely complete this repair in 1-2 hours.
For most vehicles, ignition switch replacement takes approximately 1-2 hours. The timeframe depends on several factors:
- Vehicle make and model (some designs provide easier access than others)
- Your experience level with automotive repairs
- Accessibility of the ignition switch components
- Whether programming is required after installation
Professional mechanics with specialized tools can often complete the job in under an hour, while first-time DIYers might need 2-3 hours to ensure proper installation.
A failing ignition switch can manifest in several ways:
- No-start condition: The vehicle won't start when the key is turned
- Intermittent starting issues: The vehicle starts inconsistently
- Stalling while driving: The engine may shut off unexpectedly
- Electrical system problems: Accessories may work erratically
- Key stuck in ignition: Difficulty removing the key
- Dashboard warning lights: Security or electrical system warnings
A completely failed switch prevents the electrical connection needed to power the starter motor and ignition system, resulting in a vehicle that won't start at all.
Ignition switch failure typically results from:
| Cause | Description | Prevention |
|---|---|---|
| Wear and Tear | Internal components degrade with repeated use over time | Unavoidable, but gentle key operation helps |
| Heavy Key Chains | Excess weight puts strain on the ignition cylinder | Use minimal keys and accessories on your keyring |
| Electrical Issues | Short circuits or power surges damage internal contacts | Maintain battery and electrical system |
| Worn Keys | Key edges wear down, providing improper contact | Replace worn keys before they damage the switch |
| Moisture/Corrosion | Water intrusion causes contact corrosion | Address any water leaks in the vehicle promptly |
No, vehicles with push-button start systems use sophisticated electronic security systems that require a specifically programmed key fob. These systems employ radio frequency identification (RFID) technology that verifies the presence of an authorized key fob before allowing the engine to start. Each key fob contains a unique electronic signature that must be recognized by the vehicle's immobilizer system. Using an unprogrammed or incorrect key fob will trigger the vehicle's security system and prevent engine start.
Yes, the 2006 Mini Cooper ignition switch features several differences from earlier models. The 2006 model incorporates enhanced security features, including transponder technology that requires specific key programming. The electrical connections and mounting hardware also differ, making parts non-interchangeable between generations. Additionally, the 2006 model integrated the ignition switch more closely with the vehicle's central electronic control unit, requiring more sophisticated diagnostic and replacement procedures.
When replacing a 2006 Mini Cooper ignition switch, always ensure you obtain the correct part number specific to your vehicle's production date and trim level to ensure compatibility.