


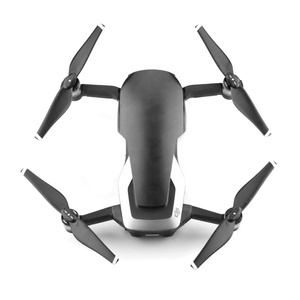


Types of Microlight Propellers
Microlight aircraft rely on various propeller types, each with distinct characteristics that affect performance, efficiency, and maintenance requirements. Understanding these differences is crucial for pilots and aircraft owners.
Wooden Propellers
Traditional laminated wooden propellers combine vintage appeal with practical performance. Made from high-quality laminated hardwoods like beech or maple.
Best for: Classic aircraft, smooth operation, vibration dampening
Maintenance Level: High (requires regular varnishing and inspection)
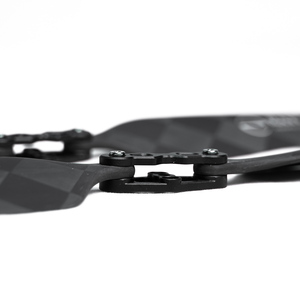
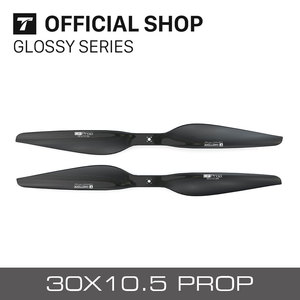
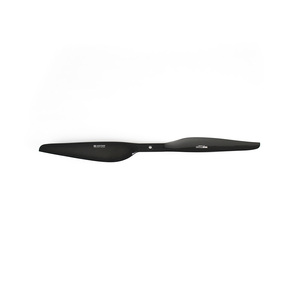
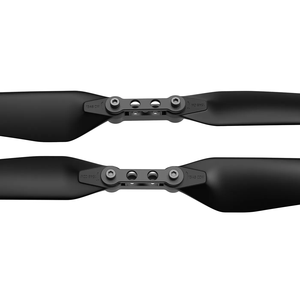
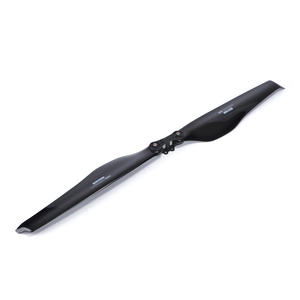
Carbon Fiber Propellers
Advanced composite propellers offering superior strength-to-weight ratio. Engineered for maximum performance and efficiency.
Best for: High-performance aircraft, fuel efficiency, durability
Maintenance Level: Low (occasional inspection for damage)
Aluminum Propellers
Made from high-strength aluminum alloys with protective coatings to resist corrosion. Offers excellent balance of cost and performance.
Best for: Budget-conscious pilots, reliable performance
Maintenance Level: Medium (regular inspection for corrosion)
Composite Propellers
Hybrid designs combining carbon fiber, glass fiber, and other materials. Customizable performance characteristics for specific applications.
Best for: Specialized operations, extreme environments
Maintenance Level: Low to Medium (depends on specific materials)
| Propeller Type | Weight | Durability | Cost | Performance | Noise Level |
|---|---|---|---|---|---|
| Wooden | Medium | Medium | Medium | Good | Low |
| Carbon Fiber | Very Light | Excellent | High | Excellent | Medium |
| Aluminum | Heavy | Good | Low | Good | High |
| Composite | Light | Very Good | Medium-High | Very Good | Low-Medium |
Expert Tip: When transitioning between propeller types, expect changes in aircraft performance characteristics. Carbon fiber propellers typically increase climb rate and cruise speed compared to wooden ones, while wooden propellers often provide smoother operation with less vibration.
Specifications and Technical Details
Understanding the technical specifications of microlight propellers is essential for optimal performance, safety, and efficiency. Here are the key specifications to consider:
Diameter
120-180 cm
Larger = more thrust
Smaller = better climb rate
Blade Count
2-6 blades
More blades = smoother
Fewer = higher speed
Blade Angle
15-25 degrees
Higher angle = more thrust
Lower angle = higher speed
Pitch
40-60 inches
High pitch = faster speed
Low pitch = better thrust
| Specification | Typical Range | Impact on Performance | Selection Considerations |
|---|---|---|---|
| Diameter | 120-180 cm | Affects thrust, climb rate, and noise level | Match to engine power and aircraft design |
| Number of Blades | 2-6 blades | Influences smoothness, efficiency, and noise | More blades for smoother operation, fewer for speed |
| Blade Angle | 15-25 degrees | Determines thrust vs. speed characteristics | Higher angles for takeoff performance, lower for cruise |
| Pitch | 40-60 inches | Affects speed, climb rate, and engine load | Match to intended flight profile and engine power |
| Weight | 0.5-3 kg | Impacts aircraft balance and performance | Lighter propellers for better acceleration |
Important Safety Note: Never exceed the manufacturer's recommended propeller specifications for your specific aircraft and engine combination. Doing so can lead to dangerous vibrations, engine damage, or catastrophic propeller failure during flight.
Maintenance and Care
Proper maintenance of microlight propellers is essential for safety, performance optimization, and extending service life. Establish a regular maintenance schedule based on flight hours and operating conditions.
Regular Inspection
Conduct thorough visual inspections before and after each flight. Look for signs of wear, damage, cracks on blades and hub, and check for loose hardware.
Frequency: Before/after each flight
Cleaning Procedures
Remove dirt, bugs, and debris using soft cloth, mild soap, and water. Avoid abrasive cleaners that can damage the propeller surface or protective coatings.
Frequency: After every 5-10 flights
Balancing
Ensure proper propeller balance to prevent vibrations that can damage engine components and airframe. Use a bubble level or digital propeller balancer for precision.
Frequency: Every 25-50 flight hours
| Maintenance Task | Frequency | Tools Required | Professional Help Needed? |
|---|---|---|---|
| Visual Inspection | Before/after each flight | Flashlight, magnifying glass | No |
| Cleaning | After 5-10 flights | Soft cloth, mild soap, water | No |
| Balancing | Every 25-50 hours | Propeller balancer, weights | Recommended for beginners |
| Pitch Adjustment | As needed/annually | Pitch gauge, micrometer | Yes, for precision |
| Surface Refinishing | When damaged/annually | Sandpaper, varnish/paint | Yes, for wooden propellers |
| Professional Inspection | Annually/100 hours | Specialized equipment | Yes |
Maintenance Tip: For wooden propellers, apply a fresh coat of marine-grade varnish annually to protect against moisture absorption and UV damage. This simple maintenance step can significantly extend the life of your wooden propeller and maintain its performance characteristics.
How to Choose the Right Microlight Propeller
Selecting the optimal microlight propeller involves considering multiple factors including your aircraft specifications, engine characteristics, and intended use. Follow this comprehensive selection guide for the best results:
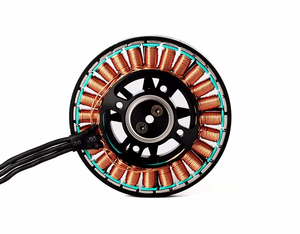
Engine Compatibility
Consider your engine's power output, RPM range, and rotational direction. Match the propeller to your specific engine for optimal performance and safety.
Key metrics: Horsepower, torque curve, redline RPM
Flight Profile Analysis
Analyze your typical flying patterns, preferred cruising altitude, speed requirements, and takeoff/landing conditions to select a propeller optimized for your needs.
Consider: Cruise speed, climb rate, field elevation
| Selection Factor | What to Consider | Recommendation |
|---|---|---|
| Engine Power | Match propeller to engine capabilities | Higher pitch for powerful engines, lower pitch for lower horsepower |
| Flying Purpose | Primary mission profile | Lower pitch for aerobatics, higher pitch for cruising |
| Operating Environment | Altitude, temperature, humidity | Adjust pitch for high altitude operations (typically higher pitch) |
| Material Choice | Durability, weight, maintenance requirements | Carbon fiber for performance, wood for comfort, aluminum for economy |
| Budget Constraints | Initial cost and long-term maintenance | Consider lifetime value rather than just purchase price |
Selection Warning: Never select a propeller based solely on performance claims without verifying compatibility with your specific aircraft and engine. Always consult your aircraft's documentation and consider seeking professional advice before making a final decision.
DIY Propeller Replacement Guide
Replacing a microlight propeller can be accomplished by experienced owners with proper tools and careful attention to detail. Follow this step-by-step guide for safe and effective propeller replacement:
Safety First: Never attempt propeller replacement without first ensuring the ignition is off and the engine cannot accidentally start. Remove the spark plug or disconnect the battery as an additional safety measure.
- Prepare for safety - Position aircraft on level ground with brakes engaged. Ensure engine is cool and cannot start accidentally.
- Gather necessary tools - Collect appropriate wrenches, torque wrench, replacement propeller, and manufacturer's documentation.
- Disconnect electrical system - Remove ignition key and disconnect battery or remove spark plugs to prevent accidental starting.
- Remove protective covers - Access the propeller by removing any spinner or protective covers.
- Document orientation - Take photos and notes of the propeller's position and orientation before removal.
- Remove mounting bolts - Carefully loosen and remove the bolts securing the propeller to the engine hub.
- Remove old propeller - Gently pull the old propeller straight off the hub, being careful not to damage the engine components.
- Inspect engine components - Check the propeller hub, mounting flanges, and bearings for wear or damage.
- Install new propeller - Align the new propeller according to manufacturer specifications and orientation marks.
- Secure with bolts - Insert and hand-tighten mounting bolts in the correct sequence (usually crisscross pattern).
- Torque to specifications - Using a calibrated torque wrench, tighten bolts to manufacturer's recommended torque values.
- Reinstall covers - Replace spinner or protective covers according to aircraft specifications.
- Reconnect electrical system - Reconnect battery or reinstall spark plugs after installation is complete.
- Final inspection - Perform thorough visual inspection of the installation before engine start.
Critical Warning: Improper propeller installation can lead to catastrophic failure during flight. If you're uncertain about any aspect of the replacement process, consult a qualified aircraft technician. Always follow the manufacturer's specific installation instructions.
Frequently Asked Questions
Q1: What materials are used to manufacture microlight propellers?
Microlight propellers are manufactured from several materials, each offering distinct advantages. Wood (typically laminated hardwoods) provides excellent vibration dampening and is easily repaired. Carbon fiber offers superior strength-to-weight ratio and durability. Aluminum provides good performance at lower cost. Composite propellers combine materials like carbon fiber and glass fiber to optimize specific performance characteristics for particular applications.
Q2: What are the benefits of carbon fiber microlight propellers?
Carbon fiber microlight propellers offer numerous advantages, including exceptional strength-to-weight ratio, superior durability, and resistance to corrosion and environmental damage. Their lightweight construction improves aircraft performance by reducing rotational mass, which enhances acceleration and responsiveness. Additionally, carbon fiber propellers maintain their structural integrity better than other materials under stress, reducing the risk of deformation during operation. These propellers typically require less maintenance and have longer service lives than wooden or aluminum alternatives, though they generally come at a higher initial cost.
Q3: Can microlight propellers be customized?
Yes, microlight propellers can be customized to meet specific requirements and optimize performance for particular aircraft and operating conditions. Customization options include diameter adjustments, pitch modifications, blade count variations, airfoil profile design, and material selection. Many manufacturers offer semi-custom or fully custom propeller options based on detailed specifications of your aircraft, engine, and intended use profile. Custom propellers can significantly enhance performance characteristics such as climb rate, cruise efficiency, and noise reduction, though they typically come at a premium price compared to standard models.
Q4: How many blades do microlight propellers have?
Microlight propellers typically feature between 2 and 6 blades, with 2 and 3-blade designs being the most common. The number of blades affects several performance characteristics: fewer blades generally provide higher efficiency and speed but may generate more noise, while more blades offer smoother operation with less vibration at the cost of some efficiency. Two-blade propellers are often used for standard recreational microlights, three-blade designs offer a good balance of performance and comfort, and multi-blade configurations (4-6 blades) are typically found on specialized aircraft requiring particular performance characteristics or noise reduction capabilities.
Q5: How often should I balance my microlight propeller?
Microlight propellers should be balanced after initial installation, following any repair or surface refinishing, and as part of regular maintenance every 25-50 flight hours. Additionally, if you notice unusual vibrations during flight, immediate propeller balancing is recommended. Proper balancing is crucial for preventing harmful vibrations that can damage engine components, reduce efficiency, cause pilot fatigue, and potentially lead to structural failures. While simple static balancing can be performed by experienced owners, dynamic balancing (which measures vibration during actual operation) is best performed by qualified technicians with specialized equipment.


 浙公网安备 33010002000092号
 浙B2-20120091-4