


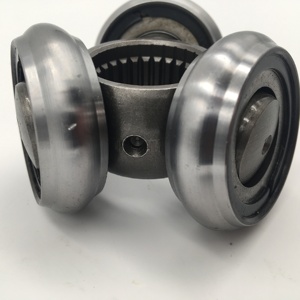


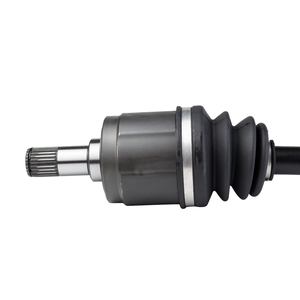


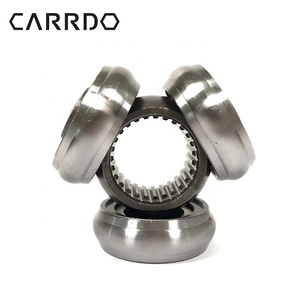


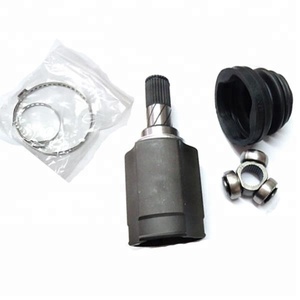


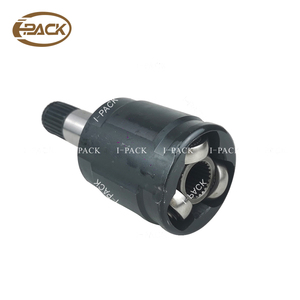
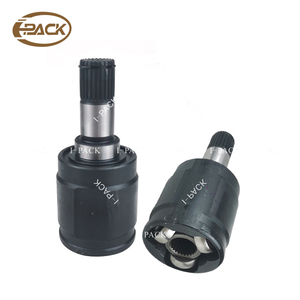


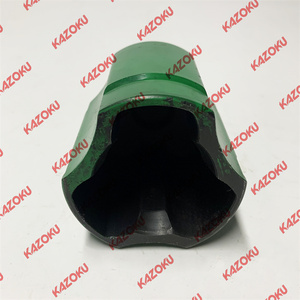
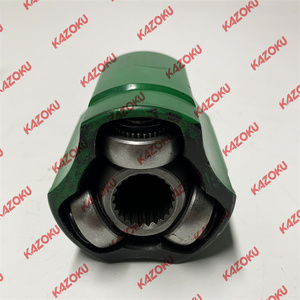
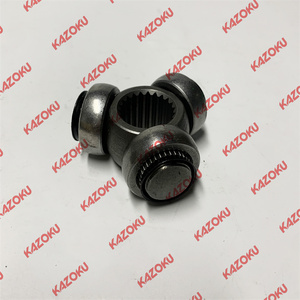


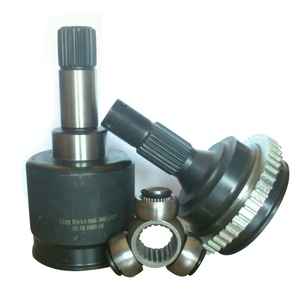


Types of Inner Tripod Joint
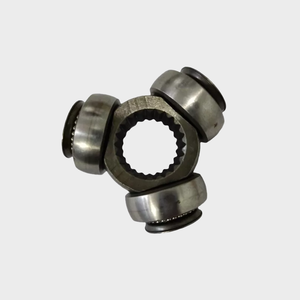
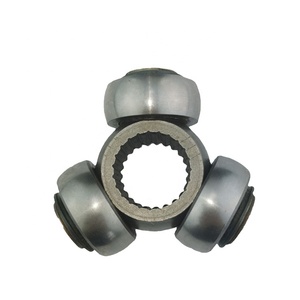
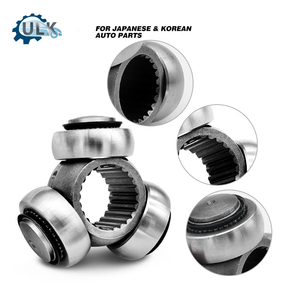
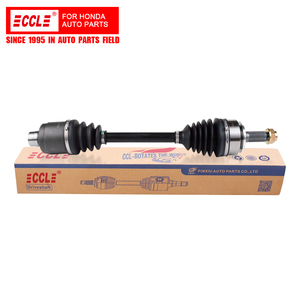
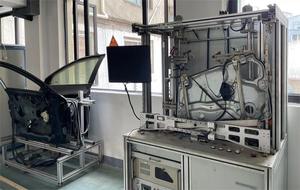
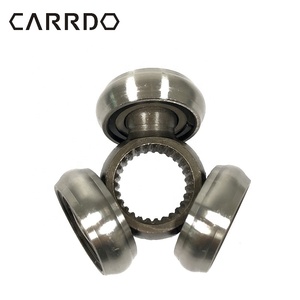
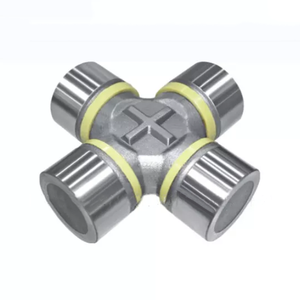
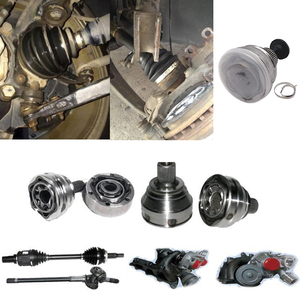
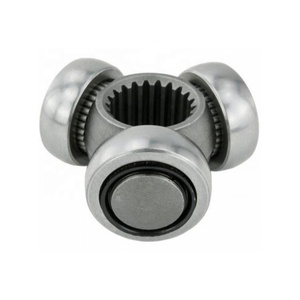
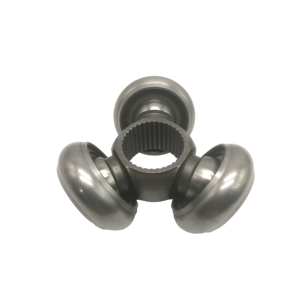
Inner tripod joint is a critical component in vehicle drivetrains, commonly used in front-wheel drive axles to enable smooth power transmission while accommodating changes in angle and length. These precision-engineered components consist of a three-pronged spider assembly that rides within a housing cup, allowing for controlled rotational motion and angular displacement.
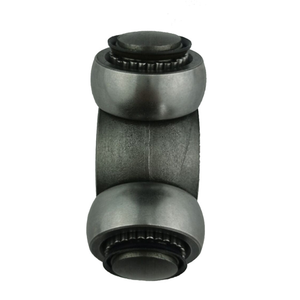
Standard Inner Tripod Joint
The workhorse solution for everyday vehicles, providing reliable performance in typical driving conditions.
- Used primarily in front-wheel-drive and all-wheel-drive passenger vehicles
- Features two tracks and internal pins for smooth motion
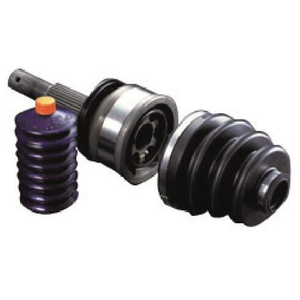
- Available in both grease-lubricated and sealed maintenance-free designs
- Optimized for balanced performance, durability, and cost-effectiveness
- Designed to handle moderate loads and speeds efficiently
Best for: Everyday passenger vehicles and light-duty applications
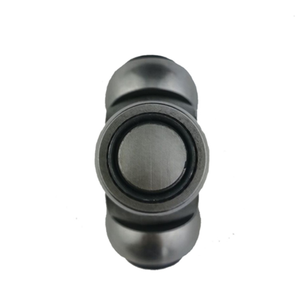
Heavy-Duty Inner Tripod Joint
Engineered for extreme conditions and high-performance applications where standard joints would fail.
- Used in trucks, buses, performance sports cars, and racing applications
- Constructed with larger dimensions and high-strength materials
- Capable of withstanding extreme torque and load conditions
- Features enhanced sealed designs to prevent contamination
- Provides superior reliability with minimal maintenance requirements
Best for: Commercial vehicles and high-performance applications
Expert Tip: When selecting between standard and heavy-duty inner tripod joints, consider not just your current driving conditions but also any future modifications to your vehicle that might increase power output or torque demands.
Related Drivetrain Components
| Component | Function | Relationship to Inner Tripod Joint |
|---|---|---|
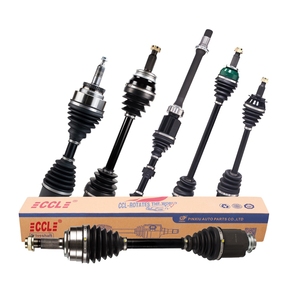
| Constant Velocity (CV) Shafts | Transmit torque from transmission to wheels while allowing for angular movement | Utilize inner tripod joints as critical connecting elements |
| Drive Axles | Transfer power from differential to wheels while allowing for suspension movement | Incorporate inner tripod joints for smooth power delivery through varying angles |
| Wheel Hubs | Connect wheels to axles and contain bearings for rotation | Work in conjunction with the outer joints while inner tripod joints connect to the differential |
Specifications of Inner Tripod Joints
Understanding the technical specifications of inner tripod joints is essential for selecting the right component for your vehicle. Below are the key specifications to consider:
-
Size
Inner tripod joints come in various sizes to match specific vehicle requirements. Common diameter measurements include 25mm, 30mm, and 35mm. The size is determined by measuring both the shaft diameter and the distance between mounting points. Proper sizing ensures optimal fit and performance.
-
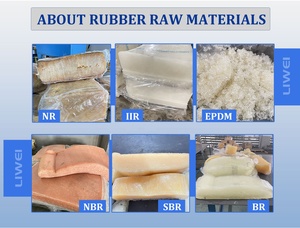
Material Composition
The material used in manufacturing inner tripod joints significantly impacts their durability and performance characteristics:
- Alloy Steel: Most common material, heat-treated for enhanced wear resistance
- Chrome-Moly Steel: Offers superior strength and durability for higher torque applications
- Titanium Alloys: Premium option providing excellent strength-to-weight ratio at a higher cost
-
Load Capacity
Load capacity indicates the maximum torque and force an inner tripod joint can handle safely. Measurements typically range from 500N to 5000N depending on the joint's size and material composition. Exceeding the specified load capacity can lead to premature failure and potential drivetrain damage.
-
Mounting Type
Inner tripod joints utilize different mounting configurations to attach to the drivetrain:
- Flange-Mounted: Uses a flat mounting surface with bolt holes for secure attachment
- Bolt-Mounted: Directly secured using threaded fasteners for positive retention
-
Precision Tolerance
Manufacturing precision is crucial for proper function and longevity. Inner tripod joints typically feature precision tolerances ranging from 0.01mm to 0.05mm. This precision is measured using specialized equipment that evaluates component run-out and ensures smooth operation with minimal vibration.
Inner Tripod Joint Size Selection Chart
| Vehicle Type | Recommended Joint Size | Typical Load Capacity |
|---|---|---|
| Compact Cars | 25mm | 500-1500N |
| Mid-Size Sedans | 27-30mm | 1500-2500N |
| SUVs & Light Trucks | 30-32mm | 2500-3500N |
| Heavy-Duty Trucks | 35mm+ | 3500-5000N |
| Performance Vehicles | 30-35mm (specialized) | 2500-4000N |
Maintenance of Inner Tripod Joints
Proper maintenance of inner tripod joints is essential for maximizing their service life and ensuring reliable drivetrain operation. Following these maintenance practices can help prevent premature failure and costly repairs:
Preventive Maintenance
- Perform regular visual inspections to check for boot tears or grease leakage
- Listen for clicking or popping noises during vehicle operation
- Check for excessive play or vibration during acceleration
- Inspect for proper lubrication levels during scheduled maintenance
- Verify proper boot clamp tension to prevent contamination
Lubrication Requirements
- Use only manufacturer-recommended CV joint grease
- Avoid mixing different types of lubricants
- Ensure complete coverage of all bearing surfaces
- Replace grease completely when servicing
- Verify proper grease volume according to specifications
Warning: Never operate a vehicle with damaged CV boots or leaking inner tripod joints. Contamination from dirt and moisture can cause rapid joint deterioration, leading to complete failure and potential safety hazards.
Maintenance Schedule
| Maintenance Task | Frequency | Importance |
|---|---|---|
| Visual inspection of boots and seals | Every 10,000 miles or 6 months | Critical |
| Check for unusual noises or vibrations | During regular driving | High |
| Inspect for grease leakage | Every oil change | High |
| Verify joint alignment | After suspension work or accidents | Medium |
| Complete lubrication service | As needed or every 40,000-60,000 miles | High |
Pro Tip: When replacing CV boots, always thoroughly clean the inner tripod joint of old grease and inspect all rolling surfaces for pitting or wear before applying fresh lubricant. This additional step can significantly extend joint life and identify potential issues before they lead to failure.
How to Choose Inner Tripod Joints
Selecting the right inner tripod joint is crucial for ensuring optimal drivetrain performance and longevity. Consider these key factors when making your selection:
Performance Considerations
- Application Type: Match to your driving conditions (highway, off-road, performance)
- Load Capacity: Select based on vehicle weight and power output
- Material Quality: Choose higher-grade materials for demanding applications
Compatibility Factors
- Size & Dimensions: Must match your vehicle's specifications exactly
- Spline Configuration: Verify correct number and design of splines
- Mounting Type: Ensure compatibility with your differential housing
Selection Decision Matrix
| Selection Factor | Standard Applications | Performance Applications | Heavy-Duty Applications |
|---|---|---|---|
| Material Recommendation | Standard alloy steel | Chrome-moly steel | High-strength alloy steel |
| Load Rating Priority | Medium | High (torque focus) | Very High (load focus) |
| Sealing Requirements | Standard boots | High-temp boots | Heavy-duty reinforced boots |
| Cost Consideration | Economy to mid-range | Premium | Commercial grade |
| Maintenance Expectation | Standard intervals | More frequent inspection | Extended durability focus |
Expert Advice: When upgrading a vehicle for performance, always upgrade your inner tripod joints to match your increased power output. Standard joints cannot handle the additional stress of performance modifications and may fail prematurely under increased loads.
Quality Indicators
Look for these quality indicators when selecting inner tripod joints:
- Precision machining with smooth, even surfaces
- Proper heat treatment indicated by consistent coloration
- High-quality bearing surfaces with proper hardness
- Comprehensive warranty coverage from reputable manufacturers
- Proper certification and quality control documentation
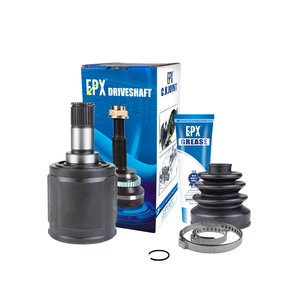
- Complete kit including all necessary hardware and lubricants
DIY Inner Tripod Joint Replacement Guide
Replacing an inner tripod joint requires mechanical skill and appropriate tools. Follow this step-by-step guide for a successful replacement:
Safety Warning: Always work on a level surface, use proper jack stands, and never rely solely on a hydraulic jack to support the vehicle. Disconnect the battery before beginning work and wear appropriate safety equipment including eye protection and gloves.
Required Tools
- Socket set and wrenches
- Torque wrench
- Floor jack and jack stands
- Pry bar or large screwdriver
- Rubber mallet
- CV joint grease
- Boot clamp pliers
- Safety glasses and gloves
Step-by-Step Replacement Process
- Prepare the Vehicle: Secure the vehicle on level ground, engage the parking brake, and chock the rear wheels. Loosen the wheel lug nuts before lifting the vehicle.
- Raise and Secure the Vehicle: Use a floor jack to lift the vehicle and place jack stands under approved lifting points. Remove the wheel for clear access to the axle assembly.
- Remove the Axle Nut: Remove the cotter pin (if present) and use the appropriate socket to remove the axle nut while keeping the brake engaged.
- Disconnect Steering and Suspension Components: Separate the ball joint from the steering knuckle by removing the retaining bolt and using a ball joint separator tool if necessary.
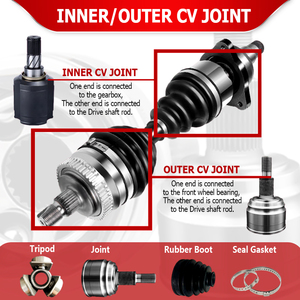
- Separate the Outer CV Joint: Carefully extract the outer CV joint from the hub assembly, using a rubber mallet if needed to break it free.
- Disconnect from the Differential: Use a pry bar to carefully separate the inner tripod joint from the differential, being cautious not to damage the differential seal.
- Remove the Entire Axle Assembly: Once freed from both the hub and differential, remove the complete axle assembly from the vehicle.
- Replace the Inner Tripod Joint: On a clean work surface, remove the boot clamps, slide off the old boot, and remove the inner tripod joint. Clean all components thoroughly before installing the new joint.
- Reassemble with New Components: Install the new inner tripod joint, apply the specified amount of CV joint grease, and secure with new boot and clamps.
- Reinstall the Axle Assembly: Carefully insert the inner joint into the differential until it clicks into place, then connect the outer joint to the hub assembly.
- Reconnect Suspension Components: Reattach the ball joint to the steering knuckle and torque all fasteners to manufacturer specifications.
- Final Assembly: Install the axle nut and torque to the specified value. Reinstall the wheel, lower the vehicle, and perform a final torque check on all fasteners.
- Test Drive: Carefully test drive the vehicle at low speeds in a safe area, checking for unusual noises or vibrations before normal driving.
Professional Insight: When installing the new inner tripod joint, ensure perfect alignment of all components. Misalignment can cause premature wear and vibration. Take your time with this critical step and verify proper seating before proceeding with reassembly.
Frequently Asked Questions
Q1: How do I know my inner tripod joint is damaged?
Signs of a failing inner tripod joint include:
- Clicking or popping noises, especially during turning maneuvers
- Noticeable vibration during acceleration that increases with speed
- Visible grease leakage or torn boots around the joint area
- Clunking sounds when shifting between drive and reverse
- Difficulty steering or uneven power delivery during acceleration
Early detection is crucial to prevent further drivetrain damage. If you notice any of these symptoms, have your vehicle inspected by a qualified mechanic promptly.
Q2: Can I drive with a faulty inner tripod joint?
It is strongly advised against driving with a known faulty inner tripod joint. While the vehicle may initially seem operational, continued driving can lead to:
- Complete joint failure resulting in loss of power to the wheels
- Damage to the differential and other expensive drivetrain components
- Unpredictable handling characteristics, especially during acceleration or turning
- Potential safety hazards if failure occurs at highway speeds
The progressive nature of joint failure means that what starts as a minor symptom can quickly escalate to complete drivetrain failure, potentially leaving you stranded or causing an accident.
Q3: How long does it take to replace an inner tripod joint?
The replacement time varies depending on several factors:
| Scenario | Estimated Time | Notes |
|---|---|---|
| Professional Mechanic | 2-4 hours | With proper equipment and experience |
| DIY - Experienced | 4-6 hours | With proper tools and mechanical knowledge |
| DIY - Beginner | 8+ hours | Allow extra time for learning and potential challenges |
Additional time may be needed for particularly difficult vehicles with complex suspension designs or if corrosion and seized components are encountered.
Q4: Can I replace the inner tripod joint myself?
Yes, with sufficient mechanical knowledge and proper tools, you can replace an inner tripod joint yourself. However, consider these factors before proceeding:
- The job requires moderate to advanced mechanical skills
- Special tools like a torque wrench and boot clamp pliers may be necessary
- Access to a service manual with torque specifications is essential
- You'll need a clean workspace and several hours of uninterrupted time
- If you encounter difficulties, professional assistance may still be required
If you're uncertain about your abilities or lack the proper tools, consulting a professional mechanic is recommended to avoid potential damage or safety issues.
Q5: Should I replace both inner tripod joints simultaneously?
While replacing both inner tripod joints simultaneously is not always necessary, there are several considerations:
- Age and Mileage: If both joints have similar high mileage, replacing both can be cost-effective in the long run
- Labor Efficiency: Much of the labor cost or time investment is in accessing the components, making it economical to replace both while the vehicle is already disassembled
- Driving Patterns: For vehicles driven symmetrically (not primarily making turns in one direction), wear patterns are typically similar on both sides
- Budget Constraints: If budget is limited, prioritize the damaged joint and plan for future replacement of the other
Consulting with a trusted mechanic who can inspect both joints can help determine the most appropriate approach based on your specific vehicle's condition and your budget.


 浙公网安备 33010002000092号
 浙B2-20120091-4