


Types of Honda Body Kits
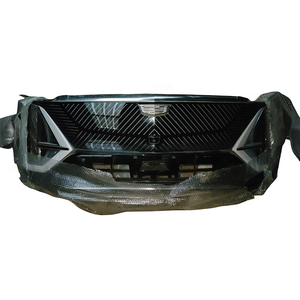
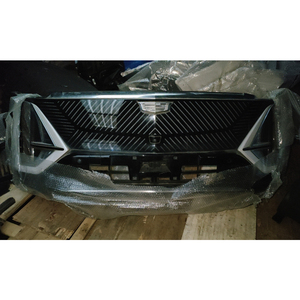
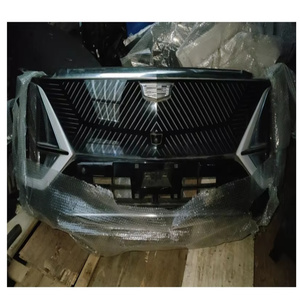
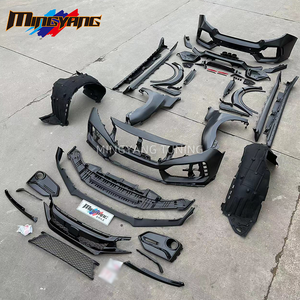
The Honda body kit is an accessory that modifies the appearance of a car. It comprises parts like front and rear bumpers, spoilers, and side skirts that enhance the car's aerodynamics and visual appeal. The kits are available for various Honda models, including Accord, Civic, CR-V, and Fit. Here are the different types of Honda body kits.
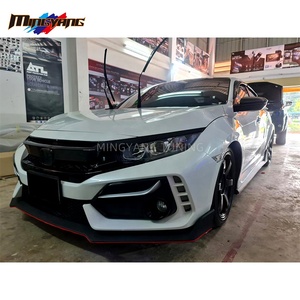
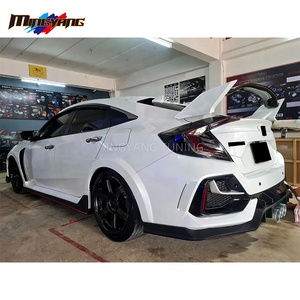
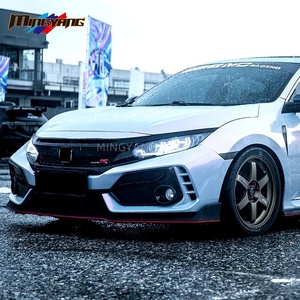
Honda Civic Body Kit
The Honda Civic is a popular choice for car enthusiasts looking to modify their vehicles. This is because it has a large selection of Honda Civic body kits. The kits range from affordable to luxurious, making it easy to find something that fits the budget.
They also come in different styles, such as JDM and VIP, to cater to various preferences. A Honda Civic body kit typically includes:
- Spoiler
- Front lip
- Side skirts
- Hood scoop
The parts work together to give the car a sportier look and improve its performance by reducing wind resistance.
Honda Accord Body Kit
The Honda Accord is a midsize sedan known for its reliability and comfort. While it stands out for its sleek design, it is possible to further enhance the car's appearance and performance using a Honda Accord body kit.
The kits are designed specifically for different Accord models, such as the Honda Accord 2016 body kit. They include:
- Front bumper
- Rear bumper
- Side skirts
- Fenders
- Hoods
- Spoilers
Together, they give the car a sportier and more aggressive look. Some kits also come with underglow lights to enhance visibility at night.
Honda CR-V Body Kit
The Honda CR-V is a compact SUV that offers a spacious interior and excellent fuel efficiency. While it is a practical family car, the Honda CR-V body kit can make it look more exciting.
The kit includes:
- Front and rear bumpers
- Fenders
- Hoods
- Side skirts
- Roof spoiler
Modifying a Honda CR-V can improve its handling and make it more fuel efficient. The body kit can also reduce wind noise, making the ride smoother.
Honda Fit Body Kit
The Honda Fit subcompact car has a simple and elegant design. A Honda Fit body kit can enhance the appearance of the vehicle and make it look more aggressive and sporty.
It typically includes:
- Front and rear bumpers
- Side skirts
- Rear wing
- Fender flares
Together, these parts change the silhouette of the car and improve its aerodynamics. The Honda Fit body kit can reduce drag, resulting in better fuel efficiency and increased speed.
| Honda Model | Popular Body Kit Styles | Key Components | Performance Benefits |
|---|---|---|---|
| Civic | JDM, VIP, Type R, Sport | Spoiler, front lip, side skirts, hood scoop | Reduced drag, improved handling |
| Accord | Sport, Executive, VIP | Front/rear bumpers, side skirts, spoilers | Better aerodynamics, reduced wind noise |
| CR-V | Sport, Off-road, Executive | Bumpers, fenders, roof spoiler | Improved handling, reduced wind resistance |
| Fit | Sport, Urban, JDM | Bumpers, side skirts, rear wing | Better fuel efficiency, reduced drag |
Specifications and Maintenance of Honda Body Kit
Each Honda body kit has its own specifications that may vary depending on the make and model of the vehicle. Here are some common specifications to consider:
Material
Honda body kits are made from different materials that are durable and lightweight:
- ABS Plastic: Affordable and highly resistant to impact. It is the most common material for Honda Civic body kits.
- Polyurethane: High flexibility and resistant to cracking.
- Carbon Fiber: Lightweight material that improves vehicle performance.
Fitment
Body kits are designed for specific makes and models of vehicles. For instance, the Honda Civic body kit is designed for the Honda Civic model.
The kits are designed to fit perfectly on the vehicle without causing damage, with precision-engineered mounting points and fasteners.
Style
There are different styles of body kits, each with its own design and features aimed at improving vehicle aesthetics and performance:
- Honda Civic Type R: Front splitter, rear wing, side skirts
- Honda Accord Sport: Front lip spoiler, side skirts
- JDM Style: Aggressive angles, wide fenders
- VIP Style: Elegant, luxury-oriented designs
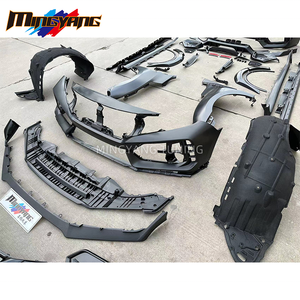
Components
A body kit usually comes as a set and includes different components that work together to enhance the appearance of the car:
- Front and rear bumpers
- Side skirts
- Spoilers and wings
- Fenders and flares
- Hood modifications
- Diffusers
Maintenance Tips
Maintaining a Honda body kit is important to ensure longevity and keep it looking great. Here are some essential maintenance tips:
| Maintenance Task | Frequency | Importance | Details |
|---|---|---|---|
| Regular Cleaning | Weekly | High | Wash with car soap and water to remove dirt, debris, and dust. Clean after driving in harsh weather conditions like snow or salt. |
| Avoid Harsh Chemicals | Always | Critical | When cleaning or maintaining, avoid products with harsh chemicals that can damage the material or cause discoloration. |
| Inspect for Damage | Monthly | Medium | Regularly inspect for signs of wear or damage. Look for cracks, chips, or fading due to sunlight exposure. |
| Protective Coatings | Quarterly | Medium | Use wax or sealants to provide an extra layer of protection against UV rays and harsh weather conditions. |
| Professional Maintenance | As needed | Medium-High | For complex repairs or replacements, seek professional services from experienced mechanics. |
How to Choose Honda Body Kit
Before choosing a Honda body kit for resale or personal use, here are the key considerations to keep in mind:
Compatibility
When selecting a Honda body kit, ensure that it is compatible with the Honda car model and year. For instance, the Honda Accord 2016 body kit may not be compatible with the Honda Civic 2016.
Always check manufacturer specifications for exact fitment details.
Quality
Check the material used to make the body kit. Body kits made from ABS plastic are of higher quality and more durable. Also, consider:
- Warranty period
- Manufacturing precision
- Finish quality
- Thickness and durability
Style
Body kits come in different styles. Choose a style that will appeal to target customers or your personal taste:
- Sporty: Aggressive angles, aerodynamic features
- Luxury: Elegant lines, refined appearance
- Racing: Performance-oriented, track-inspired
- OEM+: Subtle enhancement of factory styling
Color & Finish
Most body kits are sold in black and white. These are the colors that are in high demand. Consider:
- Painted vs. unpainted options
- Matte, gloss, or textured finishes
- Color-matching capabilities
- UV resistance properties
Installation Complexity
Choose body kits that are easy to install. Many customers prefer kits that:
- Come with detailed installation manuals
- Require minimal modifications to the vehicle
- Can be installed without specialized tools
- Have pre-drilled mounting holes
Price Considerations
Before purchasing a body kit for resale, consider the profit margin. Ensure the selling price is higher than the purchasing price. Calculate:
- Body kit wholesale price
- Shipping costs
- Storage expenses
- Marketing costs
- Competitive market pricing
Expert Tip: When selecting a body kit, research customer reviews and see examples of the kit installed on the same model and color of Honda you have. This gives you a realistic expectation of how the final result will look.
How to DIY and Replace Honda Body Kit
It's not surprising to find many Honda cars with body kits. They make the car look good and increase its resale value. The body kit can be a great addition for anyone looking to personalize a Honda vehicle.
While it may be tempting to take the body kit to a mechanic for installation, it is very easy to install. With the right tools, anyone can install a Honda Civic body kit in no time. Before the installation, make sure to read the installation manual provided by the manufacturer.
Required Tools
- Drill with various bit sizes
- Rivets (various sizes)
- Riveting gun
- Double-sided automotive tape
- Body kit parts
- Screwdriver set
- Socket wrench set
- Plastic trim removal tools
- Measuring tape
- Marker/pencil
Preparation Tips
- Clean the car thoroughly before installation
- Work in a well-ventilated, covered area
- Organize all parts and hardware before starting
- Take photos of your car before modification for reference
- Have a helper available for handling larger pieces
- Allow sufficient time (usually 4-8 hours for a complete kit)
DIY Installation Process
- Prepare the work area: Make sure the working area is clean, well-lit, and provides enough space to move around the vehicle. Ideally, use a garage or covered area to protect from elements.
- Unpack and inspect all parts: Carefully unpack all body kit components and check for any damage or missing parts. Lay them out in the order of installation.
- Test fit before permanent installation: Place each body kit part against the corresponding area of the car without fastening to ensure proper alignment and fitment. Make adjustments as needed.
- Mark mounting points: Once satisfied with the positioning, mark the locations for drilling holes or applying adhesive using a marker or pencil.
- Remove factory components: If necessary, remove factory bumpers, side skirts, or other components that will be replaced. Store these safely in case you need them in the future.
- Begin installation: Start with the front bumper, then move to side skirts, and finish with the rear components. This order helps maintain proper alignment throughout the process.
- Drill mounting holes: Using the appropriate drill bit size, carefully create holes at the marked points. Clean away any debris before proceeding.
- Apply adhesive or double-sided tape: For areas that require additional support or where drilling isn't possible, apply automotive-grade double-sided tape or adhesive.
- Secure with rivets and hardware: Use the riveting gun and provided hardware to secure the body kit components to the vehicle. Ensure everything is tight but not over-tightened.
- Final adjustments and inspection: Check all parts for proper alignment and make any necessary adjustments. Ensure all fasteners are secure.
- Allow adhesives to cure: If you've used adhesives or double-sided tape, allow sufficient time for them to fully cure according to manufacturer specifications (typically 24-48 hours).
Important Safety Tip: Always disconnect the car battery before working on areas near electrical components. Wear protective gloves when handling body kit parts with sharp edges, and use safety glasses when drilling to protect your eyes from debris.
Questions and Answers
A1: Painting a Honda body kit after installation is not always necessary. Some kits come pre-painted or in various colors and finishes that might match or complement your vehicle. However, for a seamless look that perfectly matches your car's existing color, professional painting is recommended. Many enthusiasts also choose to paint their body kits to apply protective coatings that extend the kit's lifespan and resistance to UV damage and road debris.
A2: A well-installed and quality body kit can enhance a Honda vehicle's aesthetics and potentially increase its resale value, especially among enthusiast buyers who appreciate modifications. However, excessive modifications or poor installation may have the opposite effect for buyers seeking stock vehicles. The impact on resale value largely depends on the quality of parts used, professional installation, and the taste of potential buyers in your market. For maximum resale potential, keep all original parts to offer with the sale of the modified vehicle.
A3: The installation time for a Honda body kit can vary significantly depending on several factors. A complete body kit installation typically takes 4-8 hours for an experienced installer. Simple components like a front lip or rear spoiler might take only 1-2 hours, while a comprehensive kit with complex fitment requirements could take a full weekend. DIY installations generally take longer than professional ones, especially for first-timers. Painting, if required, adds another 1-3 days to the process depending on the complexity and number of components.
A4: Many Honda body kits come with warranties, but the coverage and duration vary widely between manufacturers. Premium brands typically offer 1-3 year warranties against manufacturing defects, while budget options might offer limited or no warranty coverage. It's important to note that most warranties only cover manufacturing defects, not damage from improper installation, accidents, or normal wear and tear. To maintain warranty eligibility, keep your receipt, follow installation instructions precisely, and document the process with photos.
A5: Body kits are typically designed for specific Honda car models and even specific generation years within those models. A kit designed for a 10th generation Civic (2016-2021) won't fit a 9th generation Civic (2012-2015), for example. Some universal components like certain spoilers or diffusers might work across multiple models with modifications, but for proper fitment and appearance, it's essential to choose a kit specifically designed for your exact Honda model, year, and trim level. Always verify compatibility with the manufacturer before purchasing.