


Types of EVO 8 Body Kits
The EVO 8 body kit is designed to improve both the appearance and performance of the Mitsubishi Lancer Evolution VIII. These aerodynamic components not only create a more aggressive aesthetic but also enhance vehicle dynamics at high speeds. Below are the primary components available for your Evo 8:
Front Bumper Kit
The front bumper is a crucial component that gives the Evo 8 its distinctive rally-inspired look. Modern designs feature:
- Wider air inlet for enhanced engine cooling
- Built-in canards for increased front-end downforce
- Integrated front splitter to improve aerodynamics
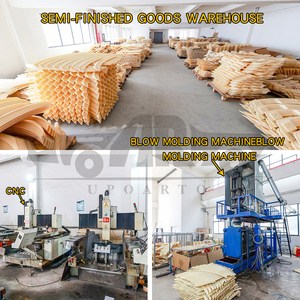
- Lightweight construction using fiberglass or carbon fiber
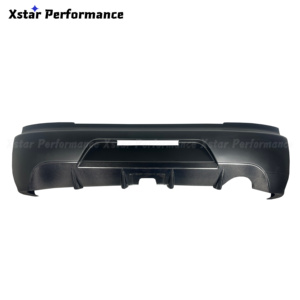
Rear Bumper Kit
The rear bumper kit transforms the back end of your Evo 8 with:
- Aerodynamic diffuser design to reduce drag
- Integrated exhaust cutouts for custom systems
- Rear bumper skirt for enhanced ground effects
- Aggressive styling to complement the front bumper
Side Skirt Kit
Side skirts serve both aesthetic and functional purposes:
- Reduces body movement caused by crosswinds
- Creates a lower visual profile for the vehicle
- Improves aerodynamic efficiency at speed
- Side skirt extensions for additional styling options
Fender Kit
The fender kit allows for wider wheel setups and improved cooling:
- Extended flares to accommodate larger tires
- Vented design for brake cooling
- Lightweight carbon fiber or aluminum construction
- Improved handling through better tire fitment
Hood Kit
The hood kit enhances both aesthetics and engine cooling:
- Vented design to reduce under-hood air pressure
- Lightweight materials for weight reduction
- Aggressive styling with power bulges
- Improved engine temperature management
Rear Wing Kit
The rear wing kit is essential for high-speed stability:
- Adjustable wing for custom downforce settings
- Race-inspired styling for authentic look
- Improved stability at highway speeds
- Available in different profiles and mounting options
Canards
Canards are small but effective aerodynamic components:
- Creates additional downforce at the front
- Directs airflow around the front wheels
- Enhances high-speed cornering stability
- Available in various sizes and configurations
Pro Tip: When selecting body kit components, consider purchasing complete kits from the same manufacturer to ensure proper fitment and a cohesive design aesthetic. Mixing components from different brands often requires additional modification for proper installation.
Specifications and Maintenance of Evo 8 Body Kits
The Mitsubishi Lancer Evolution VIII, introduced in 2003, has become a favorite among car enthusiasts and tuners. With its turbocharged inline-four engine, all-wheel drive system, and sporty chassis, the Evo 8 provides an excellent platform for body kit enhancements.
Technical Specifications
| Component | Materials | Key Features |
|---|---|---|
| Front Bumper | Urethane, Fiberglass, ABS Plastic, Carbon Fiber | Integrated canards, enlarged air inlet, splitter, headlight washers |
| Rear Bumper | Urethane, ABS Plastic, Fiberglass, Carbon Fiber | Rear diffuser, taillight cutouts, exhaust outlets |
| Side Skirts | Fiberglass, ABS Plastic, Carbon Fiber | 4-6" width, 6-8' length, raised lip, integrated vents |
| Front Fender | Steel, Aluminum, ABS Plastic, Carbon Fiber | Side vents, turn signal cutouts, extended wheel arches |
| Hood | ABS Plastic, Aluminum, Carbon Fiber | Engine bay ventilation, heat extraction, weight reduction |
| Rear Wing | ABS Plastic, Aluminum, Carbon Fiber | Adjustable positioning, aerodynamic profile, multiple mounting options |
| Roll Cage | Steel, Aluminum | Diagonal bracing, side intrusion bars, FIA compliance (racing variants) |
Maintenance Procedures
While Evo 8 body kits can be an investment, proper maintenance ensures longevity and preserves appearance. Follow these essential procedures:
Regular Inspection
Perform monthly visual inspections for:
- Stress cracks in fiberglass components
- Loose mounting hardware
- Paint damage or clearcoat deterioration
- Proper alignment of all components
Cleaning Protocol
Clean body kit components properly:
- Use pH-neutral automotive soap
- Avoid pressure washers on carbon fiber parts
- Clean in sections to prevent soap drying
- Use microfiber towels to prevent scratching
Protection Treatments
Apply protective treatments quarterly:
- Automotive wax for painted components
- UV protectant for plastic parts
- Sealant for carbon fiber components
- Rust preventative for metal parts
Damage Repair
Address damage immediately:
- Touch up paint chips promptly
- Repair fiberglass cracks with matching resin
- Replace damaged fasteners with OEM-spec hardware
- Re-align components after impacts
Important: Never use harsh chemicals or abrasive cleaners on body kit components, especially carbon fiber parts. These can damage the finish and compromise structural integrity. Always test cleaning products on an inconspicuous area first.
How to Choose the Right Evo 8 Body Kit
Selecting the perfect body kit for your Mitsubishi Lancer Evo 8 is a crucial decision that impacts not only aesthetics but also performance, durability, and value. Consider these key factors when making your selection:
Quality Assessment
High-quality materials and construction provide long-term value:
- Premium materials resist cracking and fading
- Precision manufacturing ensures proper fitment
- Quality kits maintain or enhance resale value
- Durability reduces long-term maintenance costs
Pro tip: Examine the inner surfaces of components - quality kits have consistent thickness and smooth finishes throughout.
Style Considerations
Choose a style that complements your overall vision:
- Rally-inspired designs emphasize functionality
- Circuit/track styling for aggressive aerodynamics
- Street performance kits balance looks and usability
- JDM authentic styling for traditional Japanese aesthetic
Key insight: Consider the entire visual package rather than individual components to achieve a cohesive look.
Fitment Precision
Proper fitment is crucial for both appearance and function:
- Vehicle-specific designs ensure proper alignment
- Pre-drilled mounting points simplify installation
- Precision molds create consistent panel gaps
- OEM-quality tolerances prevent installation issues
Expert advice: Research forums for real-world fitment feedback before purchasing.
Brand Reputation
Established manufacturers typically deliver better products:
- Well-known brands have proven quality control
- Customer support availability for fitment issues
- Warranty coverage varies by manufacturer
- Established companies ensure replacement part availability
Research tip: Check customer reviews and ask in Evo-specific forums about brand experiences.
Installation Complexity
Consider your skill level and available tools:
- Direct bolt-on kits require minimal modification
- Professional installation recommended for complex kits
- Some kits require cutting, drilling, or custom work
- Installation instructions quality varies by manufacturer
DIY consideration: Factor installation costs into your budget if professional help is needed.
Functionality Benefits
Many kits offer performance advantages beyond aesthetics:
- Improved aerodynamics at highway and track speeds
- Enhanced cooling for engine, brakes, and intercooler
- Weight reduction through carbon fiber components
- Increased downforce for better handling stability
Performance note: Some manufacturers provide wind tunnel or CFD testing data for their kits.
Cost Considerations
Balance quality with your budget constraints:
- Premium materials command higher prices
- Complete kits often offer better value than individual pieces
- Consider long-term value over initial cost
- Factor in shipping, paint, and installation costs
Budget strategy: Consider purchasing high-quality components gradually rather than a complete lower-quality kit.
Expert Recommendation: For the best results, select body kit components that are designed to work together as a system. Mixing components from different manufacturers can create fitment issues and compromise aerodynamic performance. If budget constraints prevent purchasing a complete kit, plan your build to ensure compatibility between current and future components.
DIY Installation Guide for Evo 8 Body Kits
Installing an Evo 8 body kit can be a rewarding DIY project that transforms your vehicle's appearance and performance. Follow this systematic approach for best results:
Preparation
Proper preparation ensures a smooth installation process:
- Select a well-lit, spacious work area with level flooring
- Gather all necessary tools including screwdrivers, socket sets, trim removal tools, and jack stands
- Document your vehicle's original configuration with photos
- Disconnect the battery before beginning electrical work
- Set aside secure storage for removed OEM parts
Remove Original Components
Carefully remove factory components to prepare for new parts:
- Start with the front bumper, removing fog lights and electrical connections
- Disconnect and label all wiring harnesses for easy reinstallation
- Remove side skirts by accessing mounting clips and bolts
- Detach rear bumper after removing trunk liner access panels
- Store all hardware in labeled bags for potential future use
Surface Preparation
Prepare mounting surfaces for optimal fitment:
- Clean all mounting surfaces thoroughly with automotive degreaser
- Remove any adhesive residue from previous installations
- Check mounting points for damage or rust and repair as needed
- Apply anti-corrosion treatment to exposed metal surfaces
- Install any required mounting brackets or reinforcements
Test Fitting
Critical test fitting prevents installation issues:
- Dry-fit each component before final installation
- Check alignment with adjacent body panels
- Verify mounting hole alignment and mark any needed adjustments
- Check clearances for moving parts like doors and hood
- Make any necessary modifications before painting
Painting (If Required)
Most body kits require painting before installation:
- Have components professionally painted for best results
- If DIY painting, properly prep surfaces with appropriate primers
- Allow sufficient curing time before installation (typically 5-7 days)
- Apply clear coat to protect the finish
- Handle painted components with extreme care during installation
Final Installation
Secure installation ensures longevity and performance:
- Use new automotive-grade hardware where possible
- Apply thread-locking compound to prevent loosening
- Utilize OEM mounting points when available
- Install components in logical order (typically bumpers last)
- Reconnect all electrical components and verify operation
Final Adjustments
Fine-tuning ensures optimal appearance and function:
- Check panel gaps for consistency
- Verify proper alignment of all components
- Test operation of lights, sensors, and moving parts
- Make final adjustments to mounting hardware
- Apply protective sealant to vulnerable seams
Important Safety Note: Body kit modifications can affect your vehicle's compliance with local regulations and impact safety features. Before installation, verify compliance with local vehicle codes and safety standards. Some modifications may affect insurance coverage or warranty status.
Professional Insight: For critical aerodynamic components like front splitters and rear wings, precise installation angle is crucial for proper function. Use a digital angle finder to ensure components are mounted at the manufacturer's recommended angle for optimal downforce without excessive drag.
Frequently Asked Questions
The Evo 8 body kit is specifically designed for the Mitsubishi Lancer Evolution VIII (2003-2005). While some components may have limited compatibility with other Lancer models from that era (such as the Lancer GT), significant modifications would typically be required. Cross-platform fitment often results in poor alignment, improper aerodynamic function, and installation challenges. For the best results, always purchase body kits designed specifically for your vehicle model and production year.
Yes, Evo 8 body kits can be painted in any automotive-grade color. Most kits come unpainted (often in black, gray, or white gel coat) specifically to allow for custom color matching. Professional painting is recommended for optimal results, as body kit materials often require specific preparation techniques and primers. Many owners choose to match their vehicle's factory color, while others opt for contrast elements such as carbon fiber sections or accent colors. Quality paint jobs not only enhance appearance but also provide UV protection that extends the lifespan of fiberglass and plastic components.
While Evo 8 body kits can be used on daily-driven vehicles, there are practical considerations to keep in mind. The lowered front splitters and side skirts reduce ground clearance, which may cause issues with speed bumps, steep driveways, and parking curbs. Some aerodynamic components optimized for track use may be impractical for daily driving. Many manufacturers offer street-oriented body kits with more practical ground clearance and durability features. If daily driving with a body kit, consider:
- Reinforced mounting points for enhanced durability
- Quick-release systems for vulnerable components like splitters
- Approach angles when navigating obstacles
- Local regulations regarding vehicle modifications
Warranty coverage for Evo 8 body kits varies significantly by manufacturer. Premium brands typically offer warranties ranging from 1-3 years covering manufacturing defects in materials and workmanship. However, most warranties exclude:
- Damage from improper installation
- Normal wear and tear
- Damage from road hazards or accidents
- Modifications to the components
- Damage from racing or competition use
Always review warranty terms before purchase and keep all documentation, including installation records if professional installation is required for warranty validation. Some manufacturers offer extended warranties for an additional fee.
The cost of Evo 8 body kits varies widely based on several factors:
- Basic fiberglass kits: $1,500-$3,000 (unpainted)
- Premium fiberglass/polyurethane kits: $3,000-$5,000 (unpainted)
- Carbon fiber kits: $5,000-$10,000+ (unpainted)
- Additional costs: Professional painting ($1,500-$3,000), professional installation ($800-$2,000), shipping (varies by location)
Complete kits typically include front bumper, side skirts, rear bumper, and sometimes fenders or hood. Individual components can be purchased separately but usually at a higher total cost than complete kits.