


Types of Engine Mounts
Engine mounts are critical components that secure engines to vehicle chassis while dampening vibrations and maintaining proper alignment. Also known as engine stabilizers, they prevent engine movement that could damage wiring looms, cooling systems, and air intake components.
Did you know? Engine mounts not only secure your engine but also significantly impact your vehicle's driving comfort, performance, and long-term reliability.
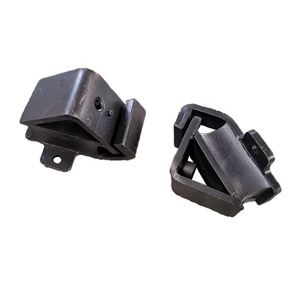
Rubber Engine Mount
The most common and cost-effective option, rubber mounts provide good noise and vibration isolation, making them popular for everyday vehicles.
Best for: Economy vehicles, everyday driving
Limitations: Can compress under stress, affecting stability in high-performance applications
Hydraulic Engine Mount
Filled with liquid (typically water and glycerin), these mounts excel at absorbing vibrations and noise, providing exceptional ride smoothness.
Best for: Luxury vehicles, hybrids, comfort-focused applications
Benefits: Superior vibration damping, energy efficiency
Polyurethane Engine Mount
Used primarily in high-performance vehicles, these mounts maintain better engine alignment during dynamic driving conditions.
Best for: Sports cars, performance vehicles
Trade-off: Increased noise and vibration transmission to the cabin
Cast Iron Engine Mount
Extremely durable mounts designed for heavy-duty applications where strength and longevity are paramount.
Best for: Commercial trucks, buses, construction equipment
Benefits: Exceptional durability, high load capacity
Metal Engine Mount
Similar to cast iron mounts but may incorporate different metal alloys for specific performance characteristics.
Best for: Industrial vehicles, specialized applications
Benefits: Customizable strength profiles, high durability
Engine Mount Comparison Chart
| Mount Type | Vibration Isolation | Durability | Cost | Best Application |
|---|---|---|---|---|
| Rubber | Good | Moderate | Low | Economy vehicles |
| Hydraulic | Excellent | Good | High | Luxury/hybrid vehicles |
| Polyurethane | Fair | Good | Medium | Performance vehicles |
| Cast Iron | Poor | Excellent | Medium-High | Commercial vehicles |
| Metal | Poor | Excellent | Medium-High | Industrial applications |
Specifications and Requirements
Understanding engine mount specifications is essential for selecting the right product for specific applications. Key considerations include:
Engine Size & Weight
Larger and heavier engines require stronger mounts with higher load capacities. The engine's displacement, configuration, and materials all contribute to its overall weight requirements.
Transmission Type
Manual transmissions typically transfer different vibration patterns than automatics, requiring specific mount designs. CVT and dual-clutch transmissions have their own unique requirements.
Vehicle Type
Commercial vehicles, performance cars, and economy vehicles all have different mounting needs based on their usage patterns, expected loads, and performance characteristics.
Material Construction
Mount materials range from various rubber compounds to polyurethane, hydraulic systems, and different metals, each offering specific performance traits and durability profiles.
Mount Design
Designs include solid mounts, hydraulic systems, and pneumatic options, with various configurations for different mounting positions and load requirements.
Important: Always match engine mount specifications to your specific vehicle requirements. Using incorrect mounts can lead to premature failure, excessive vibration, or even engine damage.
Maintenance Requirements
Proper maintenance ensures engine mounts perform optimally and reach their maximum service life. Implement these maintenance practices:
Regular Inspection
Examine mounts for cracks, splits, fluid leaks (for hydraulic mounts), and deterioration. Early detection prevents cascading failures and more expensive repairs.
Recommendation: Inspect every 15,000-20,000 miles or during routine service intervals.
Proper Lubrication
For mounts with moving parts or metal-to-metal contact points, appropriate lubrication reduces friction and prevents premature wear.
Recommendation: Use manufacturer-specified lubricants and follow recommended intervals.
Cleanliness
Keep mounts free from dirt, oil, and road debris that can accelerate deterioration, especially for rubber components.
Cleaning method: Use mild detergent and water; avoid harsh chemicals and high-pressure washing.
Alignment Verification
Improper engine alignment puts excessive stress on mounts. Regular verification ensures balanced load distribution across all mounting points.
Signs of misalignment: Uneven wear patterns on mounts, vibration at specific RPM ranges.
Load Management
Avoid exceeding vehicle payload capacities, as overloading increases stress on engine mounts, especially during acceleration and braking.
Impact: Overloading can reduce mount lifespan by 30-50%.
Professional tip: When checking engine mounts, observe the engine's movement during startup and shutdown. Excessive movement indicates mount deterioration or failure.
How to Choose an Engine Mount
Selecting appropriate engine mounts requires careful consideration of several factors to ensure optimal performance, durability, and value:
Vehicle Compatibility
Verify compatibility with your specific make, model, and year. Cross-reference manufacturer specifications to ensure proper fit and function.
Engine Configuration
Different engine types (inline, V-configuration, flat/boxer) have unique mounting requirements based on their vibration characteristics and weight distribution.
Material Selection
Choose materials based on your performance priorities: rubber for economy and comfort, polyurethane for performance, hydraulic for luxury applications, metal for heavy-duty use.
Application Purpose
Determine your primary goal: noise reduction, vibration dampening, performance enhancement, or heavy-duty support. Each requires specific mount characteristics.
Load Capacity
Select mounts rated at least 20% above your engine's weight to ensure adequate support and account for dynamic loads during acceleration and braking.
Quality & Reliability
Invest in reputable brands with proven track records. Quality mounts may cost more initially but offer better performance and longer service life.
Installation Complexity
Consider whether you'll perform DIY installation or hire professionals. Some mounts require specialized tools or precise alignment procedures.
Mount Selection by Vehicle Type
| Vehicle Type | Recommended Mount Type | Key Consideration |
|---|---|---|
| Economy Car | Rubber | Balance of cost and comfort |
| Luxury Vehicle | Hydraulic | Superior vibration isolation |
| Sports Car | Polyurethane | Improved engine response |
| Commercial Truck | Cast Iron/Metal | Maximum durability |
| Performance Modification | Polyurethane/Solid | Minimal engine movement |
DIY Engine Mount Replacement Guide
Replacing engine mounts can be accomplished as a DIY project with proper preparation and mechanical knowledge. Follow these steps carefully:
Safety Warning: Engine mounts support substantial weight. Improper support during replacement can result in serious injury or vehicle damage. If you're uncertain about any step, consult a professional mechanic.
Identify Failing Mount
Locate the problematic mount by checking for visible damage, excessive engine movement, or unusual vibrations. Consult your vehicle's service manual to identify mount locations and specific replacement procedures.
Gather Necessary Tools
You'll need: jack and jack stands, socket set and wrenches, engine support bar or crane, replacement mount, torque wrench, and penetrating oil for stubborn bolts.
Prepare the Vehicle
Park on a level surface, engage the parking brake, open the hood, and disconnect the battery negative terminal to prevent electrical issues during the procedure.
Elevate and Secure the Vehicle
Use a jack to raise the vehicle and place it securely on jack stands. Ensure the vehicle is stable before proceeding to work underneath it.
Support the Engine
Install an engine support bar across the engine bay according to the manufacturer's instructions. Adjust it to take the engine's weight without lifting it from its current position.
Remove the Old Mount
Unbolt the mount from both the engine and frame attachment points. Note the orientation and position of all hardware for reinstallation. Carefully remove the mount once all fasteners are removed.
Install the New Mount
Position the new mount in the same orientation as the original. Align mounting holes and hand-start all fasteners before final tightening. Torque all bolts to manufacturer specifications in the correct sequence.
Lower the Vehicle
Once the new mount is properly installed and secured, carefully remove the engine support. Lower the vehicle gradually using the jack, ensuring proper alignment as the mount takes the engine's weight.
Reconnect and Test
Reconnect the battery, start the engine, and check for proper operation. Listen for unusual noises and look for excessive movement. Take a short test drive to ensure the mount is functioning correctly.
DIY Tip: When replacing one mount, inspect all others for signs of wear. Engine mounts typically deteriorate at similar rates, and replacing them as a set can prevent repeated labor costs.
Frequently Asked Questions
Engine mounts secure the engine to the vehicle's chassis while absorbing vibrations and shocks from the road. They maintain proper engine alignment, prevent unwanted movement, and isolate engine vibrations from the passenger compartment for a smoother, quieter ride.
Symptoms include: increased cabin vibration (especially at idle), clunking or banging noises during acceleration or braking, visible excessive engine movement, rough shifting (in manual transmissions), and misaligned body panels or components near the engine bay.
Engine mounts generally last between 60,000 to 100,000 miles, though lifespan varies significantly based on driving habits, vehicle type, mount materials, and environmental conditions. Aggressive driving, frequent short trips, and heavy loads can substantially reduce mount longevity.
While not strictly necessary, replacing all mounts at once is often recommended when one fails. Mounts typically wear at similar rates, and when one fails, others are likely approaching failure. Complete replacement prevents repeated labor costs and ensures balanced support for the engine.
While technically possible, driving with faulty engine mounts is not recommended. Failed mounts allow excessive engine movement that can damage connected components including the transmission, exhaust system, radiator, and electrical connections. Additionally, vehicle handling may be compromised, creating safety concerns.
Professional replacement costs vary widely depending on vehicle make, model, and mount accessibility. Typical costs range from $200-$600 per mount including parts and labor. DIY replacement significantly reduces costs, with quality aftermarket mounts generally priced between $50-$200 each.