All categories
Featured selections
Trade Assurance
Buyer Central
Help Center
Get the app
Become a supplier
(17 products available)
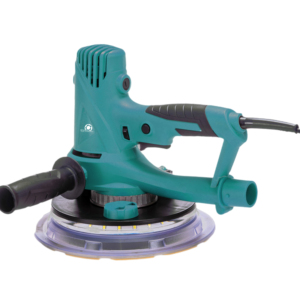


Orbital Sanders
Drywall sander with vacuum is one of the most common types, and they are made to do an even sanding job by spinning in small circles. The sanding pads they use are usually round, measuring between 5 to 6 inches in diameter. From what I can see, these sanders are good for tight spaces because of the small circles they sand with. Larger boards can be a problem in tight areas, though, because they don't reach corners as well. Orbital sanders can be found in both manual and motorized forms. Battery-powered orbital sanders are often used indoors since they make less noise than other types.
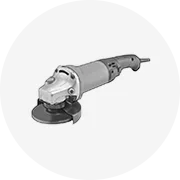
Rotary Sanders
A rotary sander moves the sanding disc in circles, which makes it good for heavy sanding to flatten a surface. This drywall sander is meant for tough work, like stripping lots of paint from a wall or getting a surface very even. The circular disc comes in different sizes, usually around 5 to 11 inches. I think what sets them apart from orbital sanders is how powerful they are for doing tough jobs. But their power means they are less gentle, which could be hard to control on delicate drywall. A rotary sander is helpful when a very strong tool is needed for a tough job, though.
Pen Sanders
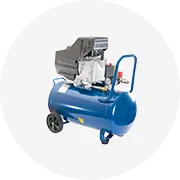
Pneumatic sanders run on air pressure from a compressor. The sanders work by spinning a sanding wheel powered by compressed air. A big upside is that the wheel spins very fast, which can allow sanding jobs to get done quicker. An orbital drywall sander vacuum may take longer, but pneumatic sanders are much faster since they harness air power. The loud volume of an air compressor does bother some people. Electric models do not require an air compressor, but they may not sand as quickly. I feel like their main benefits are speed and power, while their weaknesses are their noise and the need for an air source.
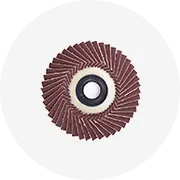
Random Orbital Sanders
Random orbital sanders rotate the sanding pad in an orbital motion while also moving it randomly. It leaves behind a finish about as smooth as the flat sander, but without the distinct crosshatch lines that flat sanding can create. Instead, random sanders create a finish that is fine yet has more depth. This is beneficial for several reasons. One, it allows the finishing coats to blend together better. Two, it gives the appearance of a completely flat surface without one specific sanding pattern standing out. Three, it cuts down the amount of time and number of passes needed to reach a perfect smooth surface. Covering more area faster meets project's needs efficiently.
Sanding large drywall areas
Wallboard sanders are created to handle the huge drywall jobs that come with big buildings. Their motorized sanding arms let them finish vast areas of ceilings and walls faster than hand sanding or smaller sanders. This saves construction crews a lot of time on sanding, which is very important for making new homes and offices.
Smoothing joint compound
Sanding drywall tape and mud (joint compound) needs a very flat surface for good painting. Sanders make the tape disappear on flat walls and ceilings. Commercial painters appreciate how sander ensures proper prep for the quality paint job they promise.
Drywall prepping for textured finishes
Sanders are also used to get drywalled areas flat before applying texture coats like popcorn or knockdown. The sander makes the surface smooth enough that textures are applied evenly and correctly. This is crucial for contractors doing their work right.
Preparing drywall for painting
Flat surfaces give exterior and interior paint better adherence. Paints stick better, and the end result looks nicer. Commercial and residential painters prefer flat areas because the paint performs best.
Facilitating installation of wall coverings
Sizers make wall paper, paneling, and other coverings apply smoothly and stay attached properly. Uneven surfaces make coverings buckle or peel. All new buildings even within warranty will use sanders to ensure coverings go on flat. This results in the award-winning installation.
Proper installation of a drywall sander is important to ensure the tool works safely and effectively. The following steps outline how to install the sander:
Assemble the Sander
Most drywall sanders have separate parts that need to be put together. The sanding head usually attaches to the long arm or pole that reaches up high. There may be other pieces like a small side handle that snap on. This lets more control when using both hands. The instructions that come with the sander show exactly how to put the parts together the right way.
Attach the Dust Bag or Vacuum
Too much dust in the air makes sanding harder. To prevent this, many drywall sanders come with a dust bag attached. When the sander is moved, any dust created collects in the bag. If less sanding happens or it's hard to fill the bag, a shop vacuum can be connected instead. Connecting a vacuum hose to the sander helps keep the work area clean.
Connect the Power Supply
The motorized sanders require power to work. An electric sander needs to be plugged into an outlet. A battery-powered sander needs a battery inserted. Properly powering the sander is required to have it function as intended.
Adjust the Settings
Different sanding tasks need different settings. The rotation speed control switch allows this adjustment. The operator should adjust the speed control switch and other settings based on the needs of the job.
Test the Sander
After putting everything together, attaching the vacuum, and adjusting the settings, it is vital to test the sander before starting the project. This is to ensure it is working properly, and the settings are correct.
Maintenance Tips
The plug should be checked regularly to ensure it has no frayed or exposed wires. Any damage noticed means the plug needs to be replaced. Additionally, connections should also be checked for corrosion. Cleaning plugs before each use helps ensure an optimal connection. Checking for cracks or physical damage in cords is also important. However, any cord with noticeable problems should not be used. Sanding heads should be inspected too. Worn sanding discs mean lower performance. Replace discs that are worn down. Further, discs should be cleaned from dust regularly to avoid excessive wear.
Repair Guidelines
The maintenance and repair tips outlined above will help prolong the life of a drywall sander while ensuring it functions safely and effectively.
Materials Used
The portercable drywall sander must use fuerte materials to keep from breaking when sanded against walls or ceilings. Metal may act like a stronger substitute for plastic for making these tools. The sanding part can't wear down over time.
Workmanship
The quality of how the parts are put together matters too. I can tell inferior workmanship gives these tools weak joints that break easily. Checking reviews helps find brand reputations for durable products.
Testing
Brands that test sanders ensure they stand up to heavy use safely. Knowing a product has officially passed quality checks gives me confidence to buy.
Guarding
Guards on sanders prevent fingers from getting caught in moving parts. This protects from pinching or cutting if hands slip while gripping tightly.
handles
Proper handles are designed to be held firmly without slipping. If a tool moves unexpectedly, a secure grip lessens chances of accident injuries like cuts or broken fingers. Looking for well-shaped handlebars gives a steady hold.
Dust management
I learned that breathing in this dust is not healthy for the body. Sanders with vacuums attached cut down on this harmful dust entering the lungs. Cleaning up daily prevents longer-term breathing issues.
To put it simply, a cordless drywall sander works by spinning a sanding pad or disc really fast. As the pad spins, it sands down the surface of a wall or ceiling. Most drywall sanders plug into an outlet for power. Some run on batteries. While sanding, dust and particles from the surface get trapped in a built-in vacuum or dust bag. This keeps the area from getting too messy. Basically, the sander smooths out the drywall to make it super flat and ready for paint or wallpaper. The faster the pad spins, the nicer the finish will be.
Yes, a drywall sander can work on more than just drywall. It's actually great for sanding wood projects like furniture or cabinets too. The built-in vacuum also picks up dust from the wood so it doesn't get all over the place. The sander's pads work well on flat wood surfaces, helping to make the wood really smooth for painting or staining. Just be careful when using it on curves or edges. Overall, it's a handy tool for anyone who likes working with both drywall and wood to keep their projects neat and smooth.
When selecting the ideal sander for drywall, there are a few factors a buyer should consider. They should look at the power. Electric sanders deliver consistent strength, while gas models provide higher power for large, tough jobs. Job size determines the type needed. Larger tasks require industrial-grade handling, while small rooms need lighter duty.
Speed settings should also be considered. A range of speeds allows fine-tuning based on the project. When selecting the sander, a buyer should also consider the weight. Heavier models provide sturdiness but strain during long use. Those who have to use the tool for a long period of time want something lighter to avoid fatigue. They should also determine whether they need a handheld or pole sander.
To have a clean workspace, a good vacuum should also be selected. A battery-operated model eliminates the need for cords. Finally, checking reviews ensures reliable, quality brands. Taking these factors into account leads to choosing the right drywall sander.
Investing in a drywall sander is an excellent decision for individuals taking on painting projects. The tool creates smoothly polished wall and ceiling surfaces. This leads to professional-looking paint applications with even color and texture. It eliminates the need for time-consuming manual sanding.
With dust collection features, it keeps work areas cleaner than hand sanding. Painters appreciate its efficiency over larger areas. Drywall Sanders enables quick prepping before painting begins. Projects finish faster with high-quality results.
Many different factors can determine how much a drywall sander costs. The brand, features, and the type of sander will all affect how much it costs. Most drywall sanders will probably cost somewhere between $50 and $200. A gas-powered model may cost more than that — perhaps even over $300.
A buyer can also get a better deal if they shop around different stores. If they can find a used sander, that could help them save some money too.