


Types of DIO Speedometer
Motorcycle speedometers, also called dio speedometers, are essential instruments for measuring a bike's speed, allowing riders to monitor their velocity at all times. DIO scooter speedometers come in two primary types: analog and digital.
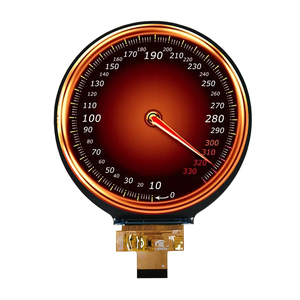
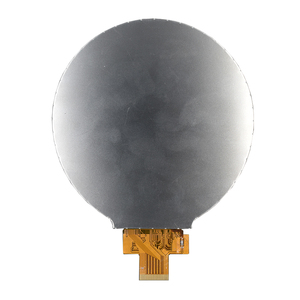
Analog DIO Speedometers
Traditional analog speedometers feature a round design with a needle gauge that moves across numbered dials. The display is typically divided into two sections:
- Inner circle: Shows speed in miles per hour (mph)
- Outer circle: Displays speed in kilometers per hour (kph)
These speedometers are positioned behind the handlebars and connected to the wheel via a cable. As the wheel rotates, the cable spins, generating a magnetic field that moves the needle to indicate the current speed.
Key Benefit: Simple visual reading that allows riders to quickly notice speed changes.
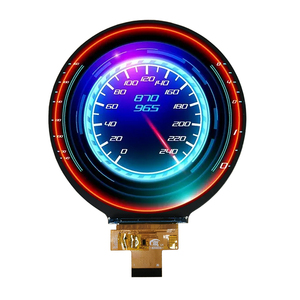
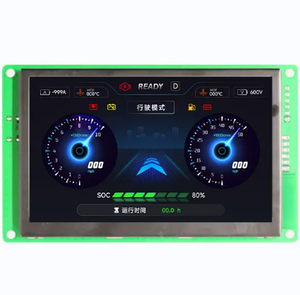
Digital DIO Speedometers
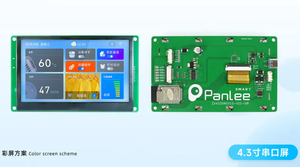
Modern digital speedometers utilize advanced technology with LED or LCD displays showing speed in large, easy-to-read numbers. Some features include:
- Color-changing backgrounds (e.g., green for low speeds, red for high speeds)
- Multiple reading options and information displays
- Higher precision measurements
The dio digital meter uses either sensors connected to the wheel/transmission or GPS technology to track the bike's movement and calculate speed.
Key Benefit: Superior accuracy and precise measurements with additional functionalities.
Rider Tip: Digital speedometers often include additional features like trip meters, fuel gauges, and maintenance indicators, making them more versatile than their analog counterparts.
Specifications and Maintenance of DIO Speedometer
Understanding the key specifications of DIO speedometers is essential for proper maintenance and optimal performance. Here are the critical specifications to know when sourcing DIO speedometer parts:
| Specification | Description | Maintenance Notes |
|---|---|---|
| Speed and Distance Units | Default: km/h (switchable to mph) and km (switchable to miles) | Unit settings can be changed through the speedometer's configuration menu |
| Top Speed Memory | Records maximum speed achieved | Reset manually or when battery is disconnected |
| Speed Tolerance | Adjustable through pulse count per revolution | Regular calibration recommended for accuracy |
| Speed Sensor Options | Compatible with transmission speed sensor or ABS wheel speed sensor | Useful for ABS upgrades from different vehicle models |
| Speedometer Cable | Must match original length and threading specifications | Replace immediately if damaged to prevent inaccurate readings |
| Transmission Gear | Affects speed calibration based on gear tooth count | Recalibration required when changing transmission gear ratio |
Calibration Methods
GPS Calibration
Drive at a steady speed while comparing GPS readings to the speedometer display. Adjust settings until the readings align for accurate speed measurement.
Distance Calibration
Drive through a known distance (e.g., mile markers) and adjust the speedometer settings to match the actual distance traveled for precise measurement.
Important: Improper calibration can lead to inaccurate speed readings, potentially resulting in safety issues or traffic violations. When in doubt, consult a professional technician.
How to Choose DIO Speedometer
Selecting the right DIO speedometer requires careful consideration of several important factors to ensure optimal performance, accuracy, and compatibility with your vehicle.
Accuracy and Precision
The most critical factor when selecting a speedometer. Look for models with:
- Close to 100% accuracy in speed readings
- Clear digital display that's easy to read at a glance
- Consistent readings unaffected by external factors
Compatibility
Ensure the speedometer works seamlessly with your specific DIO model:
- Compatible with your DIO's electrical system
- Easy installation without wiring modifications
- Proper fit in the existing dashboard space
Functionality
Consider additional features that enhance usability:
- Odometer for tracking total mileage
- Trip meter for measuring individual journey distances
- Fuel gauge integration
- Clock and other information displays
- Backlight for nighttime visibility
Readability
The speedometer should be easy to read in all conditions:
- Large, clear digital display or well-marked analog dial
- Anti-glare features for visibility in direct sunlight
- Proper illumination for nighttime riding
- Logical layout that minimizes distraction
Legal Compliance
Ensure the speedometer meets regional legal requirements:
- Verifiable calibration
- Tamper-proof seal where required
- Acceptable error margin per local regulations
- Proper certification documentation
After-sales Support
Choose suppliers offering comprehensive support:
- Manufacturer warranty against defects
- Technical support for installation issues
- Availability of replacement parts
- Clear documentation and user manual
Smart Shopping Tip: Research prices for honda dio digital speedometer models before purchasing. Prices typically range from $50-$150 depending on features and quality. Compare prices across multiple retailers to find the best value.
How to DIY and Replace DIO Speedometer
Replacing a DIO speedometer can be a straightforward process with the right tools and approach. Follow this step-by-step guide for a successful DIY replacement.
Required Tools and Materials
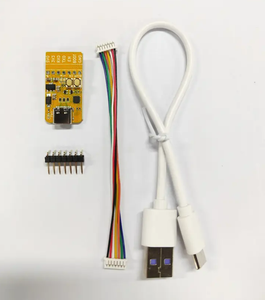
- New DIO speedometer or dio digital meter
- DIO speedometer cable (if needed)
- DIO speedometer sensor (if needed)
- Screwdriver set (Phillips and flathead)
- Socket wrench set
- Pliers
- Owner's manual for reference
- Clean cloths
- Electrical tape
Prepare Your Workspace
Find a clean, well-lit area to work. Ensure your motorcycle is on its center stand or securely positioned. Gather all tools and materials before starting.
Disconnect the Battery
Locate the battery and disconnect the negative terminal first to prevent electrical shorts during installation.
Access the Speedometer Assembly
Remove the front panel or dashboard cover to access the speedometer. This usually involves removing several screws and carefully detaching any clips.
Disconnect the Old Speedometer
Carefully disconnect all electrical connectors and the speedometer cable from the old unit. Take photos before disconnecting to remember the wiring arrangement.
Remove the Old Speedometer
Unscrew the mounting hardware holding the speedometer in place and carefully remove the old unit.
Install the New Speedometer
Position the new speedometer in the mounting bracket and secure it with the appropriate screws. Ensure it's properly aligned for easy viewing.
Connect the Wiring and Cable
Reconnect all electrical connectors to the new speedometer according to the manufacturer's instructions. Connect the speedometer cable or sensor to the wheel hub.
Reconnect the Battery
Once everything is properly connected, reconnect the battery terminals (positive first, then negative).
Test the New Speedometer
Turn on the ignition and check if the speedometer powers up correctly. Take a short test ride to verify it accurately displays speed.
Reassemble the Dashboard
Once you've confirmed the speedometer works properly, reattach any covers or panels you removed earlier.
Safety Warning: If you encounter any unexpected issues or are unsure about any steps, stop immediately and consult a professional mechanic. Improper installation can lead to inaccurate speed readings or electrical problems.
Maintenance Tip: When replacing a scratched dio meter glass, carefully clean the new glass and internal components before reassembly to prevent dust from getting trapped inside the unit.
Questions and Answers
If your speedometer stops functioning entirely, follow these troubleshooting steps:
- Check the fuses related to the instrument panel
- Inspect all electrical connections for looseness or corrosion
- Check the speedometer cable for damage or disconnection (for analog models)
- Test the speed sensor functionality (for digital models)
- Verify the wiring harness for any visible damage
If these steps don't resolve the issue, consult a professional mechanic with the diagnostic equipment necessary to identify more complex electrical problems.
A bouncing speedometer needle usually indicates one of several issues that you may be able to address yourself:
- Clean and secure all speed sensor connections
- Check the speedometer cable for kinks or damage
- Ensure the cable is properly lubricated (for analog models)
- Verify the speed sensor is properly aligned and securely mounted
- Recalibrate the speedometer according to manufacturer instructions
If the problem persists after attempting these fixes, professional diagnostic service may be necessary.
Yes, DIY installation is possible for those with basic mechanical skills. Modern DIO speedometers are designed to be relatively straightforward to install, but the complexity varies by model. Digital speedometers with advanced features may require more technical knowledge for proper setup and calibration.
If you're comfortable with motorcycle maintenance tasks like changing oil or replacing spark plugs, you likely have the skills needed for a basic speedometer replacement. Always refer to the installation manual and don't hesitate to consult a professional if you encounter difficulties.
The dio digital meter price typically ranges from $50 to $150, depending on several factors:
- Basic models with essential functions: $50-$75
- Mid-range models with additional features: $75-$100
- Premium models with advanced functionality: $100-$150
Prices may vary based on market conditions, brand reputation, and whether you're purchasing an OEM (Original Equipment Manufacturer) or aftermarket part. Always verify compatibility with your specific DIO model before purchasing.
To find the best honda dio digital speedometer price, consider these purchasing options:
- Authorized Honda Dealers: Most reliable source for genuine parts with warranty coverage
- Online Marketplaces: Platforms like Amazon, eBay, or AliExpress often offer competitive pricing
- Specialty Motorcycle Parts Retailers: Online shops like RevZilla, BikeBandit, or Partzilla
- Local Motorcycle Parts Stores: May offer installation services along with the purchase
Compare prices across multiple sources and look for retailers offering warranties or return policies. Be wary of extremely low-priced options as they may be counterfeit or of poor quality.
Replacing a scratched dio meter glass involves these steps:
- Remove the speedometer from its housing
- Carefully unscrew the bezel or rim holding the glass in place
- Remove the old glass, being careful not to damage internal components
- Clean any dust or debris from inside the speedometer
- Place the new meter glass in position
- Reattach the bezel and ensure it's properly sealed
- Reinstall the speedometer into the motorcycle
For optimal results, work in a clean, dust-free environment and handle the glass carefully to avoid fingerprints or new scratches. If the internal components are complex, consider seeking professional assistance.