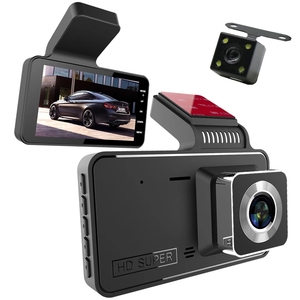
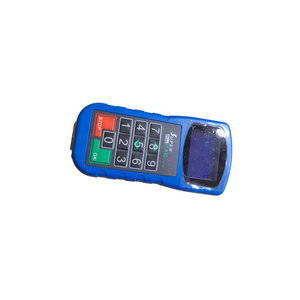
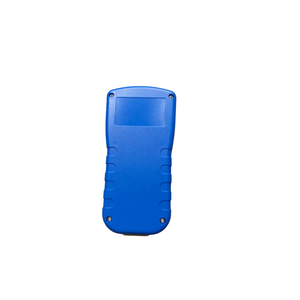
Types of Dashcoder
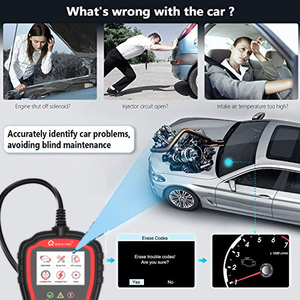
A dashcoder is a valuable tool for car instrument panel coding. It is used to set, change, and personalize configurations and parameters on dashboards and instrument clusters. This tool allows access to hidden features, enabling programming and coding beyond standard factory settings. A dashcoder comes in various types, each suitable for specific tasks and vehicles. Below are some common types of dashcoders:
- Universal Dash Programmer: This dashcoder is designed to work with different brands and models of cars. It has a wide range of functions, such as reading and writing instrument cluster data, key programming, and coding remote controls. A universal dash programmer is handy for automotive locksmiths and repair shops that deal with various vehicles.
- VAG Compliant Programmer: This dashcoder is explicitly designed for Volkswagen, Audi, Seat, and Skoda vehicles. VAG Compliant Programmers are used for coding and programming functions, such as enabling or disabling features, adjusting instrument cluster settings, and performing diagnostics. With this programmer, specific coding tasks can be done, which other vehicles cannot do.
- BMW Professional Diagnostic Tool: This is a professional dashcoder designed for BMW vehicles. It is used for diagnostics, programming, and coding functions. BMW Professional Diagnostic Tool can access and program settings in the instrument cluster, such as enabling hidden features, personalizing display elements, and performing module programming.
- Mercedes-Benz Star Diagnostic Tool: This is a diagnostic tool for Mercedes-Benz vehicles. It is primarily used for diagnostics but can also access and program settings in the instrument cluster. Mercedes-Benz Star Diagnostic Tool can perform coding and programming functions, such as adjusting display settings and enabling specific features.
Specification & Maintenance of Dashcoder
-
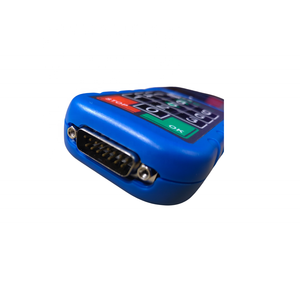
Connection:
This is an important feature for sure, as it helps to determine how the tool will be connected to the vehicle. There are two main connection types to consider: wired and wireless connections. Wired connections use a physical connection, like a USB cable, to connect the tool to the vehicle. On the other hand, wireless connections use Wi-Fi or Bluetooth technology to connect the tool to the vehicle.
-
Code coverage:
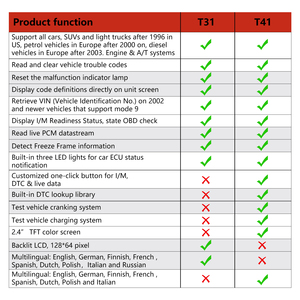
This feature helps to determine the number of diagnostic trouble codes (DTCs) that can be read and cleared by the tool. Different tools have different levels of code coverage, so this is an important feature to consider when selecting a tool. Diagnostic tools with full code coverage can read and clear all DTCs for all vehicles, while those with limited code coverage can only read and clear codes for some makes and models.
-
Power supply:
There are two main power supply options for diagnostic tools: internal batteries and power from the vehicle's OBD-II port. Tools with internal batteries provide a portable and convenient option, as they can be powered even if the vehicle's OBD-II port is not functioning properly. On the other hand, tools powered by the vehicle's OBD-II port draw power directly from the vehicle, so they don't need to be charged or replaced like internal batteries do.
-
Display:
This feature determines how information is displayed on the diagnostic tool's screen. There are two main display options to consider: analog displays and digital LCD screens. Analog displays use physical, moving dials to show data, while digital LCD screens show information in text or graphical form. LCD screens are generally considered more user-friendly because they can display more information at once than analog displays.
-
Data stream:
Diagnostic tools can access different levels of a vehicle's data stream. Some tools can access a vehicle's live data stream, which shows real-time information about the vehicle's performance and systems. On the other hand, some tools can only access basic data, which provides limited information compared to a live data stream. Accessing a live data stream can be very helpful for diagnosing and troubleshooting issues because it provides detailed information about how the vehicle is functioning in real-time.
-
Vehicle coverage:
This feature helps determine the makes and models of vehicles that can be diagnosed and accessed using the tool. Some diagnostic tools are designed to work with specific vehicle brands, while others are compatible with a wider range of makes and models. If the tool is not compatible with a particular vehicle, it may not be able to read or clear codes or perform other diagnostic functions. It's important to choose a tool that is compatible with the types of vehicles that will be worked on to ensure reliable and accurate diagnostics.
Tools should be stored properly when not in use to prevent damage or loss. They should also be handled with care, as rough handling can cause wear and tear on the equipment over time. Cleaning tools regularly helps to maintain their functionality and accuracy. Dust, dirt, and debris can accumulate on the surface of the tools, affecting their performance and readings. When cleaning, mild soap and water or a disinfectant solution can be used to remove dirt and debris from the surface of the tools. Allow the tools to dry completely after cleaning to prevent mold and mildew growth.
How to choose Dashcoder
With a plethora of options available in the market, selecting the right Dashcoder can be a daunting task. Here are some tips to consider;
- Compatibility: When selecting a Dashcoder, it’s important to consider its compatibility with various car models and brands. This will enable the Dashcoder to access and communicate with the car's control systems. Choose a Dashcoder that’s compatible with a wide range of car models and brands.
- Functionality: Different Dashcoders come with various functionalities. Some Dashcoders offer basic functionalities like reading and clearing diagnostic trouble codes (DTCs), while others provide advanced features such as live data streaming, actuation tests, programming keys, and more. Business owners should analyze their needs before selecting a Dashcoder with the desired functionalities.
- Data security: Data security is an important factor to consider when choosing a Dashcoder. Ensure that the Dashcoder has robust security measures to protect the car's data and prevent unauthorized access or data breaches. Look for Dashcoders with encryption, secure communication protocols, and regular firmware updates to enhance data security.
- Budget: Just like any other product, Dashcoders come in different prices. Select a Dashcoder that’s within the budget but also consider the features and functionalities offered.
How to DIY and Replace
Car instrument cluster coding can be a DIY-friendly project if the right tools and knowledge are available. Here's a basic guide on how to use a Dashcoder tool:
- Preparation
Ensure the vehicle's battery is charged and the Dashcoder device is fully charged or have a stable connection to avoid interruptions during the coding process. Also, read the user manual to understand the features and functions of Dashcoder.
- Connect Dashcoder
Locate the OBD-II port in the vehicle. It is usually found beneath the dashboard, around the driver's seat area. Once located, connect the Dashcoder device to the OBD-II port. Ensure a secure connection to facilitate communication between the Dashcoder and the vehicle's onboard systems.
- Access instrument cluster settings
Turn on the vehicle's ignition without starting the engine. This will power up the Dashcoder device and activate the instrument cluster. Follow the manufacturer's instructions to navigate to the instrument cluster settings menu on the Dashcoder device. This may involve selecting the appropriate vehicle make, model, and year information to ensure compatibility.
- Perform coding operations
Once accessing the instrument cluster settings, users can perform various coding operations as per their requirements. This can include changing display units (e.g., miles to kilometers), enabling or disabling certain features, adjusting instrument cluster settings, or customizing warning indicators.
- Save and exit
After performing the desired coding operations, ensure to save the changes. The Dashcoder device will prompt to save the modifications to the vehicle's instrument cluster. Once the changes are saved, disconnect the Dashcoder from the OBD-II port. Carefully remove it to avoid damaging the port or the device.
- Verify changes
Instrument cluster coding can be a DIY-friendly project if the right tools and knowledge are available. Here's a basic guide on how to use a Dashcoder tool:
Q&A
Q1: Where can people buy Dashcoder products?
A1: Dashcoder products can be purchased from authorized retailers, online marketplaces, and the official Dashcoder website.
Q2: What is the warranty period for Dashcoder products?
A2: The warranty period for Dashcoder products may vary depending on the specific product. Generally, Dashcoder offers a warranty period of 6 to 12 months. During the warranty period, they provide free repair services or replace the product if there are any quality issues.
Q3: Does Dashcoder provide after-sales support?
A3: Yes, Dashcoder provides after-sales support. Customers can contact their after-sales service team for any inquiries, product assistance, or support-related issues.
Q4: Can Dashcoder products be customized for specific needs?
A4: Yes, Dashcoder can provide customized solutions according to specific needs. For customization requirements, it is recommended to contact their sales team for further communication and arrangements.


 浙公网安备 33010002000092号
 浙B2-20120091-4