


Types of CT9 Turbo
The CT9 turbo is a forced induction component that significantly enhances engine performance by compressing additional air into the combustion chamber. This allows for increased fuel injection, resulting in greater power and torque output. Here's a comprehensive breakdown of the main CT9 turbo variants:
Single Turbo
The most common and straightforward configuration featuring a single turbine and compressor wheel.
- Design: One turbine and compressor wheel
- Advantages: Reliability, simplicity, cost-effective
- Best for: Everyday drivers seeking balanced performance
- Performance note: Smaller units provide quicker low-end response, while larger ones deliver greater top-end power
Twin-Turbo
A dual-turbocharger system providing enhanced performance across the entire RPM range.
- Configurations:
- Parallel: Each turbo handles half the cylinders
- Sequential: Small turbo for low RPM, larger for high RPM
- Advantages: Broader powerband, reduced lag, higher potential power
- Best for: Performance enthusiasts seeking maximum output
Variable-Geometry Turbo (VGT)
Advanced technology that dynamically adjusts turbine blade angles to optimize performance.
- Technology: Adjustable vanes that optimize exhaust flow
- Advantages: Reduced lag, better throttle response, improved efficiency
- Best for: Applications requiring variable power delivery
- Notable feature: Excellent low-end torque while maintaining high-end power
Electric Turbo-Compound (ETC)
Cutting-edge hybrid turbocharger utilizing electric assistance for instant response.
- Design: Electrically-assisted turbocharger system
- Advantages: Virtually no lag, energy recuperation, precise control
- Best for: High-end applications or downsized engines
- Future potential: Becoming more accessible as technology advances
Expert Insight: When selecting between CT9 turbo types, consider your driving style and performance goals. Single turbos offer the best balance of reliability and performance for most applications, while twin-turbos and VGTs are better suited for enthusiasts seeking maximum power or efficiency.
Specifications and Maintenance of the CT9 Turbo
Proper maintenance is crucial for ensuring optimal performance and longevity of your CT9 turbocharger. Following these guidelines will help prevent premature failure and maintain efficiency:
Lubrication Requirements
The CT9 turbo relies heavily on proper lubrication to function correctly.
- Use synthetic oil rated for turbocharged engines
- Change oil every 3,000-5,000 miles
- Maintain proper oil pressure (40-60 PSI under load)
Cooling Requirements
Heat management is essential for turbocharger longevity.
- Allow 3-5 minutes cooldown before shutting off
- Inspect intercooler hoses quarterly
- Maintain proper coolant levels and quality
Performance Specifications
Typical CT9 turbo performance metrics:
- Power output: 150-200 HP
- Boost pressure: 7-12 PSI (stock)
- Spool-up RPM: 2,000-2,500
Maintenance Schedule
| Maintenance Task | Frequency | Importance | Notes |
|---|---|---|---|
| Oil Change | 3,000-5,000 miles | Critical | Use quality synthetic oil meeting manufacturer specifications |
| Intercooler Hose Inspection | Quarterly | High | Check for cracks, tears, or loose fittings |
| Oil Feed/Return Line Inspection | 6 months | Critical | Look for leaks, cracks, or blockages |
| Wastegate Actuator Check | Annually | Medium | Ensure proper function for boost control |
| Exhaust System Cleaning | Annually | Medium | Remove carbon deposits that restrict flow |
| Air Filter Replacement | 15,000 miles | High | Clean air is essential for turbo longevity |
Warning: Neglecting proper cooldown periods before engine shutdown can significantly reduce turbocharger lifespan. When oil flow stops while the turbo is still hot, oil can "coke" or burn inside the bearings, leading to premature failure.
How to Choose the Right CT9 Turbo
Selecting the optimal CT9 turbo for your application requires careful consideration of several factors to ensure compatibility, performance, and reliability:
Engine Performance Goals
Define your objectives clearly:
- Daily driving: Focus on low-end torque and reliability
- Track performance: Prioritize top-end power and thermal management
- Towing/hauling: Emphasis on mid-range torque and durability
Engine Specifications
Match the turbo to your engine:
- Displacement: Larger engines need larger turbos
- Compression ratio: Higher compression may require smaller turbos
- RPM range: Consider where power is needed most
Technical Considerations
Advanced selection criteria:
- A/R ratio: Lower for quicker spool, higher for more top-end
- Compressor map: Match to engine airflow requirements
- Trim size: Affects flow characteristics and response
Selection Process Flowchart
- Determine power goals (HP/torque targets)
- Calculate required airflow based on engine displacement and desired boost
- Match compressor map to required airflow and pressure ratio
- Consider installation constraints (space, plumbing, accessories)
- Review supporting modifications needed (intercooler, fuel system, engine management)
- Compare budget against options that meet technical requirements
- Research reliability reports for final candidates
Pro Tip: Many enthusiasts make the mistake of selecting a turbo that's too large for their application. A properly-sized CT9 turbo that spools quickly will typically provide better real-world performance than an oversized unit with excessive lag, even if the larger turbo shows higher peak numbers on paper.
DIY CT9 Turbo Replacement Guide
Replacing a CT9 turbo is a moderately complex procedure that can be accomplished with basic mechanical knowledge and the right tools. Follow this step-by-step guide for a successful installation:
Required Tools
Basic Tools
- Socket set (metric)
- Wrench set
- Torx bit set
- Flathead and Phillips screwdrivers
- Pliers (regular and needle-nose)
Specialized Tools
- Oil drain pan
- Torque wrench
- Hose clamp pliers
- Penetrating fluid
- Anti-seize compound
Required Parts
- New CT9 turbocharger
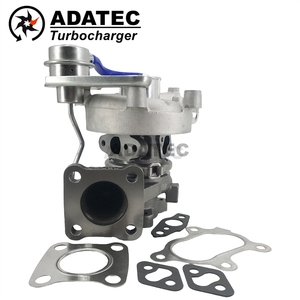
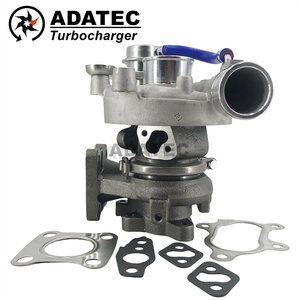
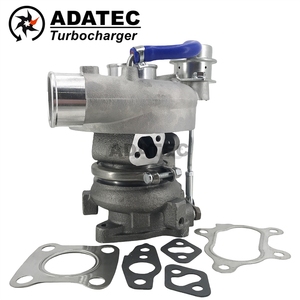
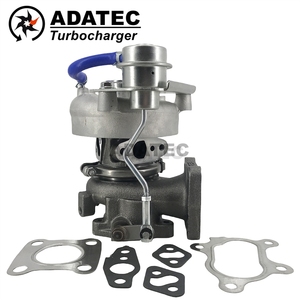
- Replacement gaskets
- New oil feed/return lines (recommended)
- Fresh engine oil and filter
- Coolant (if needed)
Installation Procedure
Safety Preparation
Disconnect the negative battery terminal to prevent electrical shorts. Ensure the engine is completely cool before beginning work to avoid burns.
Remove Engine Accessories
Remove the engine cover and air intake duct system to gain access to the turbocharger. Label all connections before removal to ensure proper reassembly.
Drain Fluids
Drain the engine oil completely. If your turbo is coolant-cooled, you may need to drain part of the cooling system as well.
Disconnect Cooling Lines
Remove the clamps securing coolant hoses to the turbocharger. Have towels ready to catch any remaining coolant.
Remove Oil Lines
Disconnect the oil feed and return lines from the turbocharger. Cap the lines to prevent contamination and excessive oil leakage.
Disconnect Exhaust Components
Remove the exhaust downpipe from the turbocharger outlet. You may need penetrating fluid for stubborn bolts that have been exposed to high heat.
Remove Turbo Mounting Bolts
Unbolt the turbocharger from the exhaust manifold. These bolts are often difficult to access, so patience and the right extensions are key.
Extract the Turbocharger
Carefully remove the old turbo from its mounting location. Note the orientation and position for proper installation of the new unit.
Prepare the New Turbo
Before installation, pre-lubricate the new turbocharger by adding a small amount of clean engine oil to the oil inlet. Rotate the turbine wheel by hand to distribute oil to the bearings.
Install New Turbo
Mount the new CT9 turbo using new gaskets. Tighten mounting bolts in a cross-pattern to the manufacturer's torque specifications.
Reconnect All Components
Reattach exhaust components, oil lines, and coolant hoses in reverse order of removal. Use new clamps where appropriate.
Refill Fluids
Add fresh engine oil and coolant as needed. Double-check all connections for tightness.
Initial Startup Procedure
Before starting the engine, crank it without firing (disable fuel or ignition) to build oil pressure. Then start the engine and let it idle while checking for leaks.
Break-In Period
Drive conservatively for the first 500 miles, avoiding high boost and high RPM operation to allow proper break-in of the new turbocharger.
Important Safety Note: Turbochargers operate at extremely high temperatures. Ensure the engine has completely cooled before attempting removal. Additionally, proper torque specifications must be followed to prevent exhaust leaks which can pose both performance and safety hazards.
Frequently Asked Questions
A CT9 turbo generally lasts between 100,000 to 150,000 miles when properly maintained. However, longevity depends significantly on several factors including:
- Regular oil changes with high-quality synthetic oil
- Proper cooldown procedures before engine shutdown
- Driving habits (aggressive driving shortens lifespan)
- Quality of installation and supporting components
With meticulous maintenance and moderate driving habits, some CT9 turbos have been known to exceed 200,000 miles.
The standard CT9 turbo is a moderate-output unit typically found on older Toyota and Subaru vehicles. In stock form, it produces approximately 150-200 horsepower, depending on the application. Performance specifications include:
- Boost pressure: 7-12 PSI (stock configuration)
- Flow rate: Moderate compared to modern turbos
- Spool characteristics: Relatively quick spool-up around 2,000-2,500 RPM
While not considered high-performance by modern standards, the CT9 provides reliable boost and was well-matched to its original applications.
Yes, the CT9 turbo can be upgraded using aftermarket components for improved performance. Upgrade options include:
- CT9 upgrade kits: These comprehensive packages typically include modified compressor wheels, upgraded wastegates, and reinforced housings
- Internal modifications: Porting and polishing the compressor housing can improve airflow
- Custom tuning: Professional ECU tuning to maximize the turbo's potential
With proper upgrades and supporting modifications, a modified CT9 turbo can achieve 250-300 horsepower in some applications. However, for significant power gains beyond this range, many enthusiasts opt for a complete turbo replacement with a larger aftermarket unit.
Be alert for these symptoms that may indicate your CT9 turbo is failing:
- Excessive exhaust smoke: Blue smoke can indicate oil leaking into the exhaust from worn turbo seals
- Decreased performance: Noticeable power loss or inconsistent boost
- Unusual noises: Whistling, whining, or rattling sounds from the turbo area
- Oil consumption: Increased oil usage without visible external leaks
- Check engine light: Often triggered by boost-related fault codes
If you notice these symptoms, prompt inspection is recommended to prevent secondary damage to other engine components.
The CT9 turbo was designed specifically for certain Toyota and Subaru engines, primarily the smaller displacement 4-cylinder models. While adapters and custom fabrication can make it work on other engines, several factors determine compatibility:
- Mounting flanges: The exhaust manifold flange pattern must match
- Oil and coolant lines: Proper connections must be established
- Flow requirements: The turbo must be appropriately sized for the engine
- Engine management: Proper tuning is required for optimal performance
For non-standard applications, consulting with a turbo specialist is highly recommended before attempting installation.