


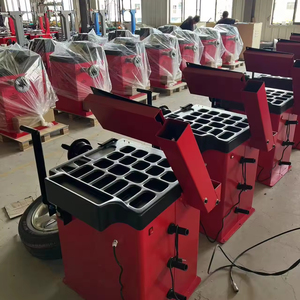


Types of Computer Balancer
A computer balancer is a sophisticated wheel balancing machine that uses a computer to analyze wheel data and automatically calculate the optimal weight distribution. These machines ensure that vehicles run smoothly and last longer, improving safety, comfort, and fuel efficiency while preventing premature tire wear.
Why Use a Computer Balancer? Properly balanced wheels reduce vehicle vibration, extend tire life, improve fuel efficiency, and enhance overall driving comfort and safety.
Dynamic Balancer
Dynamic computer balancers analyze wheels while in motion, making them ideal for high-speed vehicles. They use sensitive sensors to detect imbalances in multiple planes of the wheel's mass distribution.
- Best for vehicles that frequently travel at highway speeds
- Detects both static and couple imbalances
- Allows placement of weights on both inner and outer rims
- Provides the most comprehensive balance solution
Static Balancer
Static computer balancers are designed for low-speed applications and wheels that rotate on a single axis without a center point. They are generally less expensive and simpler to operate than dynamic balancers.
- Suitable for motorcycles, ATVs, and golf carts
- More affordable than dynamic balancers
- Weights are applied to a single plane (usually the centerline)
- Easier to use but less comprehensive than dynamic balancing
Laser Wheel Balancer
Laser wheel balancers incorporate laser technology to improve wheel alignment and balance precision. The laser indicates the wheel's perfect alignment path and helps detect subtle imbalances.
- Highest precision measurement capabilities
- Often used for luxury and performance vehicles
- Visual guidance for weight placement
- Can simultaneously check for runout issues
Touchless Wheel Balancer
Touchless computer balancers detect imbalances without physical contact with the wheel surface. This advanced technology is ideal for delicate or expensive wheels that could be damaged by traditional contact methods.
- Prevents damage to sensitive wheel finishes
- Uses optical or sonar technology for measurements
- Ideal for custom and high-end alloy wheels
- Typically more expensive than traditional balancers
| Balancer Type | Best Application | Precision Level | Relative Cost |
|---|---|---|---|
| Dynamic Balancer | Passenger vehicles, trucks, high-speed applications | High | Moderate to High |
| Static Balancer | Motorcycles, ATVs, low-speed applications | Moderate | Low to Moderate |
| Laser Wheel Balancer | Luxury vehicles, performance cars | Very High | High |
| Touchless Wheel Balancer | Custom wheels, expensive alloys | High | Very High |
Specifications of Computer Balancers
Understanding the key specifications of computer balancers is essential for selecting the right equipment for your specific needs. These technical parameters determine the machine's functionality, efficiency, and compatibility with different wheel types.
Size and Weight
Computer balancers vary significantly in their physical dimensions based on their intended use:
- Portable Models: Typically around 60 cm long and weighing approximately 30 kg, designed for mobile service or limited space applications
- Workshop Models: Larger and more robust at approximately 120 cm long and weighing up to 200 kg, offering enhanced stability and precision for high-volume operations
Measuring Speed
The time required to complete a full wheel balance measurement significantly impacts workflow efficiency:
- Portable Models: Average measuring speed of approximately 60 seconds per wheel
- Workshop Models: Faster operation at around 20 seconds per wheel, enabling higher throughput in professional settings
- Premium Models: Can achieve measurement times as low as 6-8 seconds in advanced systems
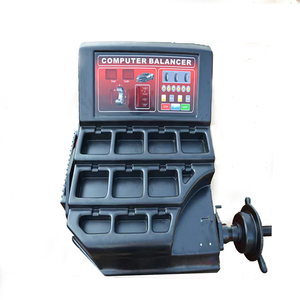
Display Type
The display technology affects usability, especially in various lighting conditions:
- LCD Screens: More affordable but may have visibility issues in bright environments
- LED Screens: Offer superior brightness and clarity, ideal for workshop environments with variable lighting
- Touchscreen Displays: Available on premium models, providing intuitive navigation and advanced feature access
Power Supply
Power source options determine where and how the balancer can be used:
- Battery-Powered: Offers portability and convenience for mobile operations, but requires regular recharging
- Electric-Powered: Provides consistent performance without interruption, ideal for busy workshops with high volume
- Hybrid Models: Some units offer both options for maximum flexibility
Balance Accuracy
The precision with which a balancer can detect and correct imbalances:
- Standard Accuracy: ±1 gram, sufficient for most passenger vehicles
- High Precision: Some advanced models offer accuracy down to ±0.5 grams for performance applications
- Resolution: The smallest increment of weight the machine can differentiate (typically 1 gram)
| Specification | Portable Models | Workshop Models | Premium Models |
|---|---|---|---|
| Size | ~60 cm long | ~120 cm long | ~150 cm long |
| Weight | ~30 kg | ~200 kg | ~250 kg |
| Measuring Speed | ~60 seconds | ~20 seconds | 6-10 seconds |
| Display Type | Basic LCD | LED | Touchscreen LED |
| Power Supply | Battery | Electric | Electric (w/ backup) |
| Max Wheel Weight | ~65 kg | ~80 kg | ~200 kg |
Maintenance of Computer Balancers
Regular maintenance is critical for ensuring the accuracy, reliability, and longevity of computer wheel balancers. Following a structured maintenance schedule helps prevent costly repairs and maintains calibration accuracy.
Important: Always disconnect power before performing maintenance procedures unless specifically instructed otherwise by the manufacturer's guidelines.
Daily
Daily Maintenance Tasks
- General Cleaning: Remove dust, dirt, and debris from the display screen, control panel, and sensors using appropriate electronic-safe cleaners
- Inspection: Check all moving parts for signs of wear, damage, or loose components
- Software Updates: Check for and install any available software updates to improve performance and fix bugs
- Battery Charging: For portable models, ensure batteries are charged to maintain proper operation
- Wheel Mount Check: Inspect the shaft and mounting adaptors for cleanliness and damage
Weekly
Weekly Maintenance Tasks
- Cable Inspection: Thoroughly examine all cables and connections for cracks, fraying, or other damage
- Replace Damaged Cables: Immediately replace any cables showing signs of wear to prevent electrical hazards
- Clamp and Jaw Maintenance: Clean and adjust wheel mounting hardware to ensure secure wheel retention
- Lubrication: Apply manufacturer-recommended lubricant to moving parts according to the service manual
- Sensor Check: Verify all sensors are functioning correctly and free from obstruction
Monthly
Monthly Maintenance Tasks
- Deep Cleaning: Perform a thorough cleaning of all internal components accessible without disassembly
- Calibration Check: Verify the machine's calibration using manufacturer-provided test weights
- Full Calibration: If necessary, perform a complete calibration procedure according to the manual
- Inventory Check: Count and organize balancing weights, ordering replacements as needed
- Belt Tension: For belt-driven models, check and adjust motor belt tension
- Electrical Connections: Inspect and tighten all electrical connections
Yearly
Annual Maintenance Tasks
- Professional Servicing: Schedule a comprehensive inspection by a certified technician
- Component Replacement: Replace wear parts such as belts, bearings, and shaft accessories
- Full System Diagnostic: Perform complete system diagnostics to identify potential issues
- Software Upgrade: Install major software upgrades if available
- Electrical Safety Test: Conduct electrical safety testing to ensure safe operation
How to Choose a Computer Balancer
Selecting the right computer wheel balancer requires careful consideration of several important factors. The ideal machine will align with your specific business needs, workload demands, and budget constraints while providing reliable performance.
Business Operation Type
Different business models require different balancer configurations:
- Mobile Service Providers: Compact, portable, battery-powered models that can be easily transported
- Tire Specialty Shops: High-capacity, fast-operating models with advanced features for rapid throughput
- General Auto Repair: Mid-range models balancing features with reasonable cost
- Dealerships: Premium models with diagnostic capabilities and high precision
Volume of Work
Your expected workflow will determine the capacity requirements:
- Low Volume (1-10 wheels/day): Basic models sufficient
- Medium Volume (10-30 wheels/day): Mid-range models with faster operation
- High Volume (30+ wheels/day): Industrial-grade models with rapid cycle times
- Seasonal Fluctuations: Consider peak capacity requirements
Wheel Types and Sizes
Consider the range of wheels you'll be servicing:
- Standard Passenger: Most balancers handle these effectively
- Performance/Custom Wheels: Look for models with special adapters and touchless options
- Commercial/Heavy Duty: Require high capacity balancers (up to 200kg)
- Motorcycle/ATV: Need specialized mounting adaptors
Power Source Considerations
Select the appropriate power configuration:
- Fixed Workshop: Standard electric-powered models offer consistent performance
- Mobile Operations: Battery-powered or 12V DC options for field work
- Inconsistent Power Areas: Consider models with power surge protection
- Multiple Locations: Hybrid models that can operate on different power sources
Budget Considerations
Establish a realistic budget that accounts for:
- Initial Purchase: Entry-level ($1,000-$3,000), Mid-range ($3,000-$7,000), Premium ($7,000-$15,000+)
- Installation Costs: Professional setup may be required for some models
- Maintenance Expenses: Regular calibration and parts replacement
- Return on Investment: Higher-end models may pay for themselves through improved efficiency
Additional Features
Consider value-adding capabilities:
- Automatic Data Entry: Laser measurement of wheel dimensions
- Hidden Weight Placement: For preserving wheel aesthetics
- Weight Optimization: Minimizes the amount of weight needed
- Match Mounting: Matches tire high spots with rim low spots
- Networking Capabilities: Integration with shop management systems
Pro Tip: Consider purchasing a balancer with slightly higher capacity than your current needs to accommodate business growth and potential changes in your customer base.
How to Use a Computer Balancer: DIY Guide
While professional wheel balancing is recommended for optimal results, many automotive enthusiasts with the right equipment can perform basic wheel balancing. Follow this step-by-step guide for using a computer wheel balancer effectively and safely.
Safety First: Always wear appropriate safety gear including eye protection and work gloves. Ensure the balancer is properly grounded and follow all manufacturer safety guidelines.
Prepare the Vehicle and Workspace
Create optimal conditions for accurate balancing:
- Park the vehicle on a level surface in a well-ventilated, well-lit area
- Position the computer balancer on stable, level ground
- Clean the wheels thoroughly, removing all dirt, old weights, and debris
- Check tire pressure and adjust to manufacturer specifications
- Inspect wheels for damage that might affect balancing results
Mount the Tire Properly
Correct mounting is crucial for accurate balancing:
- Select the appropriate cone or adapter for your wheel type
- Center the wheel precisely on the balancer shaft
- Secure the wheel using the quick-release hub nut, tightening to recommended specifications
- Verify the wheel rotates freely without wobbling
- Close the wheel guard (if equipped) before proceeding
Calibrate and Enter Wheel Data
Ensure the balancer is properly calibrated before use:
- Verify the digital readout shows zero or enter calibration mode if needed
- Enter wheel dimensions (diameter, width, and offset) using the control panel
- For automatic data entry systems, position the measuring arm against the rim as directed
- Select the appropriate balancing mode (dynamic, static, etc.)
- Choose weight placement options (standard clip-on, adhesive, hidden placement)
Perform the Balancing Spin Cycle
Conduct the measurement process:
- Ensure the wheel area is clear of obstacles and people
- Press the start button to begin the spin cycle
- Allow the wheel to accelerate to measuring speed and complete the cycle
- Wait for the wheel to come to a complete stop
- Observe the digital readout for imbalance measurements and weight placement instructions
Apply Balancing Weights Correctly
Precise weight placement is essential for effective balancing:
- Clean the weight placement areas with alcohol or appropriate cleaner
- Rotate the wheel to the positions indicated on the display (usually marked by indicator lights)
- Apply clip-on weights securely to the rim edge or adhesive weights to the designated locations
- Ensure weights are firmly attached and won't shift during wheel rotation
- For hidden weight placement, follow the specific angle and location instructions provided
Verify Balance with a Check Spin
Confirm the effectiveness of your weight placement:
- Perform a second spin cycle after applying weights
- Check that all imbalance readings are within acceptable limits (typically 0-5 grams)
- If readings remain high, adjust weight positions or add additional weights as indicated
- Repeat until satisfactory balance is achieved
- Record the amount of weight used for future reference
Complete the Process
Finalize the wheel balancing procedure:
- Remove the wheel carefully from the balancer
- Inspect the weights one final time to ensure proper attachment
- Mount the wheel back on the vehicle, torquing lug nuts to manufacturer specifications
- Perform a test drive to verify the elimination of vibration issues
- Clean and reset the balancer for the next wheel
Troubleshooting Tip: If you're experiencing inconsistent readings between spins, check for loose mounting hardware, ensure the wheel is centered properly, or consider recalibrating the balancer before continuing.
Frequently Asked Questions
Q1: Can a computer wheel balancer be used for motorcycle wheels?
Yes, computer wheel balancers can effectively balance motorcycle wheels with the proper equipment. Most professional balancers offer motorcycle-specific adapters to accommodate the smaller wheel diameters and widths. These adapters ensure proper centering of motorcycle wheels on the balancer shaft.
Key considerations for motorcycle wheel balancing include:
- Using specialized cone adapters designed for motorcycle wheel bores
- Setting the correct balancing mode (often static balance is sufficient)
- Selecting proper weight types (often adhesive weights for alloy rims)
- Ensuring the balancer is calibrated for the lighter weight of motorcycle wheels
Some high-end balancers even feature preset motorcycle modes that automatically adjust settings for optimal results with motorcycle wheels.
Q2: How long does it take to balance a wheel on a computer balancer?
The total time required to balance a wheel using a computer balancer typically ranges from 1 to 5 minutes per wheel, depending on several factors:
- Machine Type: Entry-level models may take 3-5 minutes per wheel, while advanced models can complete the process in 1-2 minutes
- Operator Experience: Skilled technicians can mount, measure, and apply weights more efficiently
- Wheel Condition: Wheels with significant pre-existing imbalance may require multiple measurement and correction cycles
- Data Entry Method: Manual dimension entry takes longer than automatic measurement systems
The actual spin cycle and measurement process typically takes only 6-30 seconds, with the remainder of the time spent on mounting, data entry, and weight application.
Q3: Is it necessary to use new wheel weights every time a wheel is balanced?
Reusing wheel weights is generally acceptable under certain conditions, but industry best practices suggest the following guidelines:
- Clip-on Weights: Can be reused if they show no signs of deformation, corrosion, or metal fatigue
- Adhesive Weights: Should generally not be reused as the adhesive backing loses effectiveness once removed
- Weight Amount: If the balance requirements have changed significantly, new weights should be used for precision
- Weight Material: Lead weights (where still legal) may be reused more successfully than zinc or steel alternatives
For professional service operations, using new weights is considered best practice as it ensures optimal adhesion, proper weight distribution, and overall quality of service. The minimal cost of new weights is justified by the assurance of proper balance.
Q4: Can a computer balancer correct dynamic imbalances?
Yes, computer balancers are specifically designed to detect and correct dynamic imbalances. Dynamic imbalance occurs when the weight distribution is uneven across multiple planes of the wheel assembly.
Here's how computer balancers address dynamic imbalance:
- They spin the wheel at speeds that simulate actual driving conditions
- Multiple sensors measure vibrations in both the vertical and horizontal planes
- The computer analyzes these measurements to determine the location and amount of imbalance
- The system calculates the optimal placement of weights on both the inner and outer planes of the wheel
- Visual guides (laser pointers, LED indicators) help technicians place weights at the exact positions needed
This capability to correct imbalances in multiple planes is what distinguishes modern computer balancers from older, simpler static balancing methods.
Q5: Do computer balancers require regular maintenance?
Yes, regular maintenance is essential for computer balancers to ensure accurate measurements and long service life. Proper maintenance includes:
- Daily Cleaning: Removing debris from mounting surfaces and sensors
- Regular Calibration: Most manufacturers recommend monthly calibration checks
- Software Updates: Installing the latest firmware provides improved features and bug fixes
- Hardware Inspections: Checking mounting shafts, cones, and adapters for wear
- Sensor Verification: Testing piezoelectric or strain gauge sensors periodically
- Annual Professional Service: Having a certified technician perform comprehensive maintenance
Following the manufacturer's maintenance schedule will prevent degradation of measurement accuracy, reduce downtime, and extend the useful life of the equipment. Many manufacturers offer service contracts that include regular maintenance and calibration visits.


 浙公网安备 33010002000092号
 浙B2-20120091-4