


Types of C11 C13 Injectors 2490713
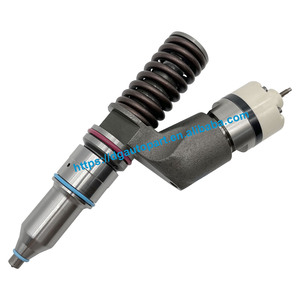
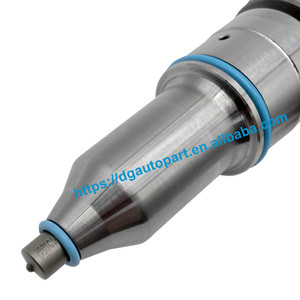
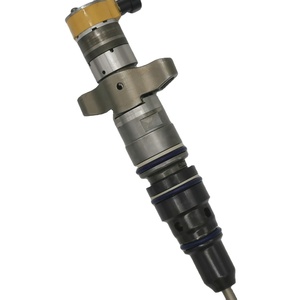
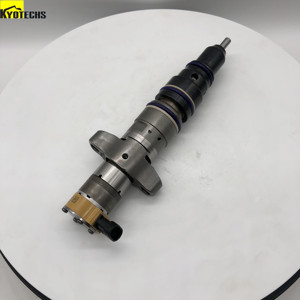
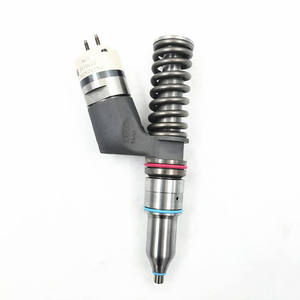
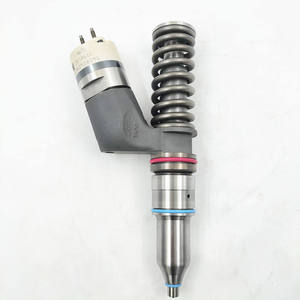
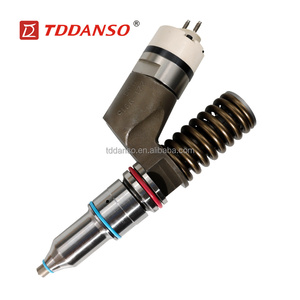
C11 C13 injector 2490713 is a critical component used in diesel engines to precisely deliver fuel into the combustion chamber. The effectiveness of this fuel injection process directly impacts engine power, performance, and emissions. Below are the various types of C11 and C13 injectors available in the market:
Unit Pump Injectors
These injectors integrate both fuel pumping and injection functions into a single, compact component. They deliver high-pressure fuel directly into the combustion chamber, resulting in:
- Precise fuel metering
- Superior fuel atomization
- Enhanced combustion efficiency
Best for: High-performance diesel engines requiring precision fuel delivery
Common Rail Injectors
Connected to a shared high-pressure rail, these injectors enable multiple injection events during a single engine cycle. Benefits include:
- Reduced emissions
- Increased power output
- Improved fuel economy
- Quieter engine operation
Best for: Modern engines requiring emissions compliance with maximum efficiency
Solenoid Fuel Injectors
Using electrical current to activate a solenoid, these injectors open a valve that allows fuel flow into the combustion chamber. Key characteristics include:
- Rapid response times
- Versatility across operating conditions
- Cost-effective design
Best for: Engines with varied operating speeds and loads
Piezoelectric Fuel Injectors
Using piezoelectric crystals that change shape under electrical stress, these advanced injectors offer:
- Exceptional precision
- Ultra-fast response times
- Superior reliability
- Enhanced durability
Best for: Premium applications requiring highest performance standards
Dual-Row Fuel Injectors
Featuring two rows of injector nozzles, this design optimizes:
- Fuel atomization
- Distribution within combustion chamber
- Combustion efficiency
- Emissions performance
Best for: Applications focused on emissions reduction and power enhancement
Electronic Control Fuel Injectors
Using sophisticated electronic control units, these injectors provide:
- Precise fuel delivery timing
- Optimized air-fuel ratios
- Adaptability to operating conditions
- Diagnostic capabilities
Best for: Modern engines requiring adaptive performance across varying conditions
| Injector Type | Key Benefits | Common Applications | Relative Cost |
|---|---|---|---|
| Unit Pump Injectors | Precision metering, excellent atomization | Heavy-duty applications | Medium-High |
| Common Rail Injectors | Multiple injections, quiet operation | Modern diesel engines | Medium-High |
| Solenoid Fuel Injectors | Fast response, cost-effective | Wide range of applications | Medium |
| Piezoelectric Fuel Injectors | Highest precision, durability | Premium diesel engines | High |
| Dual-Row Fuel Injectors | Improved atomization, lower emissions | Performance-focused applications | Medium-High |
| Electronic Control Fuel Injectors | Precise timing, adaptive performance | Modern computerized engines | Medium-High |
Expert Tip: When selecting a replacement injector type, consider not only the direct replacement need but also your specific operating conditions. For high-altitude operations or extreme temperatures, piezoelectric or electronic control injectors may offer better adaptability than standard solenoid types.
Specifications and Maintenance of C11 C13 Injectors 2490713
Technical Specifications
The C11 C13 injector 2490713 is engineered to precise standards to ensure optimal engine performance and reliability. Understanding these specifications is essential for proper selection and maintenance.
Model Information
Model Number: Injector 2490713
Engine Series: CAT C11 and C13 engines
Engine Arrangement: Inline 6, 6V, and 12V
Physical Characteristics
Length: 220 mm
Width: 50 mm
Weight: 0.5 kg
Material: High-strength steel and aluminum construction
Configuration Details
Injectors per Engine: 1 injector per cylinder
Fuel Control: Electronic delivery control
Cooling Method: Water-cooled injectors
Electrical Specifications
Operating Voltage: 12V standard
Electrical Interface: Connectors for communication and control
Performance Parameters
Fuel Type: DIESEL
Engine Speed Range: 1500-2200 RPM
Injection Timing: Electronically controlled
Injection System: High-pressure common rail
Maintenance Guidelines
Proper maintenance of C11 C13 injectors 2490713 is crucial for ensuring optimal engine performance, fuel efficiency, and longevity. Following these maintenance practices can help prevent costly repairs and downtime:
| Maintenance Task | Recommended Frequency | Importance | Notes |
|---|---|---|---|
| Regular Inspections | Every 10,000 miles / Monthly | High | Check for leaks, damage, and loose electrical connections |
| Fuel Quality Management | Continuous | Critical | Use only high-quality diesel with recommended Cetane rating |
| Fuel Additive Treatment | Every 5,000 miles | Medium | Use diesel injector cleaners to prevent deposits |
| Fuel Filter Replacement | Every 15,000 miles or as recommended | High | Critical for preventing contaminants from reaching injectors |
| Professional Injector Cleaning | Every 30,000-50,000 miles | Medium-High | Removes carbon deposits and restores spray patterns |
| Performance Monitoring | Continuous | Medium | Track fuel consumption, power, and emissions for early problem detection |
| Professional Diagnosis | At signs of performance issues | High | Consult professional mechanic for diagnostic testing |
Important: Always replace injectors with genuine CAT parts or manufacturer-approved alternatives. Counterfeit or low-quality aftermarket injectors may cause severe engine damage and void warranties.
How to Choose C11 C13 Injector 2490713
Selecting the right C11 C13 injector 2490713 requires careful consideration of multiple factors to ensure optimal performance, compatibility, and value. Use this comprehensive guide to make an informed decision:
Market Analysis Considerations
- Assess demand for C11 and C13 engines in your target market
- Determine if customers prefer specific brands or generic parts
- Research current market pricing and availability trends
- Consider regional differences in emission requirements
Compatibility Factors
- Verify exact engine model compatibility (C11 vs. C13)
- Check for wide compatibility across multiple engine variants
- Confirm fitment with your specific engine serial number range
- Assess backward/forward compatibility with system updates
Performance Evaluation
- Compare power output specifications between options
- Analyze fuel efficiency improvements
- Consider emissions compliance capabilities
- Evaluate durability ratings and expected lifespan
Maintenance Requirements
- Compare maintenance intervals between options
- Assess specific maintenance procedures and complexity
- Consider specialized tools or equipment needed
- Evaluate long-term maintenance costs
Repairability & Parts
- Check availability of repair kits and components
- Determine if injectors are rebuildable or one-time use
- Assess availability of diagnostic support
- Consider aftermarket support network
Warranty & Cost Factors
- Compare warranty terms and coverage periods
- Evaluate upfront cost versus expected lifespan
- Calculate total cost of ownership including maintenance
- Consider performance benefits versus premium pricing
Purchasing Tip: When balancing cost and quality, consider the operational context. For mission-critical applications like emergency vehicles or primary income-generating equipment, premium OEM injectors typically offer the best long-term value despite higher initial costs. For secondary equipment or budget-sensitive applications, high-quality remanufactured injectors from reputable suppliers can offer excellent value.
| Selection Factor | OEM Injectors | Quality Remanufactured | Budget Aftermarket |
|---|---|---|---|
| Initial Cost | High | Medium | Low |
| Quality Assurance | Excellent | Good | Variable |
| Expected Lifespan | 500,000-700,000 km | 400,000-600,000 km | 200,000-400,000 km |
| Warranty Coverage | 1-2 years standard | 6-12 months typical | 30-90 days typical |
| Performance Impact | Original specifications | Near-original performance | May have reduced efficiency |
| Best Application | Critical operations | Regular commercial use | Budget-constrained operations |
How to DIY and Replace C11 C13 Injector 2490713
Replacing C11 C13 injectors 2490713 can be challenging but achievable with proper tools and precautions. While professional service is recommended, this step-by-step guide will help those who need to perform the replacement themselves.
Required Tools and Materials
Essential Tools
- Socket wrench set
- Torx screwdriver set
- Needle nose pliers
- Ratchet wrench with extensions
- Torque wrench
Cleaning Supplies
- Wire brush
- Clean, lint-free rags
- Electrical contact cleaner
- Brake cleaner (for degreasing)
Replacement Parts
- New C11 C13 injector 2490713
- Copper washers/seals (if not included)
- O-rings (verify correct sizes)
- Anti-seize compound
Safety Warning: Diesel fuel systems operate under extreme pressure. Ensure the engine is completely cool and pressure has been relieved from the fuel system before beginning work. Always wear appropriate safety equipment including eye protection and gloves.
Step-by-Step Replacement Procedure
Step 1: Prepare the Work Area
Ensure you have adequate lighting, ventilation, and a clean workspace. This prevents contamination of the fuel system and makes it easier to track small components. Allow at least 3-4 hours for the complete procedure.
Step 2: Disconnect the Battery
Locate the negative battery terminal and disconnect it first to prevent electrical shorts or accidental system activation during the repair. Secure the cable away from the terminal.
Step 3: Remove the Engine Cover
Using the appropriate socket wrench, remove the bolts securing the engine cover. Carefully lift the cover away and store it in a safe location to prevent damage.
Step 4: Remove the Air Intake Duct
Loosen the clamps on both ends of the air intake duct using a screwdriver. Carefully remove the duct and set aside, creating workspace access to the injectors.
Step 5: Disconnect the Fuel Lines
Using the appropriate Torx screwdriver, carefully disconnect the high-pressure fuel lines from each injector. Be prepared for some residual fuel spillage. Place a rag underneath to catch any drips.
Important: Label each fuel line connection point to ensure correct reassembly later.
Step 6: Disconnect the Electrical Connections
Locate and disconnect the electrical connectors from each injector. Some may require a release tab to be pressed while others might need a gentle prying motion with needle nose pliers.
Step 7: Remove the Old Injectors
Using the appropriate socket or wrench, remove the bolts securing the injector hold-down brackets. Carefully extract the injectors, using a gentle rocking motion if they're stuck. Never force an injector as this can damage the cylinder head.
Step 8: Clean the Injector Seating Area
Using a wire brush and clean rags, thoroughly clean the injector bores in the cylinder head. Remove all carbon deposits, old seals, and debris. A perfectly clean seating surface is essential for proper sealing.
Step 9: Install the New Injectors
Place new copper washers/seals if required. Carefully insert each new C11 C13 injector 2490713 into its bore, ensuring it seats fully and squarely. Install and torque the hold-down brackets to the manufacturer's specifications using a torque wrench.
Step 10: Reconnect the Electrical Connections
Reattach the electrical connectors to each injector, ensuring they click firmly into place. Verify all connections are secure by gently tugging on them.
Step 11: Reconnect the Fuel Lines
Carefully reconnect the high-pressure fuel lines to each injector, following your earlier labeling. Tighten the connections to the specified torque using the appropriate tool.
Step 12: Reinstall the Air Intake Duct
Replace the air intake duct and secure the clamps at both ends, ensuring proper alignment and a tight seal.
Step 13: Replace the Engine Cover
Reinstall the engine cover and secure all mounting bolts to the proper torque specifications.
Step 14: Reconnect the Battery and Test
Reconnect the negative battery terminal. Prime the fuel system according to the manufacturer's instructions, then start the engine and check for leaks. Monitor engine performance during a test drive, listening for unusual noises or checking for error codes.
DIY Success Tip: After installation, the engine may run roughly for the first few minutes as air is purged from the system. If rough running persists beyond 5 minutes or if any warning lights appear, shut down the engine and recheck all connections.
Frequently Asked Questions
Several warning signs indicate potential injector failure:
- Starting Issues: Difficulty starting the engine, particularly in cold weather
- Performance Problems: Poor acceleration, power loss, or inconsistent power delivery
- Efficiency Reduction: Noticeable decrease in fuel economy
- Rough Idling: Engine runs unevenly or vibrates excessively at idle
- Visible Symptoms: White smoke from exhaust or fuel odor indicating over-fueling
- Knocking Sounds: Unusual engine noises, particularly under acceleration
- Warning Lights: Check engine light or specific injector fault codes
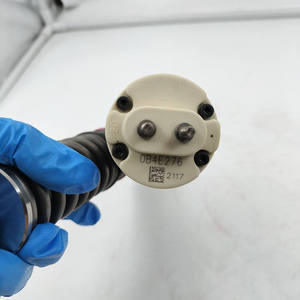
There are several reliable methods to identify whether you have a C11 or C13 engine:
- Engine Nameplate: The most definitive method - locate the metal nameplate on the engine block which will clearly indicate "C11" or "C13" along with the serial number
- Service Manual: Check your vehicle's service manual for specific engine identification information
- Displacement: C11 engines typically have 11.1L displacement while C13 engines have 12.5L displacement
- VIN Lookup: For vehicles, the Vehicle Identification Number can be decoded to determine engine type
- ECM Data: Electronic Control Module data can be accessed with diagnostic tools to confirm engine model
No, the C11 Injector 2490713 and C13 Injector 2490713 are not interchangeable despite sharing a part number reference. These injectors are specifically calibrated for their respective engines with different:
- Injection timing parameters
- Fuel flow rates
- Pressure specifications
- Electronic calibration profiles
Using the wrong injector variant can result in:
- Poor engine performance
- Increased emissions
- Reduced fuel efficiency
- Potential damage to engine components
- Engine control system errors
Always verify the correct injector specification for your specific engine model and serial number range.
The typical service life of C11 and C13 injectors 2490713 ranges from 500,000 to 700,000 kilometers (approximately 300,000 to 435,000 miles) under normal operating conditions. However, actual lifespan varies significantly based on several factors:
- Maintenance Quality: Regular filter changes and fuel system maintenance can extend lifespan
- Fuel Quality: Clean, high-quality diesel with proper cetane rating enhances longevity
- Operating Conditions: Severe duty cycles, extreme temperatures, or high-altitude operation can reduce lifespan
- Idle Time: Excessive idling can accelerate carbon buildup and reduce injector life
- Engine Tuning: Modified engines with increased power settings often experience shortened injector life
With excellent maintenance practices and premium fuel quality, some operators report injector lifespans exceeding 800,000 kilometers.
Using genuine Caterpillar C11 and C13 injectors 2490713 provides several significant advantages:
- Precise Engineering: Manufactured to exact OEM specifications for perfect fit and function
- Quality Materials: Premium components designed for durability in demanding environments
- Performance Optimization: Calibrated specifically for your engine to maintain factory performance standards
- Emissions Compliance: Ensures your engine meets designed emissions standards
- Warranty Protection: Maintains your engine warranty coverage
- System Integration: Fully compatible with engine management systems
- Rigorous Testing: Undergoes extensive quality control beyond typical aftermarket standards
While aftermarket alternatives may offer cost savings, they frequently lack the precision engineering and quality control that ensures optimal engine performance and longevity. In critical applications, the higher initial cost of genuine parts typically translates to better long-term value through improved reliability, efficiency, and reduced downtime.