


Types of Brake Lever Guard
A brake lever guard is an essential motorcycle accessory designed to prevent accidental brake engagement during bike-to-bike contact in racing or during a fall. These protective devices come in various designs to suit different motorcycle types and riding styles.
Single-Point Brake Lever Guard
The most common type, mounted directly to the handlebar and covering the front brake lever.
Best for: Daily commuting, standard motorcycles
Key feature: Simple installation, effective protection against accidental engagement
Dual-Point Brake Lever Guard
Mounted to the handlebar using two points for extra stability and strength.
Best for: Racing, high-performance motorcycles
Key feature: Enhanced stability, stronger protection during high-speed racing
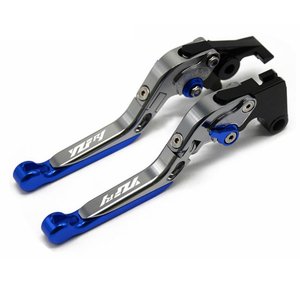
Retractable Brake Lever Guard
Features an advanced design with a retractable mechanism for customized protection.
Best for: Sports bikes, racing applications
Key feature: Adaptable to various lever lengths, customizable reach
Bar-End Brake Lever Guard
Mounted at the end of the handlebar to protect both the brake lever and rider's hands.
Best for: Supermoto and street bikes
Key feature: Dual protection for both hands and levers
Adjustable Brake Lever Guard
Designed with telescopic or sliding mechanisms to fit various handlebar sizes and brake lever lengths.
Best for: Multiple motorcycle models, universal application
Key feature: Versatility across different bike models
Carbon Fiber Brake Lever Guard
Premium option made from lightweight yet strong carbon fiber material.
Best for: Racing, high-performance applications
Key feature: Ultra-lightweight construction with premium aesthetics
Expert Tip: When selecting a brake lever guard type, consider not only your current riding style but also the environment you typically ride in. Racing and track day enthusiasts should prioritize stronger dual-point models, while daily commuters might prefer the simplicity of single-point guards.
| Guard Type | Best Application | Installation Complexity | Protection Level | Price Range |
|---|---|---|---|---|
| Single-Point | Daily riding | Simple | Standard | $ |
| Dual-Point | Racing, high-speed | Moderate | High | $$ |
| Retractable | Sports bikes | Complex | Customizable | $$$ |
| Bar-End | Supermoto, street | Moderate | Extended (hands + lever) | $$ |
| Adjustable | Multiple bikes | Simple to Moderate | Variable | $$ |
| Carbon Fiber | Racing, premium | Moderate | High | $$$$ |
Specifications and Maintenance of Brake Lever Guards
Understanding the key specifications and proper maintenance procedures ensures your bike lever guard provides optimal protection and longevity.
Size Compatibility
The guard should be compatible with your specific brake lever design. It needs sufficient length to cover the lever and appropriate width to fit various lever configurations. This ensures adequate protection and proper fitment.
Material Construction
Modern brake lever guards utilize durable materials including carbon fiber, aircraft-grade aluminum, and high-impact reinforced plastics. These materials offer excellent strength-to-weight ratios and can withstand significant forces during crashes or impacts.
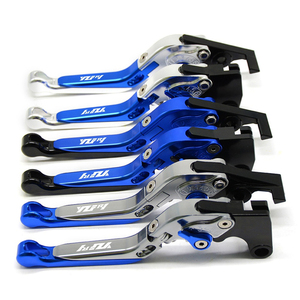
Color Options
While black is the most popular choice for its universal matching capability, brake lever guards also come in racing colors like red, blue, and team-specific color schemes. Some manufacturers offer customizable color options to match your bike's aesthetics.
Installation Hardware
Quality brake lever guards include all necessary mounting hardware such as bolts, washers, and mounting brackets. Some premium options include model-specific adapters to ensure perfect fitment across different motorcycle makes and models.
Maintenance Requirements
Regular maintenance involves inspecting for wear, damage, or loose fittings. Check the mounting hardware after every race or every few weeks for street riding. Replace damaged guards immediately as compromised guards may fail during critical moments.
Safety Warning: Never modify the brake lever guard in ways not recommended by the manufacturer. Improper modifications can compromise the structural integrity and may lead to failure during an accident.
| Maintenance Task | Frequency | Tools Required | Notes |
|---|---|---|---|
| Visual inspection | Before each ride | None | Check for cracks or deformation |
| Hardware tightening | Weekly or after off-road riding | Allen wrenches, socket set | Verify torque specifications |
| Deep cleaning | Monthly | Soft cloth, mild soap | Avoid harsh chemicals on carbon fiber |
| Full inspection | After any crash or impact | Various tools | Replace if any damage is visible |
How to Choose Brake Lever Guard
Selecting the right lever guard for your motorcycle requires careful consideration of several key factors. Whether for retail stocking or personal use, these guidelines will help ensure you make the optimal choice.
Motorcycle Compatibility
Brake lever guards are designed for specific motorcycle models. Ensure the guard is compatible with your bike's make, model, and year. Universal options exist but may require additional modifications for perfect fitment.
Pro tip: Check the manufacturer's compatibility list before purchasing
Material and Durability
Consider the guard's construction material based on your riding style. Carbon fiber offers premium lightweight protection for racing, while aluminum provides excellent durability for everyday riding at a more accessible price point.
Pro tip: Carbon fiber guards are up to 40% lighter than aluminum equivalents
Mounting Options
Different guards attach to various points on your motorcycle. Handlebar-mounted guards are most common, while bar-end models provide additional hand protection. Consider where and how the guard will be mounted based on your bike's configuration.
Pro tip: Bar-end mounts may interfere with some aftermarket grips
Adjustability
Adjustable guards offer versatility to fit different handlebar sizes and brake lever lengths. This feature is especially valuable if you own multiple motorcycles or frequently modify your controls.
Pro tip: Look for guards with tool-free adjustment capabilities
Retailer Advice: Stock a variety of guards across multiple price points. Entry-level aluminum guards appeal to budget-conscious riders, while premium carbon fiber options attract performance enthusiasts. Offering both ensures you meet the needs of your entire customer base.
| Selection Factor | Importance | Considerations |
|---|---|---|
| Motorcycle Compatibility | Critical | Verify exact model fit, especially for sports and racing bikes |
| Material | High | Balance between weight, strength, and budget |
| Mounting Method | High | Consider handlebar configuration and existing accessories |
| Adjustability | Medium | Important for universal applications or changing setups |
| Color/Style | Low-Medium | Match bike aesthetics; black offers most versatility |
| Installation Complexity | Medium | Consider user mechanical ability and included instructions |
| Additional Features | Low | Wind deflection, extended protection, aerodynamic design |
How to DIY and Replace Brake Lever Guard
Installing or replacing a bike lever protector is a straightforward DIY project that most riders can complete in under 30 minutes with basic tools. Follow these step-by-step instructions for a successful installation.
Tools and Materials Needed:
- Appropriate brake lever guard kit for your motorcycle model
- Screwdriver set (Phillips and flathead)
- Allen/hex key set (typically 3mm-6mm)
- Small socket wrench set
- Clean rags
- Optional: thread-locking compound
Prepare your workspace - Position your motorcycle in a well-lit area with plenty of room to work. Use a center stand if available for maximum stability. Clean the handlebar area and brake lever assembly thoroughly.
Remove existing guard (if applicable) - If replacing an old guard, carefully remove it by loosening the mounting bolts or screws. Keep track of all hardware in case you need to reuse any components.
Clean installation area - Thoroughly clean the mounting points on the handlebar or brake assembly to ensure proper fitment and adhesion of the new guard.
Pre-fit the new guard - Before final installation, position the new brake lever guard in place without fully tightening to ensure proper alignment with the brake lever. Check that the guard doesn't interfere with normal lever operation.
Install mounting hardware - Following the manufacturer's instructions, secure the brake lever guard using the provided hardware. If no instructions are available, typically the guard mounts to the handlebar using a clamp or direct mounting to the brake perch.
Align and adjust - Properly align the guard so it provides maximum protection without interfering with brake lever operation. For adjustable guards, set the position to allow normal lever function while still protecting from accidental activation.
Secure all fasteners - Once properly positioned, tighten all mounting hardware to the specified torque settings. Consider using a small amount of thread-locking compound for added security, especially for off-road applications.
Test operation - With the installation complete, test the brake lever operation to ensure the guard doesn't interfere with normal braking. The lever should move freely while the guard prevents accidental engagement.
Perform safety checks - After installation, perform a comprehensive safety check. Ensure all hardware is tight, the guard is securely mounted, and there are no loose components that could compromise safety during riding.
Important Safety Note: After installation, always test your brakes at low speed in a safe area before normal riding. Ensure the guard doesn't interfere with proper brake function in any way. If you notice any issues with brake performance, immediately stop and reassess the installation.
Maintenance Reminder: Regularly check your brake lever guard for tightness, especially after off-road riding or any impacts. Vibration can gradually loosen mounting hardware, potentially compromising protection when you need it most.
Questions and Answers
A brake lever guard serves multiple crucial safety functions for motorcyclists:
- Prevents accidental brake activation during close racing conditions or bike-to-bike contact
- Reduces crash risk by preventing front wheel lock-up from unintended brake engagement
- Protects the brake lever from damage during falls or crashes
- Provides additional hand protection in certain designs (especially bar-end models)
- Required equipment for many racing organizations and track day events
The primary function is preventing your front brake from being inadvertently activated when another rider or object makes contact with your handlebars, which could cause immediate front wheel lockup and a potentially serious crash.
The installation process varies by guard type, but generally follows these steps:
| Guard Type | Installation Method | Tools Required | Difficulty Level |
|---|---|---|---|
| Handlebar-mounted | Clamps to handlebar using bracket | Allen keys, screwdriver | Easy |
| Bar-end mounted | Replaces handlebar end weights | Allen keys, socket wrench | Easy |
| Master cylinder mounted | Attaches to brake master cylinder | Allen keys, socket set | Moderate |
| Integrated handguard | Mounts to handlebar and fork/triple clamp | Various wrenches and sockets | Complex |
Always follow the manufacturer's specific instructions, as improper installation can compromise safety. Professional installation is recommended for complex systems or if you're unfamiliar with motorcycle modifications.
Beyond the six main types covered earlier (Single-Point, Dual-Point, Retractable, Bar-End, Adjustable, and Carbon Fiber), there are specialized variants including:
Handguard with Integrated Lever Protection
Primarily used in off-road riding, these provide comprehensive protection for both the rider's hands and brake levers from branches, debris, and crashes. They typically mount to both the handlebar and either the fork tube or triple clamp for maximum strength.
Folding/Collapsible Guards
Designed to fold away when not needed, these guards can be deployed for racing or track days and folded back for street riding. This versatility makes them popular among riders who use their motorcycles in multiple environments.
Each design offers different benefits depending on your riding style, motorcycle type, and specific protection needs.
While not universally required for all motorcycles, brake lever guards are strongly recommended for:
- Sport bikes and race motorcycles - Essential for close competition where handlebar contact is possible
- Track day motorcycles - Often required by track day organizers for safety
- Off-road and adventure motorcycles - Provides protection from branches and during falls
- Group riding motorcycles - Helpful when riding in close formation with other motorcyclists
For casual street riding and cruisers, they're optional but still provide valuable protection. In motorcycle racing, they're typically mandatory equipment per technical regulations.
Brake lever guards come in both universal and model-specific designs:
- Universal guards typically feature adjustable mounting systems that can accommodate various handlebar sizes and configurations. They may require some modification for optimal fitment on certain motorcycles.
- Model-specific guards are designed for particular motorcycle makes and models, offering perfect fitment without modification but limited cross-compatibility.
When selecting a universal guard, verify it will work with your motorcycle's specific handlebar diameter, brake lever design, and available mounting space. Some universal guards include multiple mounting kits to increase compatibility across different motorcycle types.
Shopping Advice: For precision fit and optimal protection, model-specific guards are generally preferable when available. Universal guards offer greater flexibility for modified motorcycles or less common models without dedicated options.