


Types of Body Kit for Honda Freed
A body kit for Honda Freed is a popular modification option designed to enhance the car's aesthetics and improve aerodynamic performance. These kits typically include modified front and rear bumpers, side skirts, spoilers, fenders, and other styling components that dramatically alter the vehicle’s appearance while potentially offering functional benefits.
Choosing the right body kit can significantly impact how your Honda Freed looks and performs on the road. Each type of body kit serves a specific purpose and offers different levels of customization and performance enhancement.
Full Kits
The most comprehensive upgrade option available, full body kits transform the entire exterior of the Honda Freed.
Advantages
- Complete transformation of vehicle appearance
- Improved aerodynamics across all angles
- Professional, cohesive look
- Potential increase in resale value
Limitations
- Higher cost compared to partial kits
- More complex installation process
- May require painting to match original color
Best for: Owners seeking complete exterior transformation, show-quality vehicles, and enthusiasts prioritizing aesthetics and aerodynamics
Conversion Kits
Designed to mimic the appearance of more expensive or sportier models within Honda's lineup or even rival brands.
Advantages
- Cost-effective way to achieve premium looks
- Unique styling options not available on stock Freed
- Increases visual appeal without major modifications
Limitations
- Limited compatibility with certain model years
- May require minor fabrication during installation
- Not always street legal in all jurisdictions
Best for: Budget-conscious owners wanting luxury or sporty looks like Freed Gathers, N-Box, or N-Concept models
Styling Kits
Focused primarily on enhancing visual appeal through subtle yet effective design elements.
Advantages
- Easy to install with minimal modifications
- Cost-effective way to refresh vehicle appearance
- Improves aggressive stance and modernity
- Available in various styles and materials
Limitations
- Limited aerodynamic benefits
- Less dramatic transformation than full kits
- Potential for low-quality knockoffs
Best for: Owners looking for a quick style update with spoiler lips, canards, and modest front/rear accents
Performance Body Kits
Engineered specifically for enhanced driving dynamics rather than just appearance.
Advantages
- Significant aerodynamic improvements
- Better high-speed stability and handling
- Functional components like splitters and diffusers
- Enhanced cooling and airflow management
Limitations
- Most expensive option
- May be overkill for daily drivers
- Requires proper tuning for optimal effect
Best for: Track-oriented builds, enthusiasts focused on handling improvements, and drivers who frequently travel at higher speeds
Universal Body Kits
Designed to fit multiple vehicle platforms, including the Honda Freed with some adaptation.
Advantages
- Most affordable entry-level option
- Widely available from many retailers
- Quick solution for budget builds
Limitations
- Potential fitment issues requiring modification
- Inconsistent quality between manufacturers
- Limited design options tailored to Freed
Best for: DIY enthusiasts comfortable with fabrication, temporary projects, or those testing the waters of body modifications
| Type | Style Impact | Performance Benefit | Installation Complexity | Ideal Use Case |
|---|---|---|---|---|
| Full Kit | Excellent | Good | High | Complete exterior transformation with cohesive styling |
| Conversion Kit | Excellent | Moderate | Moderate | Creating luxury/sporty look similar to other models |
| Styling Kit | Good | Fair | Low | Minor aesthetic upgrades with minimal effort |
| Performance Kit | Good | Excellent | Very High | Track-focused builds and serious aerodynamic improvements |
| Universal Kit | Moderate | Fair | Moderate | Budget-friendly entry into body modifications |
Expert Tip: Before purchasing any body kit for your Honda Freed, verify compatibility with your specific model year (Freed, Freed+, or Freed Hybrid) and trim level. Some kits may require additional modifications or professional installation for proper fitment and finish.
Specifications and Maintenance of Body Kit for Honda Freed
Understanding Honda Freed Body Kits
Body kits enhance the aesthetic appeal and performance characteristics of your Honda Freed. These kits are typically made from materials like ABS plastic, polyurethane, or carbon fiber, each offering unique benefits in terms of durability, weight, and visual impact. Proper maintenance is crucial to preserve both the appearance and functionality of these components.
Key Maintenance Practices
Regular Cleaning
Freed body kits require regular cleaning to maintain their pristine appearance and structural integrity. Materials such as ABS plastic, polyurethane, and carbon fiber can be susceptible to surface damage if not properly cared for.
Dirt, mud, and environmental debris that accumulate on the body kit can cause scratches, discoloration, and even premature wear over time. Use a gentle car wash solution along with a soft microfiber cloth or sponge to remove contaminants without damaging the surface.
Avoid abrasive cleaners, stiff brushes, or any tools that could scratch or mar the finish. For stubborn grime, allow the cleaning solution to dwell for a few moments before gently wiping away residue.
Protective Coatings
Applying protective coatings such as sealants or ceramic coatings offers significant benefits for Honda Freed body kits. These treatments create a durable barrier against UV rays, oxidation, acid rain, bird droppings, and other environmental contaminants.
Ceramic coatings, in particular, provide long-lasting hydrophobic properties that make water and dirt bead off easily, simplifying cleaning and reducing maintenance frequency. Additionally, they enhance the depth and gloss of painted surfaces, giving your body kit a showroom-quality shine.
Ensure the surface is thoroughly clean and dry before applying any coating. Follow manufacturer instructions carefully for best results and longevity.
Regular Inspection
Perform routine inspections of your Honda Freed’s body kit to identify any signs of wear or damage. Look for cracks, chips, warping, or areas where the material may have become discolored or degraded due to prolonged exposure to sunlight or chemicals.
Also check all mounting points, brackets, and hardware for looseness or corrosion. Loose components can rattle while driving or potentially detach, posing safety risks and reducing aerodynamic efficiency.
If you notice any issues during inspection, address them promptly. Small problems can escalate into larger ones if ignored, leading to more expensive repairs or replacements down the line.
Avoid Harsh Chemicals
Harsh solvents, degreasers, and acidic cleaners can degrade the materials used in body kits, especially softer plastics and composites. Always use automotive-specific cleaning products that are formulated to be safe for exterior trim, paint, and synthetic materials.
Test any new cleaner on a small, inconspicuous area first to ensure it doesn’t cause discoloration or damage. If in doubt, consult the manufacturer’s recommendations for approved cleaning agents.
For daily maintenance, stick to pH-neutral shampoos and gentle detailing sprays that won’t strip protective layers or compromise the material's integrity.
| Maintenance Task | Recommended Frequency | Tools & Products Needed |
|---|---|---|
| Surface Cleaning | Bi-weekly or after long drives | Gentle car shampoo, microfiber cloths, soft sponge |
| Protective Coating Application | Every 3–6 months (ceramic), 1–2 months (sealant) | Ceramic coating, applicator pads, polish |
| Hardware Check | Monthly or after rough terrain | Screwdriver, torque wrench, silicone lubricant |
| Full Detailing | Quarterly | Clay bar, polishing compound, wax |
Important: Never attempt to repair cracked or broken body kit components with adhesives or fillers unless specifically recommended by the manufacturer. Improper repairs can weaken the structure, create unsafe conditions, and void warranties. When in doubt, replace damaged components with OEM or high-quality aftermarket alternatives.
How to Choose a Body Kit for Honda Freed
Selecting the perfect body kit for your Honda Freed is more than just an aesthetic decision—it’s about enhancing the vehicle's character, performance, and uniqueness. A well-chosen body kit can transform your car into a personalized expression of style while potentially improving aerodynamics and handling. Here are the key considerations when selecting a body kit for your Honda Freed:
Style Preferences
Your personal taste plays a major role in choosing the right body kit. Whether you're aiming for a sporty, aggressive look or something sleek and minimalist, there’s a wide range of designs tailored for the Honda Freed.
- Sport Kits: Include front bumpers with air dams, side skirts, rear spoilers, and diffusers for a dynamic appearance.
- Street Style Kits: Focus on clean lines and subtle enhancements without over-the-top styling.
- Racing-Inspired Kits: Feature exaggerated components like wide fenders, large splitters, and vented panels for a track-ready aesthetic.
Tip: Consider how the kit will complement existing features of your Honda Freed and whether it aligns with your long-term vision for the vehicle.
Quality and Durability
The material used in the body kit significantly affects both its lifespan and performance. High-quality materials ensure that your investment lasts through various weather conditions and driving environments.
- ABS Plastic: Lightweight, impact-resistant, and paintable—ideal for budget-conscious buyers seeking good quality.
- Polyurethane: More flexible and durable than ABS, making it excellent for parts exposed to road debris or minor impacts.
- Carbon Fiber: Offers a premium look and exceptional strength-to-weight ratio, though typically more expensive.
Pro Tip: Always check customer reviews and manufacturer warranties to assess the real-world durability of the kit.
Fitment and Compatibility
Ensuring proper fitment is crucial for both aesthetics and function. Honda Freed models may vary slightly by year and trim level, so confirm that the body kit is specifically designed for your model.
- Look for kits labeled as "model-specific" rather than universal fitments.
- Verify if any modifications (like drilling or trimming) are required during installation.
- Check if all necessary hardware and mounting points are included or compatible with your vehicle.
Note: Some manufacturers offer test-fit guarantees or return policies for misfitting parts—take advantage of these offers.
Performance Enhancement
A body kit isn't just about looks; many kits are engineered to improve aerodynamic efficiency and stability at higher speeds. This is especially important for drivers who enjoy spirited driving or highway cruising.
- Front splitters reduce lift and increase downforce.
- Rear spoilers help stabilize airflow over the vehicle at speed.
- Side skirts minimize turbulence under the car, improving drag coefficient.
- Detailed diffusers optimize airflow exiting the rear of the vehicle.
Key Insight: While visual appeal is important, performance-focused kits often provide functional benefits that enhance driving dynamics.
Ease of Installation
Installation complexity varies depending on the brand and design of the body kit. Some kits are plug-and-play, while others require professional assistance or bodywork expertise.
- DIY-friendly kits usually come with detailed instructions and pre-drilled mounting points.
- Professional installations may be needed for complex kits requiring painting, cutting, or welding.
- Some kits include paint-matching options or primer-ready surfaces to simplify finishing touches.
Advice: If unsure about your mechanical skills, opt for a professionally installed kit or seek assistance from a reputable shop.
Warranty and Support
A reliable warranty and responsive customer support can make a significant difference if issues arise after purchase. Many high-end manufacturers offer coverage against manufacturing defects, warping, or cracking.
- Read the fine print—some warranties cover only certain parts or specific types of damage.
- Contact the manufacturer directly to gauge their responsiveness and willingness to assist.
- Check online forums or review sites for feedback from other owners regarding post-purchase service.
Recommendation: Prioritize brands that offer clear return policies and accessible technical support.
Budget Planning: When setting your budget for a Honda Freed body kit, consider not only the cost of the kit itself but also additional expenses such as shipping, painting, and installation. Entry-level kits can start around $300–$500, while premium carbon fiber sets may exceed $1,500. Professional installation could add another $200–$600 depending on complexity and location.
| Material Type | Pros | Cons | Estimated Cost Range |
|---|---|---|---|
| ABS Plastic | Affordable, lightweight, easy to install | Less durable, may warp over time | $300 - $600 |
| Polyurethane | Durable, flexible, resistant to impacts | Heavier, slightly more expensive | $500 - $900 |
| Carbon Fiber | Lightweight, extremely durable, premium look | High cost, requires expert handling | $1,000 - $2,000+ |
| Fiberglass | Inexpensive, customizable | Prone to cracking, heavier than composites | $400 - $800 |
DIY Guide for Installing a Body Kit on Honda Freed
Installing a body kit on your Honda Freed can dramatically enhance its appearance while offering a fun and rewarding DIY project. Whether you're aiming for a sportier look or improved aerodynamics, following the proper installation steps ensures both safety and aesthetic satisfaction. This guide will walk you through the process with tips to help avoid common mistakes.
Safety Warning: Always work in a well-lit, ventilated area and wear protective gloves and eyewear when handling adhesives or power tools. Ensure the vehicle is parked on a level surface with the parking brake engaged before beginning any installation.
Preparation Steps Before Installation
- Review the Manual
- Thoroughly read the manufacturer’s installation instructions included in the body kit package.
- Note any specific requirements such as adhesive types, hardware, or specialized tools needed.
- Check for all parts listed in the manual to ensure nothing is missing from the kit.
- Vinyl and Surface Preparation
- Wash the car thoroughly using automotive soap to remove dirt, wax, or grease that could interfere with adhesion.
- Dry the vehicle completely with a microfiber towel or chamois.
- Use rubbing alcohol or a degreaser to wipe down areas where components will be attached.
- Dry-Fitting Components
- Before applying any adhesive or drilling holes, perform a dry-fit of each part to verify fitment and alignment.
- Adjust positioning as necessary and mark mounting points if required by the design.
- This step helps prevent irreversible mistakes during the actual installation.
| Installation Phase | Key Tasks | Potential Pitfalls | Tools & Materials Needed |
|---|---|---|---|
| Preparation | Reading instructions, washing vehicle, dry-fitting parts | Skipping the dry-fit, not checking for missing parts | Car wash supplies, paper towels, marking pen |
| Adhesive Application | Applying recommended bonding agent evenly, allowing setup time | Rushing application, uneven coverage leading to poor adhesion | Automotive-grade adhesive (e.g., 3M), applicator nozzles |
| Mounting Components | Securing parts with provided hardware or clips | Over-tightening screws causing plastic cracks | Screwdriver set, torque wrench (if specified) |
| Electrical Work | Routing wires safely, connecting to fuse box or existing circuits | Short circuits due to improper grounding or insulation | Wire strippers, electrical tape, zip ties |
| Curing & Testing | Allowing full cure time, checking gaps and finish | Driving too soon, causing misalignment or detachment | Patience and inspection checklist |
Pro Tip: If your body kit includes LED lighting or other electronic accessories, test them before final installation to ensure functionality. Route wires away from moving parts and use zip ties to keep wiring neat and secure.
Installation Process Breakdown
- Install Components in Order
- Begin with smaller pieces like side skirts, rear diffusers, or lip spoilers before tackling larger components like bumpers.
- Apply adhesive according to the manufacturer's instructions—some may require drying time before pressing into place.
- If hardware is included, use it sparingly to avoid over-cluttering or damaging the paint.
- Handle Electrical Add-ons Carefully
- Route wires along existing channels or under trim to hide them effectively.
- Connect to the vehicle’s electrical system using relay kits or fused circuits to prevent overloading.
- Always double-check connections with a multimeter before powering up lights or accessories.
- Final Fit Check and Adjustments
- Once all parts are installed, visually inspect for alignment issues, uneven gaps, or warping.
- Make minor adjustments by gently bending or repositioning panels before the adhesive fully sets.
- Ensure all components are securely fastened and do not rattle or vibrate at highway speeds.
- Curing and Post-Installation Care
- Allow the adhesive to cure fully as per the product guidelines—typically 24–48 hours.
- Avoid driving the vehicle during this time, especially on rough roads or highways.
- After curing, give the entire kit a gentle tug test to confirm secure attachment.
Customization Suggestion: Consider adding carbon fiber accents or custom paint matching your body kit for a personalized touch. Always apply UV protection coatings to painted parts to prevent fading or discoloration from sun exposure.
Q and A About Honda Freed Body Kits
A body kit for the Honda Freed is a collection of exterior components designed to modify and enhance the vehicle's appearance, while sometimes offering performance benefits. These kits typically replace or augment original factory parts with more aggressive, sporty, or custom styling elements. The primary purpose of a body kit is to give the Honda Freed a unique visual identity that stands out from stock models.
Commonly made from materials like fiberglass, polyurethane, ABS plastic, or carbon fiber, these kits can be tailored to suit different aesthetics—ranging from subtle enhancements to full-on tuner-style transformations. They are popular among car enthusiasts who want to personalize their vehicles without making mechanical modifications.
A standard body kit for the Honda Freed includes several key components that transform the vehicle’s exterior:
- Front bumper: Often redesigned with larger air intakes, LED lighting integration, and sharper contours.
- Rear bumper: May feature dual exhaust cutouts, diffuser-like designs, or added reflectors.
- Side skirts: Add a lower, wider appearance and reduce airflow under the vehicle.
- Fender flares: Provide a more muscular look and accommodate wider tires if desired.
- Rear spoiler or wing: Enhances aerodynamics and adds a sporty profile.
- Hood vents: Improve engine cooling and offer a functional aesthetic.
Premium kits may also include:
- Custom grilles
- Roof spoilers or sunroof extensions
- Additional lighting (e.g., DRLs, fog lights)
- Widened wheel arches
- Lower body cladding or trim pieces
The exact contents vary depending on whether the kit is full-body, half-body, or partial.
While the main function of a body kit is cosmetic, certain design choices can have secondary effects on performance:
- Aerodynamics: A well-designed body kit can improve airflow around the vehicle, reducing drag and increasing stability at higher speeds. Front lips and rear spoilers help manage downforce and turbulence.
- Weight savings: Many aftermarket kits use lightweight materials such as carbon fiber or ABS, which can reduce overall vehicle weight compared to OEM parts—potentially improving acceleration and fuel efficiency.
- Cooling improvements: Hood vents and modified bumpers can increase airflow to the radiator and brakes, aiding in thermal management during spirited driving.
- Ground clearance: Some aggressive kits lower the front or side profiles, which might slightly impact ground clearance but often enhances cornering dynamics.
It’s important to note that not all body kits are engineered for performance gains—some are purely aesthetic. Proper fitment and material quality are essential to ensure safety and long-term functionality.
The complexity of installing a Honda Freed body kit depends on the type of kit and the level of customization involved:
- Bolt-on kits: These are the easiest to install and usually require basic tools and moderate mechanical knowledge. They attach directly to existing mounting points without cutting or drilling.
- Modified kits: Some kits may require trimming, welding, or reshaping the car's body panels for proper fitment. These installations should be performed by experienced professionals.
- Painted vs. unpainted: Unpainted kits will need preparation, priming, and painting to match your vehicle's color, adding time and labor to the process.
DIY-friendly kits can take anywhere from 6–12 hours to install, depending on experience. However, for best results and to avoid damage to the vehicle, it's often recommended to hire a professional mechanic or body shop, especially for high-end or widebody kits.
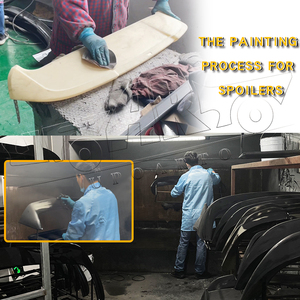
Yes, body kits for the Honda Freed can absolutely be painted in any color you desire. In fact, one of the major advantages of aftermarket body kits is the ability to customize them to match your personal style or the original paint scheme of your car.
Here are some common options:
- Factory color match: Most professional painters can match your car’s original paint code to ensure seamless blending.
- Different color accents: Some owners choose to paint specific parts (like the front bumper or side skirts) in contrasting colors for a two-tone effect.
- Metallic, matte, or gloss finishes: High-quality paints allow for various textures and sheens to further personalize the look.
To ensure durability and longevity, it's highly recommended to have the body kit professionally painted using automotive-grade primer and paint. This protects against UV fading, chipping, and weathering. Always apply a clear coat finish for added protection and shine.