


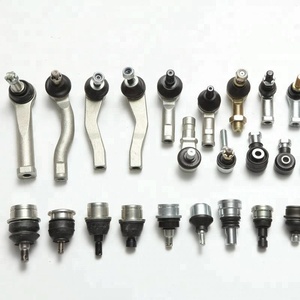


Types of Ball Joint Linkage
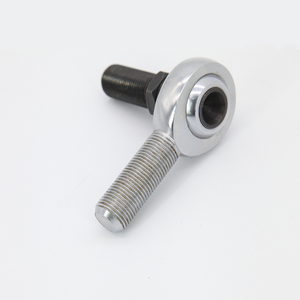
A ball joint linkage is a mechanical connection featuring a ball-and-socket joint that permits a wide range of motion while maintaining stability between components. Most commonly found in automotive steering and suspension systems, these critical components connect the control arm to the wheel hub assembly, allowing wheels to move vertically while enabling steering maneuvers. Ball joint linkages are fundamental to vehicle stability, handling performance, and overall safety.
Expert Insight: Ball joint linkages are the most crucial pivot points in your vehicle's suspension system. They bear the entire weight of your vehicle while allowing the suspension to move smoothly through its travel range.
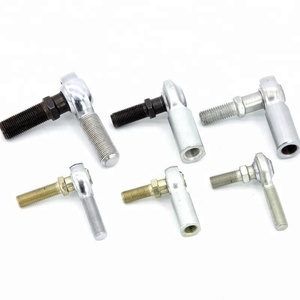
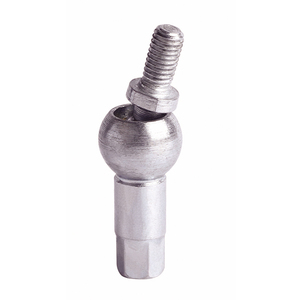
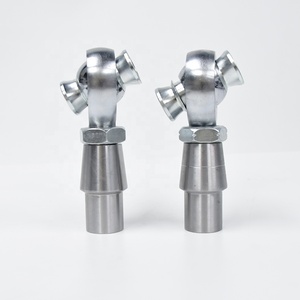
Regular Ball Joint Linkage
The most common type, consisting of a ball stud and socket design. The ball stud connects to either a control arm or steering knuckle and offers multi-directional movement.
Types:
- Threaded: Ball stud has bolt-like threads for screwing into components
- Non-Threaded: Ball stud has a smooth shaft secured with clamps or pinch bolts
Loaded Ball Joint Linkage
Pre-loaded with constant force to maintain optimal contact between the ball and socket. They excel in suspension systems that handle steady loads like vehicle and passenger weight.
Benefits: Enhanced alignment stability and reduced wear rates
Moog Ball Joint Linkage
Premium brand ball joints designed for heavy-duty and performance applications. Features include alloy steel housings, hardened steel balls, and sintered metal bearings.
Best for: Trucks, buses, commercial vehicles, and high-performance applications
Hydraulic Ball Joint Linkage
Uses hydraulic fluid for variable preload force that can be adjusted as needed. Automatically adapts to load changes, making them ideal for vehicles that frequently carry varying cargo weights.
Function: Self-adjusting to maintain optimal performance under changing loads
Composite Ball Joint Linkage
Manufactured from advanced composite materials offering significant weight reduction and superior corrosion resistance compared to traditional metal designs.
Applications: Aviation, aerospace, and weight-critical systems
Sealed and Lubricated Ball Joint Linkage
Contains internal grease to reduce friction and is enclosed with a protective rubber or plastic boot to prevent contamination from environmental elements.
Advantage: Lower maintenance requirements and extended service life
| Ball Joint Type | Best Application | Key Advantages | Maintenance Level |
|---|---|---|---|
| Regular (Threaded) | Standard passenger vehicles | Easy installation, widely available | Moderate |
| Regular (Non-Threaded) | Custom applications, performance vehicles | Adjustable positioning, secure connection | Moderate |
| Loaded | Daily drivers, family vehicles | Enhanced alignment, reduced wear | Low to Moderate |
| Moog | Heavy-duty vehicles, commercial applications | Superior durability, performance design | Low |
| Hydraulic | Vehicles with variable loads | Self-adjusting, adaptive performance | High |
| Composite | Lightweight applications, aerospace | Weight reduction, corrosion resistance | Low |
| Sealed and Lubricated | All-weather vehicles, off-road applications | Protection from contaminants, extended life | Very Low |
Specifications of Ball Joint Linkage
Understanding the technical specifications of ball joint linkages is essential for ensuring proper functionality, safety, and longevity in automotive applications. These specifications determine the performance characteristics and suitability for specific vehicles and operating conditions.
Load Capacity
The maximum load a ball joint can support without failure or excessive wear. The industry standard for passenger vehicles requires a minimum capacity of 1200 pounds per joint.
Critical for: Vehicle safety and handling stability
Materials
Common materials include:
- Carbon Steel: Excellent durability and toughness
- Forged Steel: Heat-treated for increased strength
- Stainless Steel: Superior corrosion resistance
Joint Types
Available in two primary categories:
- Regular: Standard specification for most passenger vehicles
- Heavy-duty: Enhanced design for commercial vehicles and trucks
Vehicle Compatibility
Ball joint designs are specific to vehicle makes and models. Manufacturers provide compatibility charts to ensure proper fitment.
Note: Always verify compatibility before purchase
Wear & Corrosion Resistance
Quality ball joints feature specialized surface treatments and coatings to resist environmental damage and extend operational life.
Common treatments include zinc plating, phosphate coating, and chrome plating.
Installation Design
Modern ball joints incorporate user-friendly design elements for easier installation and removal, including:
- Pre-installed studs
- Integrated dust boots
- Standardized mounting patterns
Safety Warning: Never compromise on ball joint quality to save costs. Failure of this critical component can lead to catastrophic loss of vehicle control and potential accidents. Always choose ball joints that meet or exceed OEM specifications.
Maintenance of Ball Joint Linkage
Proper maintenance of ball joint linkages is essential for ensuring vehicle safety, optimal handling, and maximizing component lifespan. Following these maintenance practices can help prevent premature failure and costly repairs.
| Maintenance Task | Frequency | Purpose | Tools Required |
|---|---|---|---|
| Visual Inspection | Monthly | Identify damage, wear, or looseness | Flashlight, inspection mirror |
| Lubrication | Every 3-6 months | Reduce friction and extend lifespan | Grease gun, recommended lubricant |
| Torque Check | Every 6 months | Ensure proper fastener tension | Torque wrench, socket set |
| Alignment Check | Annually or after suspension work | Verify proper wheel alignment | Alignment tools or professional service |
| Boot Inspection | Every 3 months | Check for cracks or tears in protective boot | Flashlight, inspection mirror |
| Complete Replacement | Every 70,000 miles or when worn | Replace entire assembly before failure | Vehicle-specific ball joint tools |
Professional Tip: When inspecting ball joints, look for grease leakage around the boot - this is often the first sign of impending failure. Also, listen for clunking noises when driving over bumps, which typically indicates excessive play in the joint.
Warning Signs of Ball Joint Failure
- Uneven tire wear - particularly on inside or outside edges
- Clunking or knocking noises - especially when driving over bumps
- Vibration or wandering - vehicle pulls to one side during driving
- Visible damage - torn boots, grease leakage, or rust accumulation
- Excessive wheel movement - when the suspension is loaded or unloaded
Critical Safety Information: Ball joint failure can cause the wheel to separate from the vehicle while driving, resulting in complete loss of control. Never postpone replacement of worn ball joints, even if symptoms seem minor.
How to Choose Ball Joint Linkage
Selecting the right ball joint linkage requires consideration of several important factors to ensure optimal performance, safety, and longevity for your specific application.
Load Capacity & Strength
Select ball joints with appropriate load ratings for your vehicle type and usage patterns. Consider:
- Vehicle weight (including passengers and cargo)
- Dynamic loads during cornering and braking
- Towing or hauling requirements
Best Practice: Choose ball joints with at least 20% higher capacity than minimum requirements
Material Selection
Different materials offer specific advantages:
- Steel: Excellent strength and durability for heavy-duty applications
- Aluminum: Lightweight option that reduces unsprung weight for better handling
- Forged Steel: Superior impact resistance for off-road or performance use
Consideration: Match material to environmental conditions (e.g., corrosion resistance for coastal areas)
Size & Dimensions
Ensure proper fitment with your specific vehicle:
- Ball stud diameter must match mounting points
- Socket size must accommodate the ball correctly
- Overall dimensions must fit within suspension geometry
Important: Even small size variations can affect handling and component life
Maintenance Features
Consider maintenance requirements:
- Grease fittings for regular lubrication
- Sealed designs for reduced maintenance
- Replaceable components vs. full assembly replacement
Tip: Sealed designs cost more initially but save on maintenance long-term
Expert Advice: When upgrading suspension components, always replace ball joints in pairs (left and right sides) even if only one shows wear. This ensures balanced handling and prevents uneven wear on other components.
Quality Indicators
Look for these quality indicators when selecting ball joint linkages:
| Feature | Quality Indicator | Benefit |
|---|---|---|
| Construction | One-piece forged housing | Superior strength and durability |
| Ball Stud | Hardened steel with polished surface | Reduced friction and wear |
| Boot Material | Synthetic rubber with reinforced design | Better protection from contaminants |
| Bearing Material | Sintered metal or polymer composite | Extended service life under load |
| Warranty | Lifetime or extended coverage | Manufacturer confidence in quality |
DIY Replacement of Ball Joint Linkage
Replacing ball joint linkages can be accomplished as a DIY project with the right tools, knowledge, and attention to detail. Follow this comprehensive step-by-step guide to safely replace your vehicle's ball joints.
Safety Warning: Ball joints are critical safety components. If you're unsure about performing this repair yourself, consult a professional mechanic. Always follow manufacturer specifications and torque values precisely.
Tools and Materials Needed
- Floor jack and jack stands
- Lug wrench
- Socket set and wrenches
- Torque wrench
- Ball joint separator tool (pickle fork)
- Ball joint press kit (for press-in ball joints)
- Hammer
- Penetrating oil
- Wire brush
- New ball joint assembly (compatible with your vehicle)
- New cotter pins (if applicable)
- Wheel chocks
Step-by-Step Replacement Guide
-
Prepare the Vehicle
Park on a flat, level surface. Engage the parking brake and chock the wheels opposite to the side you're working on. Loosen (but don't remove) the lug nuts on the wheel before lifting the vehicle.
-
Lift and Secure the Vehicle
Using a floor jack, lift the vehicle at the recommended lifting point. Place jack stands under appropriate support points and lower the vehicle onto them. Never rely solely on a hydraulic jack for support.
-
Remove the Wheel
Remove the lug nuts completely and take off the wheel to access the suspension components. Set the wheel aside in a safe location.
-
Disconnect Related Components
Depending on your vehicle, you may need to remove the brake caliper, rotor, and/or tie rod end to access the ball joint. Support any components you disconnect to prevent damage to brake lines or other parts.
-
Separate the Ball Joint
Remove the cotter pin and castle nut (if present). Use a ball joint separator tool to break the tapered connection between the ball joint stud and the steering knuckle. Apply penetrating oil if the connection is stubborn.
-
Remove the Old Ball Joint
For bolt-in ball joints, remove the mounting bolts. For press-in ball joints, use a ball joint press tool to push the old joint out of the control arm. Clean the mounting surface thoroughly after removal.
-
Install the New Ball Joint
For bolt-in types, position the new ball joint and install mounting bolts to the specified torque. For press-in types, use the press tool to carefully install the new joint until fully seated.
-
Reconnect to Steering Knuckle
Insert the ball joint stud into the steering knuckle hole. Install the castle nut and tighten to the specified torque. Install a new cotter pin (never reuse old cotter pins).
-
Reassemble Components
Reinstall all components removed during disassembly (tie rod, brake caliper, etc.) in the reverse order of removal, following torque specifications for each fastener.
-
Reinstall the Wheel
Place the wheel back on the hub and hand-tighten the lug nuts in a star pattern. Lower the vehicle and use a torque wrench to tighten the lug nuts to specification in the proper sequence.
-
Test Drive
Take the vehicle for a careful test drive in a safe area. Listen for unusual noises and feel for any handling issues. Check for proper steering response and suspension behavior.
-
Professional Alignment
Schedule a professional wheel alignment as soon as possible after ball joint replacement to ensure proper tire wear and handling characteristics.
DIY Pro Tip: Take photos during disassembly to reference during reassembly. Label any parts and fasteners as you remove them to ensure everything goes back in the correct position and orientation.
Frequently Asked Questions
A ball joint linkage is a mechanical connection system that utilizes a ball-and-socket design to provide a pivoting link between two components. This design allows for multi-directional movement while maintaining a secure connection. In automotive applications, ball joint linkages are critical components in suspension systems, connecting control arms to steering knuckles while accommodating changes in alignment and position during vehicle movement.
Several key indicators suggest ball joint wear or failure:
- Uneven Tire Wear: Abnormal wear patterns, particularly on inner or outer edges, indicating suspension misalignment
- Unusual Noises: Clunking, knocking, or popping sounds, especially when driving over bumps or making turns
- Steering Issues: Wandering, pulling to one side, or imprecise steering response
- Visual Indicators: Torn rubber boots, grease leakage, visible damage, or excessive rust
- Excessive Movement: Noticeable play when the suspension is tested (can be checked with a pry bar by a qualified mechanic)
- Vibration: Unusual vibrations felt through the steering wheel or floor
There is no universal replacement interval for ball joints as their lifespan depends on multiple factors:
| Factor | Impact on Ball Joint Life |
|---|---|
| Driving Conditions | Rough roads, off-road use, and potholes accelerate wear |
| Vehicle Weight | Heavier vehicles put more stress on ball joints |
| Maintenance Practices | Regular lubrication (for greasable types) extends lifespan |
| Quality of Components | Premium ball joints typically last longer than economy options |
| Climate | Exposure to salt, moisture, and temperature extremes affects durability |
Many manufacturers recommend inspection every 12,000-15,000 miles and replacement as needed. As a general guideline, ball joints often last between 70,000-150,000 miles under normal driving conditions, but should be replaced immediately if wear is detected regardless of mileage.
Driving with a worn or damaged ball joint is extremely dangerous and strongly discouraged. Ball joint failure while driving can cause the wheel to separate from the vehicle, resulting in complete loss of control and potentially catastrophic accidents. Even if the symptoms seem minor, a compromised ball joint should be replaced immediately before further vehicle operation.
In vehicles with double wishbone or SLA (short-long arm) suspension systems, upper and lower ball joints serve different functions:
- Lower Ball Joints: Usually larger and stronger as they bear most of the vehicle's weight and provide primary load support. They typically experience more wear and often include grease fittings for maintenance.
- Upper Ball Joints: Generally smaller and primarily help control wheel alignment and steering geometry rather than supporting weight. They may be designed as "load-carrying" or "follower" types depending on the suspension design.
Modern MacPherson strut suspensions typically use only lower ball joints, as the strut assembly replaces the function of the upper ball joint.