Types of bad nail art
Nail art can be a great way to express creativity and personal style. But certain designs can go very wrong. Some bad nail art styles include:
- Overly Busy Designs: When too many elements are crammed onto the nails, such as intricate patterns, multiple colors, and embellishments, it can become overwhelming and chaotic. A more streamlined design with a few well-executed features often creates a more elegant and impactful look.
- Messy Paint Application: If nail polish is applied carelessly, such as sloppily getting it on the cuticles or not properly lining up the tips, it can create an unkempt appearance. Smooth application and clean edges are essential for a polished (pun intended) finish.
- Poor Color Choices: Colors that clash or do not complement each other can make the design look haphazard. Selecting colors that work well together, whether through contrasting or complementing shades, is crucial for a cohesive look.
- Unnecessary Rhinestones: While rhinestones can add sparkle and glamour when used excessively or inappropriately, they can make the design look over-the-top. In some cases, the application may be flawed, such as not properly adhering the stones, which can create further issues. A few strategically placed rhinestones often provide the right amount of bling without going overboard.
- Poorly Executed Ombré: An ombré effect that does not blend well or has harsh lines between colors can detract from the overall look. For a successful ombré manicure, it is important to have a smooth transition between shades that creates a gradient effect.
- Unbalanced Proportions: Nail art designs that do not appropriately fit the size and shape of the individual nails can create a disjointed appearance. It is important that designs are scaled to match the nails they are being applied to for a harmonious look.
How to choose bad nail art
- Color Selection: Colors that don't go well together or don't match the theme can ruin the look. Using too many bright colors or colors that clash can make the nails look messy. Picking colors that work well together is important.
- Neatness: Nail art has to be neat. If the design lines are not straight or the colors are not inside the lines, it can make the nails look bad. The details should be drawn carefully so everything looks good together.
- Design Complexity: Very complex designs may be hard to paint on a small nail. Lines and shapes that are too small can be hard to do neatly. Simple designs with a few colors or patterns that are repeated often look better on nails than complicated ones.
- Theme Consistency: All the designs on different nails should match or relate to each other. When each nail has its own separate design that doesn't relate to the others, it can look chaotic. The designs should be different but still part of the same theme or style.
- Excessive Bling: Too many sparkles, gems, or 3D objects can cover the nail and make it heavy. This excess bling may fall off or be hard to use. Some bling with a few sparkly items or a single glittery nail and matte finish nails will look better than too many all over. Some shine adds fun without the hassle of too much.
- Trend Awareness: Knowing what's current helps avoid looking dated. Some styles are always in, but others come and go, like the clothes we wear. Keeping up with what's popular makes sure nail art feels fresh, not old-fashioned.
- Seasonal or Event Appropriateness: Certain colors and themes are good for seasons or events. Bright colors suit summer, while cozy winter colors work well. Knowing the right themes for holidays like Christmas or Halloween makes art feel right for the time. Using colors that match the season makes the nails fit in and look good.
How to use and product safety
Using nail art sets requires creativity and patience. Here's how to get started:
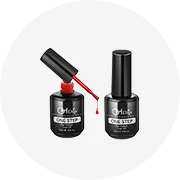
- Prep the Nails: Start with clean, shaped, and polished base coats on the nails. Remove any old polish. Use a nail clipper to trim long nails. Shape each nail with a nail file. Gently push back cuticles using a cuticle pusher or orange stick. Paint a thin layer of base coat on all 10 fingernails. Let it dry completely before moving on.
- Choose a Design: Pick one simple design to start, like polka dots or stripes. Pick two or three nail polish colors you want to use. Keep it easy at first until getting the hang of nail art techniques.
- Apply the First Color: Paint one coat of the first nail polish color over every nail. Choose a color that will be the main background for most nails. Let this coat dry before adding a second coat for full coverage.
- Add the Second Color: Once the first color dries, use a thin brush or dotting tool to add a second nail polish color in a new design. For example, paint tiny dots with the dotting tool or paint stripes using the brush. Work quickly while the first coat is still wet so they stick together.
- Finish Up: Continue adding more colors and designs on each nail until all are decorated. Let the nail art dry completely. Once dry, finish with a clear coat to seal the design and add shine. Allow nails to dry longer before doing activities like showering or typing on the computer. Enjoy the complimented on the creative nail art.
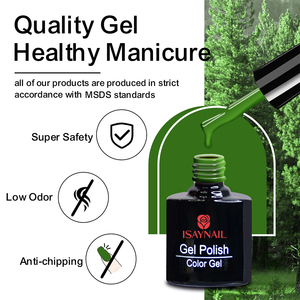
Product Safety
Nail art products can be fun to use, but it's important to follow safety guidelines. Here are some tips for using them safely:
- Ventilation: Nails should only be painted in well-ventilated rooms. Many polishes contain strong chemicals that give off fumes. Breathing these fumes can make people lightheaded, dizzy, or even nauseous. Good airflow helps reduce inhaling too much of these harmful substances.
- Protect Skin: Avoid getting polish, remover, or other nail products on the skin near nails. These chemicals can cause rashes or irritation if they touch sensitive skin. If any products spill on the hands, immediately wash the area with soap and water.
- Be Careful with UV: If using a UV lamp to dry gel polish, don't stare directly into the light. It can hurt eyes like sunlight. Turn the hand so the nails face down and the fingers block the light. Watch for redness or discomfort from exposure.
- Allergies: Check for nail art allergies by trying a small amount on the arm first. Some people may be allergic to glitter, gel, or certain pigments in polish. It's better to be safe and test before using lots on the nails.
- Follow Labels: Always read and follow directions written on nail products. Take note of any warnings or special precautions. Companies make these rules to help people use the item safely.
Functions, features, and design of bad nail arts
Function
- Beauty enhancement: Bad nail art can be an intentional choice to embrace imperfection. Some people may find beauty in smudges, unevenness, or flaws, celebrating a lack of precision as a more personal expression of art.
- Creativity: Bad nail art can also serve as a medium for experimentation and creative expression, allowing one to explore unconventional designs and techniques without the pressure of perfectionism.
- Temporary style: Bad nail art can also be a temporary style, easily changed or removed, perfect for those who like to change their looks often.
Feature
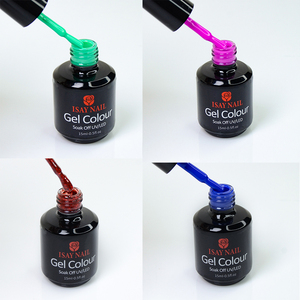
- Variety of colors: Bad nail kits are available in many colors, from muted pastels to bold brights, so one can pick any shade that fits their mood or outfit.
- Ease of use: Nail stickers and press-ons are easy to use; even beginners can use them. The kits contain detailed instructions, which take a short time to create a nail art design.
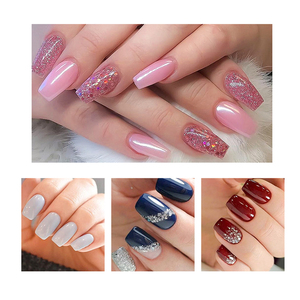
- Versatility: Bad nail art can be used on different occasions, formal or casual. Some designs may not be suitable for formal events but can be used for everyday wear.
- Accessibility: Many bad nail art supplies are easily accessible and inexpensive, making them easy for those who like to do their nails at home to create nail art designs.
Design
- Randomness: Incomplete or mismatched patterns characterize chaotic or random designs. This design embraces the beauty of randomness and celebrates the charm of disarray.
- Messy Textures: Messy textures nail art intentionally embraces smudges, uneven polish applications, and messy brush strokes. These designs celebrate the beauty of imperfections and the idea that not every artwork needs to be polished and perfect.
- Subtlety: Subtlety nail art is more understated and less pronounced, with very light hints of color or design. It is suitable for those who prefer not to have their nails stand out too much.
- DIY disasters: This category includes designs that may have smudges, uneven polish application, or misplaced decals. Such nail art shows the charm of DIY and the idea that perfection isn't necessary for creativity.
Q&A
Q1: What are some examples of bad nail art?
A1: Bad nail art can come in various forms, such as uneven lines or smudged polish that ruins the design. Overly complicated or excessive designs that clutter the nail space can also be unappealing. Poor color combinations, like clashing or colors that don't match the intended theme, can make a design look unprofessional. Additionally, when the nail art doesn't fit the shape or size of the nail, it can appear awkward and out of place.
Q2: How do I fix bad nail art?
A2: Fixing bad nail art starts with removing the flawed design gently. Use a nail polish remover to take off the existing polish without damaging the nail. Next, prepare the nail surface by cleaning, filing, and buffing it to create a smooth base. Apply a fresh coat of polish in a color that complements the design or a simple, classic shade. If the previous design is to be salvaged, touch up smudged lines with a thin brush or nail art tool and add extra layers where needed to achieve a smooth finish. Patience and a steady hand can often fix nail art mistakes.
Q3: What makes nail art good or bad?
A3: Good nail art is characterized by clean lines, even application, and designs that complement the nail's shape and size. Color combinations should be harmonious, and the overall look should appear professional and polished. Bad nail art often features smudges, uneven application, and designs that are overly complicated or cluttered. Poorly chosen color combinations and a lack of attention to detail can also make nail art seem unappealing.
Q4: What are the trends in nail art for 2023?
A4: Trends in nail art can change frequently, but some popular styles for 2023 may include minimalist designs, geometric patterns, and subtle gradients. Other trends may incorporate natural or earth-tone colors, as well as metallic or holographic finishes. Nail art that features texture, such as matte and glossy contrasts, or 3D elements, may also be trending.
Q5: What are the disadvantages of nail art?
A5: One potential disadvantage of nail art is the cost, as intricate designs may require more time and additional products, increasing the expense. Maintenance can also be a factor, as nail art that involves 3D elements or detailed work may be harder to keep looking fresh between applications. Some designs may require specialized tools or skills that make them challenging to do at home, necessitating professional service.