


Types of 7 HP Outboard Motors
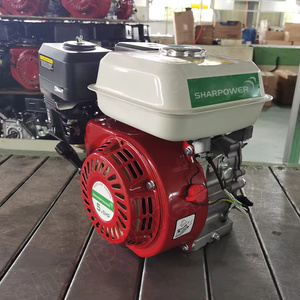
A 7 hp outboard motor is a compact and versatile propulsion system designed for small watercraft such as dinghies, inflatables, and fishing boats. With an ideal balance of power and portability, these motors are favored by recreational boaters, anglers, and light commercial users. Their fuel-efficient operation and manageable weight make them suitable for both freshwater and saltwater environments.
Engine Cycle Classification
Two-Stroke Outboard Motors
These engines generate power with every revolution of the crankshaft, using only two piston strokes to complete the combustion cycle. This design results in a lightweight, high-performance engine that delivers immediate throttle response.
Advantages
- High power-to-weight ratio
- Faster acceleration and higher RPM capability
- Simpler mechanical design with fewer moving parts
- Generally more affordable upfront cost
Limitations
- Higher fuel consumption compared to four-stroke models
- Greater emissions output
- Requires mixing oil with fuel (in older models)
- More frequent maintenance needed
Best for: Racing, shallow water fishing, or applications where quick bursts of power are essential
Four-Stroke Outboard Motors
Four-stroke engines complete the combustion process over four distinct piston strokes, resulting in smoother operation and greater efficiency. These motors are engineered for reliability and cleaner performance.
Advantages
- Superior fuel efficiency
- Lower emissions and compliance with modern environmental standards
- Quieter and smoother running characteristics
- Dedicated lubrication system reduces wear
Limitations
- Heavier and bulkier than two-stroke equivalents
- Higher initial purchase price
- Slightly slower throttle response
Best for: Recreational boating, family outings, and long-duration trips on the water
Additional Classifications Based on Design and Cooling
Electric Outboard Motors
Powered entirely by rechargeable batteries, electric motors offer silent operation and zero emissions. They're increasingly popular among eco-conscious boaters and those who prioritize stealth, such as fishermen.
Advantages
- Zero emissions and environmentally friendly
- Nearly silent operation
- Minimal maintenance requirements
- Easy to install and operate
Limitations
- Limited runtime depending on battery capacity
- Longer charging times between uses
- Less power available at higher speeds
Best for: Small electric boats, trolling, and quiet waterways with noise restrictions
Air-Cooled Outboard Motors
Air-cooled motors rely on natural airflow generated during operation to dissipate heat. These are typically found in entry-level and portable outboard designs.
Advantages
- Lightweight and simple construction
- Low maintenance needs
- Cost-effective option
Limitations
- Less effective cooling under prolonged use
- May overheat in slow-moving or idle conditions
- Not ideal for continuous high-speed operation
Best for: Smaller boats, short trips, and casual use in calm waters
Water-Cooled Outboard Motors
Water-cooled motors utilize ambient water from the surrounding environment to regulate engine temperature, making them more efficient for extended operation.
Advantages
- Better heat dissipation for sustained performance
- More reliable under heavy load or high-speed conditions
- Improved longevity due to consistent cooling
Limitations
- Increased complexity and maintenance
- Heavier than air-cooled alternatives
- Potential for corrosion if not properly maintained
Best for: Frequent use, coastal waters, and applications requiring reliable cooling
| Type | Power Output | Eco-Friendliness | Maintenance | Best For |
|---|---|---|---|---|
| Two-Stroke | High | Fair | Moderate | Racing, shallow water fishing |
| Four-Stroke | Good | Excellent | Low to Moderate | Recreational boating, family trips |
| Electric | Fair | Excellent | Very Low | Quiet lakes, trolling, eco-sensitive areas |
| Air-Cooled | Good | Fair | Low | Casual boating, small crafts |
| Water-Cooled | Very Good | Good | Moderate | Extended use, coastal environments |
Expert Tip: If you frequently navigate saltwater environments, opt for a water-cooled four-stroke model with corrosion-resistant components to ensure longer service life and optimal performance.
Comprehensive Guide to Specifications and Maintenance of 7 HP Outboard Motors
Understanding the Core Components and Their Roles
A 7 horsepower outboard motor is a compact but powerful piece of machinery that plays a crucial role in small boat performance. Proper understanding of its specifications and regular maintenance are essential for optimal operation, longevity, and reliability on the water.
The following sections break down key components, their maintenance requirements, and how they contribute to overall engine performance. This guide expands on standard maintenance procedures with additional technical insights and practical tips to help boat owners get the most from their equipment.
Maintenance Checklist & Technical Details
Lubrication System: Oil Changes
Frequency: Every 50 operating hours or once per season, whichever comes first.
Purpose: Engine oil serves as both a lubricant and coolant, reducing friction between moving parts while carrying away heat. Over time, oil breaks down and accumulates contaminants like carbon deposits and metal particles.
Best Practices:
- Always use the manufacturer-recommended oil type (usually a marine-specific 2-stroke or 4-stroke oil).
- Change oil when the engine is warm but not hot to ensure better flow and removal of suspended contaminants.
- Replace the oil filter at each change if applicable (some models include an integrated filter).
Cooling System Maintenance
Frequency: After every use in saltwater environments; periodic deep cleaning every 2-3 years.
Purpose: The cooling system circulates water through passages in the engine block to regulate temperature. Blockages or corrosion can lead to overheating and severe engine damage.
Best Practices:
- Flush the engine with freshwater after each use in saltwater or brackish conditions using a flushing attachment.
- Inspect the water pump impeller annually for wear or cracks—replace if damaged or flattened blades.
- Use descaling solutions specifically designed for marine engines to clean internal cooling passages during major service intervals.
Fuel System Care
Frequency: Fuel filter replacement every 100 hours; fuel lines inspected every 25 hours.
Purpose: The fuel system delivers gasoline from the tank to the carburetor or fuel injection system. Contaminated fuel or deteriorated lines can cause poor performance or engine failure.
Best Practices:
- Use ethanol-free fuel when possible, especially for long-term storage or infrequent use.
- Install a high-quality inline fuel filter rated for marine applications.
- Visually inspect all fuel lines for cracks, swelling, or brittleness. Replace any hose showing signs of aging.
- Run a fuel stabilizer through the system before storing the motor for extended periods.
Ignition System: Spark Plugs & Coils
Frequency: Inspection every 100 hours; spark plug replacement every 2-3 years or sooner if fouled.
Purpose: The ignition system creates the spark necessary to ignite the air-fuel mixture. Faulty spark plugs or coils can result in misfires, hard starting, and reduced efficiency.
Best Practices:
- Check electrode gap using a feeler gauge according to manufacturer specifications (typically 0.025–0.030 inches).
- Look for carbon buildup, oil fouling, or worn electrodes—clean or replace as needed.
- Test ignition coils with a multimeter to check resistance values and ensure consistent spark delivery.
- Apply anti-seize compound to plug threads during installation to prevent seizing in aluminum heads.
Propulsion System: Propeller and Lower Unit
Frequency: Visual inspection after each outing; lower unit oil change annually.
Purpose: The propeller converts engine power into thrust, while the lower unit houses gears and bearings critical to transmission function. Damage or wear can affect speed, handling, and durability.
Best Practices:
- Inspect the propeller for dings, bends, or missing blades—these can create imbalance and vibration.
- Ensure the propeller hub isn't slipping by checking for unusual spinning under load.
- Drain and refill the lower unit with fresh gear oil to remove metal shavings and moisture.
- Check the shift mechanism linkage for proper tension and alignment to avoid gear grinding or shifting issues.
Electrical System Monitoring
Frequency: Monthly visual checks; comprehensive inspection twice per season.
Purpose: The electrical system powers everything from the starter to gauges and safety lights. Corrosion and loose connections are common causes of outboard failures.
Best Practices:
- Clean battery terminals with a wire brush and apply dielectric grease to prevent corrosion.
- Test battery voltage regularly with a multimeter—should read above 12.4V when fully charged.
- Inspect wiring harnesses for chafing, exposure to moisture, or cracked insulation.
- Ensure all switches, kill switches, and ignition controls operate smoothly and without hesitation.
Exterior Protection and Storage
Frequency: End-of-season cleaning and protection; light maintenance after each use.
Purpose: Exposure to sun, saltwater, and weather can degrade plastics, metals, and painted surfaces over time.
Best Practices:
- Rinse the entire motor with freshwater after each use, especially in saltwater environments.
- Apply a UV protectant to plastic covers and rubber components to prevent fading and cracking.
- Store the motor in an upright position with a breathable cover to allow airflow and reduce condensation.
- Lubricate pivot points, throttle cables, and steering mechanisms with marine-grade grease before storage.
Hours-Based Preventative Maintenance Schedule
Recommended Interval: Every 50 hours of operation
Key Tasks Include:
- Oil change and oil filter replacement
- Inspection of all fluid levels (fuel, gear oil, etc.)
- Visual check of belts, hoses, and wiring
- Throttle and shift cable adjustment
- Testing of safety systems (kill switch, alarms)
Note: Refer to your specific model's owner’s manual for exact torque specs, recommended fluids, and service schedules tailored to your engine design.
| Maintenance Task | Interval | Tools/Products Needed |
|---|---|---|
| Oil Change | Every 50 hours or seasonally | Wrench, oil catch pan, funnel, correct oil type |
| Fuel Filter Replacement | Every 100 hours | New filter, wrench, gloves |
| Spark Plug Inspection | Every 100 hours | Spark plug socket, gap tool, multimeter |
| Lower Unit Oil Change | Annually | Socket set, marine gear oil, drain pan |
| Electrical Connections Check | Bi-monthly | Dry cloth, dielectric grease, multimeter |
Important Safety Reminder: Always disconnect the battery and ensure the motor is off before performing any maintenance tasks. Work in a well-ventilated area and keep flammable materials away from fuel and oil sources. If you're unsure about any procedure, consult a certified marine technician.
How to Choose a 7 HP Outboard Motor
Selecting the right 7 horsepower outboard motor involves more than just picking the first option you come across. A well-informed decision should take into account several important factors that directly affect your boating experience, including boat compatibility, fuel availability, regulatory compliance, ease of maintenance, and performance characteristics.
Weight and Boat Size Compatibility
The weight of the motor in relation to your boat's size and type is crucial for maintaining balance, stability, and overall performance on the water. An improperly matched motor can lead to handling issues, reduced efficiency, or even safety concerns.
- Lightweight models (typically under 90 lbs) are ideal for small inflatable boats, dinghies, and light fishing skiffs
- Mid-weight motors (90-110 lbs) suit average-sized jon boats, utility crafts, and smaller pontoons
- Boats over 14 feet or with heavy loads require careful consideration of mounting points and transom strength
Key tip: Always check your boat’s maximum recommended motor weight capacity before purchasing
Fuel Type and Availability Considerations
Understanding which fuel type best suits your needs and environment will help ensure consistent operation and easier refueling while on the water. This choice also affects long-term maintenance requirements and environmental impact.
- Gasoline engines remain the most common and widely supported option
- Diesel variants offer better fuel economy but may be harder to find in recreational settings
- Electric outboards provide quiet operation and zero emissions but have limited range
- Ethanol-blended fuels require special fuel system materials to prevent corrosion
Environmental note: Many regions now encourage low-emission two-stroke or four-stroke engines
Coastal Regulations and Safety Compliance
Before making a purchase, it's essential to verify that your chosen motor meets all local, national, and international regulations regarding emissions, noise levels, and safety standards. Non-compliant motors may be restricted from use in certain areas.
- Check EPA certification for U.S. waters
- Verify CE marking for European Union compliance
- Review state-specific noise restrictions (e.g., California CARB standards)
- Ensure inclusion of required safety shut-off lanyard systems
Pro tip: Some lakes and reservoirs restrict engine types for environmental protection
Maintenance Accessibility and Service Network
Consider the long-term ownership experience by evaluating parts availability, service network coverage, and the complexity of routine maintenance tasks. Motors with widespread support networks make ownership significantly easier.
- Major brands like Yamaha, Honda, and Mercury have extensive dealer networks
- Aftermarket parts availability varies by manufacturer
- Some motors feature tool-less access to key components
- Service intervals differ between two-stroke and four-stroke designs
DIY-friendly features: Look for accessible oil fill ports, easily replaceable water pumps, and clear inspection windows
Torque Characteristics and Propeller Selection
Understanding how torque output and propeller configuration affect performance helps optimize speed, acceleration, and fuel efficiency based on your specific boating needs and conditions.
- High-torque motors excel at pushing heavier loads through rough water
- Lower pitch props improve acceleration and towing ability
- Higher pitch props maximize top-end speed at the expense of initial acceleration
- Aluminum props are durable and affordable; stainless steel offers improved performance
Performance factor: Torque ratings vary significantly between two-stroke and four-stroke engine designs
Expert Advice: When upgrading from an older model, consider not just matching horsepower but also evaluating newer technology benefits such as electric start, improved fuel efficiency, and enhanced corrosion resistance. These features can dramatically improve your overall boating experience despite similar power ratings.
| Application Type | Recommended Features | Ideal Motor Weight Range | Best Fuel Option |
|---|---|---|---|
| Recreational fishing | Lightweight design, quiet operation | 85-95 lbs | Four-stroke gasoline |
| Family outings | Electric start, tilt assist | 95-105 lbs | Low-emission two-stroke |
| Commercial use | Durable construction, easy serviceability | 100-110 lbs | Four-stroke with ethanol resistance |
| Remote locations | Simple mechanics, minimal electronics | 85-95 lbs | Traditional two-stroke |
Comprehensive DIY Guide to Replacing a 7 HP Outboard Motor
Replacing a 7 horsepower outboard motor is a significant task that requires attention to detail, the right tools, and a methodical approach. While it's not a beginner-level project, with proper preparation and guidance, experienced boat owners can complete this job successfully. This guide will walk you through every step of the replacement process while offering valuable insights to ensure your new motor performs reliably.
Safety First: Always disconnect the battery before beginning work on any marine engine. Ensure your workspace is well-ventilated and free from open flames or sparks when working with fuel systems.
Detailed Replacement Procedure
- Gather Essential Tools and Equipment
- A complete socket set (metric and standard sizes)
- Ratchet wrenches and extension bars
- Flathead and Phillips screwdrivers
- Needle-nose pliers and wire cutters
- Marine-grade grease for lubricating components
- Torque wrench for precise bolt tightening
- Clean rags and degreaser for maintenance tasks
- Owner’s manual or service manual specific to your motor model
Having the correct tools ensures efficient progress and prevents damage to fasteners or components during removal and installation.
- Selecting the Correct Replacement Motor
- Match horsepower and shaft length to your boat specifications
- Verify compatibility with existing mounting hardware and controls
- Check for proper weight balance with your vessel
- Ensure compliance with local environmental regulations
Consulting with a marine technician or contacting the manufacturer directly can help confirm you're getting the right replacement. Pay special attention to rotation direction (standard or counter-rotation) if applicable.
- Preparing Your Boat for Motor Replacement
- Securely position the boat on a trailer or stable stand
- Remove any protective covers or cowling around the motor
- Clean the transom area thoroughly to remove dirt and debris
- Lubricate the mounting bracket pivot points with marine grease
Proper preparation makes the job easier and helps prevent contamination of sensitive components during reinstallation.
- Removing the Old Outboard Motor
- Disconnect all electrical connections, labeling them for reference
- Close the fuel shut-off valve and disconnect fuel lines
- Loosen and remove the motor mounting bolts carefully
- Use proper lifting technique or assistance to lower the motor safely
Take photos during disassembly to aid in reassembly. Drain any remaining fuel from disconnected lines into an approved container.
- Installing the New Outboard Motor
- Position the new motor using appropriate lifting equipment
- Align the mounting brackets with the transom holes
- Install and torque all mounting bolts to manufacturer specifications
- Apply marine anti-seize compound to threads before installation
Double-check that the motor tilts freely and locks securely in the upright position. Ensure the trim tab is positioned correctly for optimal performance.
- Setting Up the Fuel System
- Connect fuel lines using new hose clamps
- Inspect all connections for cracks or wear
- Prime the fuel system according to manufacturer instructions
- Check for leaks by running the primer bulb after connection
Always use marine-rated fuel lines and fittings. Consider replacing the entire fuel system if original components show signs of aging.
- Connecting the Electrical System
- Reconnect all labeled wiring harnesses
- Ensure ground wires are securely connected
- Test circuit continuity with a multimeter
- Protect exposed connections with waterproof heat-shrink tubing
Refer to the wiring diagram in your service manual. Improper electrical connections can lead to intermittent starting issues and sensor malfunctions.
- Adjusting Throttle and Shift Controls
- Route throttle and shift cables following factory routing
- Adjust cable tension to specification in the service manual
- Lubricate cable ends with marine grease
- Test shifting through all gears for smooth operation
Improper cable adjustment can cause poor acceleration, difficulty shifting, or premature component wear. Take time to get this right.
- Testing Safety Systems
- Verify kill switch functionality with safety lanyard attached
- Test emergency stop button operation
- Check low oil warning system (if equipped)
- Confirm tachometer and other gauges function properly
These safety features protect both operator and motor. Never operate the boat without confirming all safety systems are fully functional.
- Final Testing and Break-In Procedure
- Add fresh fuel with proper ethanol content
- Fill gear case with recommended lubricant
- Perform initial start-up with motor in water or using flush muffs
- Follow manufacturer break-in procedure for first 10 hours of operation
Monitor for unusual noises, vibration, or fluid leaks during testing. Gradually increase RPM as recommended in the owner's manual.
| Replacement Stage | Key Components | Common Pitfalls | Recommended Practices |
|---|---|---|---|
| Preparation | Tools, service manual, replacement parts | Mismatched motor specs, missing specialized tools | Compare model numbers, organize tools systematically |
| Disconnection | Electrical connectors, fuel lines, control cables | Unlabeled wires, fuel spills, damaged components | Label everything, use drip pans, photograph connections |
| Motor Removal | Mounting bolts, tilt mechanism | Poor lifting support, dropped motor | Use lifting straps, have assistant assist |
| Installation | Mounting hardware, alignment | Over-tightened bolts, misalignment | Use torque wrench, verify level positioning |
| Reconnection | Electrical connections, fuel system | Loose connections, fuel leaks | Double-check connections, test for leaks |
| Testing | Engine operation, safety systems | Incomplete break-in, ignored warnings | Follow break-in protocol, address all error signals |
Professional Tip: Before installing the new motor, inspect and replace any worn or corroded components from the old setup that might be reused, such as cowlings, fuel tanks, or control boxes. Clean all contact surfaces thoroughly for optimal performance and longevity.
Post-Installation Best Practices
- Keep detailed notes of the replacement process for future reference
- Save all original hardware until you’re certain the new motor works properly
- Dispose of old motor fluids and parts at designated recycling centers
- Create a digital photo record of your installation for troubleshooting
- Establish a regular maintenance schedule based on the new motor’s requirements
Remember that even though this is a DIY project, consulting with a certified marine technician for a final inspection can provide peace of mind and help catch potential issues early.
Frequently Asked Questions about 7 HP Outboard Motors
A 7 horsepower (hp) outboard motor typically provides speeds ranging from 5 to 8 miles per hour (mph), depending on several factors such as the weight and design of the boat, water conditions, and wind resistance. Lighter boats with minimal load will generally achieve higher speeds within this range, while heavier or poorly designed hulls may struggle to reach the upper limit. These motors are ideal for small fishing boats, dinghies, or utility vessels where high speed is not a priority.
The main differences between 4-stroke and 2-stroke 7 hp outboard motors lie in their engine operation, efficiency, and environmental impact:
- 4-Stroke Engine: Uses separate oil and gasoline systems, making it more fuel-efficient and environmentally friendly. It produces less noise and vibration, runs smoother, and requires less frequent maintenance. However, these engines tend to be heavier and more mechanically complex due to additional components like camshafts and valves.
- 2-Stroke Engine: Requires pre-mixed oil and gasoline, which simplifies the internal design and makes it lighter and easier to maintain. While offering better power-to-weight ratios and quicker acceleration, 2-stroke engines are generally less fuel-efficient and emit more pollutants compared to 4-stroke models. They are often preferred for applications where weight savings and simplicity are critical.
Your choice should depend on your priorities—opt for a 4-stroke if you value quiet operation, fuel economy, and cleaner emissions, or choose a 2-stroke if you prefer lightweight performance and ease of maintenance.
Regular oil changes are essential for maintaining the longevity and performance of your 7 hp outboard motor. As a general guideline, it’s recommended to change the oil every 50 to 100 hours of operation or at least once per boating season. Frequent use in harsh conditions—such as saltwater environments or extreme temperatures—may necessitate more frequent changes. Always consult the manufacturer's manual for specific service intervals tailored to your model, and never skip this maintenance step, as old or contaminated oil can cause significant engine wear over time.
Yes, a 7 hp outboard motor can be used in saltwater environments. However, special care must be taken to protect the engine from corrosion caused by salt buildup. After each use in saltwater, it’s crucial to thoroughly rinse the motor with freshwater to remove residual salts and minerals. Applying a light coat of marine-grade corrosion inhibitor on exposed metal parts can further enhance protection. Regular inspections and maintenance, including checking for signs of rust or pitting, will help extend the life of the motor when operating in saline conditions.
The fuel consumption of a 7 hp outboard motor varies based on the engine type (2-stroke vs. 4-stroke), operating conditions, and load. On average:
- 2-Stroke Models: Typically consume around 0.8 to 1.0 liters of fuel per hour under normal operating conditions.
- 4-Stroke Models: Are more efficient and usually consume between 0.5 to 0.7 liters per hour.
Factors such as throttle usage, boat weight, and water conditions can significantly influence actual fuel consumption. For example, running at full throttle continuously will increase fuel use, while cruising at lower RPMs will improve efficiency. Proper engine tuning and regular maintenance also play a role in optimizing fuel economy.