


Types of Burr Removal Tools
Burr removal tools are specialized instruments designed to eliminate unwanted burrs and edges from various materials including metals, wood, plastics, and composites. These precision tools come in various configurations to address specific deburring challenges and material requirements.
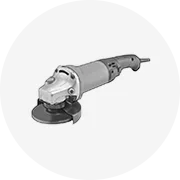
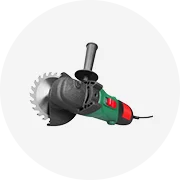
Rotary Tool
A versatile handheld device that spins at high speeds (typically 5,000-35,000 RPM) to perform various tasks including deburring operations. When fitted with appropriate grinding or cutting bits, rotary tools provide:
- Precise control for detailed work
- Versatility through interchangeable bits
- Options for both corded (consistent power) and cordless (portability) operation
Best for: Detail work, hard-to-reach areas, and versatile applications
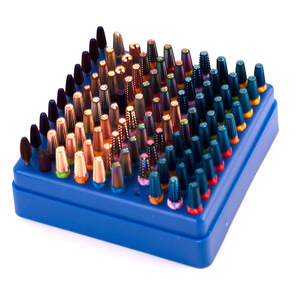
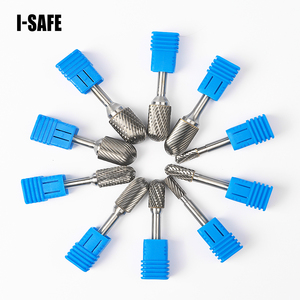
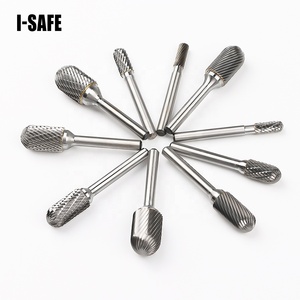
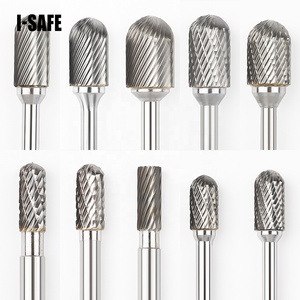
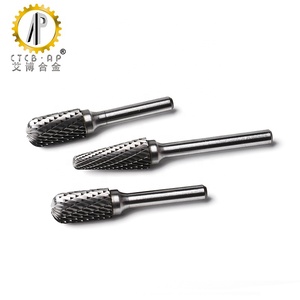
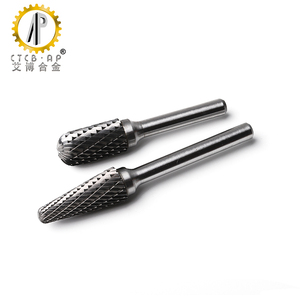
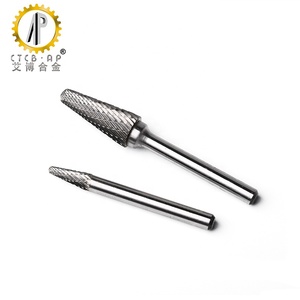
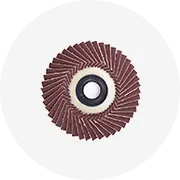
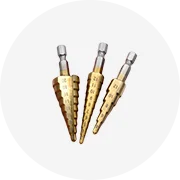
Burrs (Cutting Tools)
Hardened steel cutting implements with various profiles attached to a handle or tool shank. These specialized cutting tools come in numerous shapes designed for specific applications:
- Circular burrs: Ideal for internal holes and curved surfaces
- Flat burrs: Perfect for leveling and finishing flat surfaces
- Tapered burrs: Specialized for deburring holes and conical shapes
Best for: Precision deburring on metals, plastics, and wood
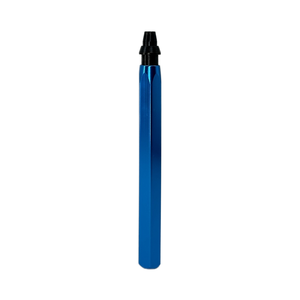
Deburring Knife
A simple yet effective hand tool featuring a sharp blade specifically designed for deburring operations. These knives typically feature:
- Ergonomic handles for comfortable grip
- Replaceable or resharpenable blades
- Compact design for portability and storage
Best for: Quick deburring of plastic parts, soft metals, and accessible edges
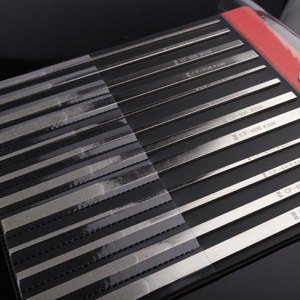
Hand Files
Traditional manual tools with textured surfaces used to remove material through a filing action. Hand files offer:
- Various profiles (flat, round, half-round, triangular)
- Different cut patterns (single-cut, double-cut, rasp)
- Precise control without power requirements
Best for: Manual deburring work where precision and control are priorities
Scraper
A basic tool consisting of a flat, sharpened metal piece with a handle designed for removing surface imperfections. Scrapers provide:
- Simple operation with minimal training required
- Effective removal of burrs from flat surfaces
- Economical solution for basic deburring needs
Best for: Deburring castings, sheet metals, and flat surfaces
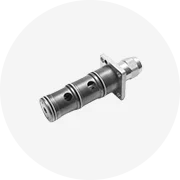
Specialized Deburring Tool
Purpose-built instruments designed specifically for deburring operations on pipes, tubes, and sheet metals. These tools feature:
- Specialized cutting edges for specific applications
- Adjustable settings for different material thicknesses
- Designs that prevent damage to the parent material
Best for: Professional deburring of pipes, holes, and sheet metal edges
Effectiveness Comparison by Material Type
Specifications and Maintenance of Burr Removal Tools
Understanding the key specifications of burr removal tools is essential for selecting the right tool for specific applications. Manufacturers and suppliers provide detailed specifications to help users make informed decisions based on their deburring requirements.
Material Composition
The material of the cutting element significantly impacts performance and durability:
- High-Speed Steel (HSS): Good balance of hardness and toughness, ideal for general-purpose deburring
- Tungsten Carbide: Superior hardness and wear resistance, excellent for hard materials and high-volume production
- Cobalt Steel: Enhanced hardness and heat resistance compared to standard HSS, maintains sharpness longer
- Diamond Coated: Ultimate hardness for working with abrasive materials like ceramics and composites
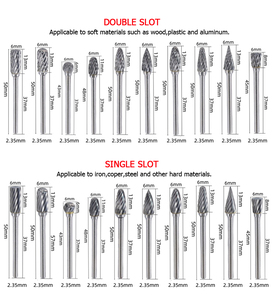
Size and Shape Specifications
Tools vary in dimensions to accommodate different applications:
- Length: Typically ranges from 3 to 6+ inches, affecting reach and leverage
- Cutting Edge Shape: Available in flat, round, triangular, conical configurations for different burr types
- Shank Diameter: Common sizes include 1/8", 1/4", and 3/32" to fit various tool holders
- Overall Weight: Affects handling comfort during extended use
Grit Size/Cutting Properties
The abrasiveness or cutting profile determines material removal rate and finish quality:
- Coarse (36-60 grit): Rapid material removal with rougher finish
- Medium (80-120 grit): Balanced material removal and surface finish
- Fine (150-240 grit): Slower material removal with smoother finish
- Extra-fine (320+ grit): Minimal material removal with polished finish
Essential Maintenance Practices
Proper maintenance extends tool life and ensures consistent performance:
- Post-Use Cleaning: Always clean tools thoroughly after use to remove debris, metal particles, and coolant residue that could cause corrosion or impair performance.
- Regular Inspection: Examine tools for signs of wear, damage, or rust. Look for chipped cutting edges, bent shanks, or excessive wear patterns that might indicate improper use.
- Proper Storage: Store tools in a clean, dry environment away from moisture and extreme temperatures. Consider using protective sheaths or cases for cutting tools.
- Follow Manufacturer Guidelines: Adhere to specific maintenance instructions provided by the tool manufacturer regarding lubrication, resharpening, and replacement schedules.
- Rotation and Replacement: Implement a system to rotate tools to distribute wear evenly and establish clear criteria for when tools should be replaced rather than continued use.
| Tool Type | Recommended Cleaning Method | Maintenance Frequency | Signs of Replacement Need |
|---|---|---|---|
| Rotary Tool | Compressed air for dust removal, light oil for moving parts | After each use, deep clean monthly | Motor noise, decreased power, excessive heat |
| Cutting Burrs | Solvent cleaning, wire brush for chip removal | After each use | Dulled cutting edges, chipping, excessive vibration |
| Deburring Knife | Wipe clean, occasional honing of blade | After each use, sharpen as needed | Dulled edge, blade damage, loose handle |
| Hand Files | File card/brush to clean teeth, chalk to prevent clogging | After each use | Smoothed teeth, clogging, corrosion |
| Scraper | Wipe clean, occasional edge conditioning | After each use, sharpen as needed | Dulled edge, chipping, deformation |
How to Choose Burr Removal Tools
Selecting the appropriate burr removal tool involves careful consideration of several key factors to ensure optimal performance, efficiency, and safety in your deburring operations.
Tool Type Selection
The nature of your deburring application should determine your tool choice:
- Large Metal Parts with Tough Burrs: Electric or cordless die grinders provide the power and durability needed
- Precision Work: Specialized deburring tools with adjustable cutting depths
- Soft Materials: Hand files and manual deburring tools provide controlled material removal
- Production Volume: Consider automated or pneumatic options for high-volume operations
Material Compatibility
Match tool material to your workpiece requirements:
- High-Speed Steel (HSS): Excellent for aluminum and other non-ferrous metals
- Tungsten Carbide: Ideal for stainless steel, tool steel, and hardened materials
- Cobalt Steel: Superior performance on heat-resistant alloys
- Ceramic/Diamond: Necessary for extremely hard materials like ceramics or hardened steels
Burr Size and Geometry
Consider the physical characteristics of the burrs you're removing:
- Large Burrs: Require tools with larger cutting surfaces and more aggressive profiles
- Circular Edges: Best addressed with wheel-shaped tools that follow contours
- Straight Edges: Cylindrical tools provide consistent removal along linear surfaces
- Internal Features: Require specialized tools with appropriate reach and profile
Technical Specifications
Pay attention to critical technical details:
- Shank Size: Must match your tool holder's collet or chuck capacity
- Tool Coarseness/Grit: Determines removal rate and finish quality
- Speed Ratings: Ensure compatibility with your power tool's RPM range
- Ergonomics: Consider weight, balance, and grip design for extended use
Important Selection Consideration: Always prioritize safety when selecting burr removal tools. Choose tools with appropriate guards and safety features, and ensure you have the proper personal protective equipment (PPE) including eye protection, gloves, and respiratory protection when necessary.
Tool Selection Priority Factors
DIY Installation and Usage of Burr Removal Tools
Following proper installation and usage procedures ensures safe, effective deburring operations and extends the life of your tools. While specific instructions may vary by manufacturer, these general guidelines apply to most deburring applications.
Choose the Right Tool
Start by selecting a tool that matches both the material being worked on and the specific characteristics of the burrs:
- Consider burr size, material hardness, and location accessibility
- For metals, use tools specifically rated for the material hardness
- For plastics, choose tools that won't melt or damage the parent material
- For precision work, select tools with appropriate size and control features
Secure the Workpiece
Proper workpiece fixturing is critical for safety and quality:
- Use clamps, vises, or other appropriate holding devices
- Ensure the workpiece cannot move during the deburring operation
- Position the workpiece to provide comfortable access to all areas requiring deburring
- Consider using soft jaws or protective materials when clamping finished surfaces
Inspect and Assess the Burrs
Before beginning work, carefully examine the burrs to develop an appropriate approach:
- Note burr size, location, and orientation
- Identify any challenging areas that may require special techniques
- Plan your approach to ensure consistent results across all similar features
- Consider marking particularly problematic areas for special attention
Apply Proper Technique
Using the tool correctly ensures efficient burr removal without damaging the workpiece:
- Apply minimal pressure—let the tool do the work
- Maintain consistent speed and pressure throughout the operation
- Work in one direction when possible (with the cutting edge, not against it)
- For power tools, start at lower speeds and increase as needed
Monitor Progress
Regular inspection during the deburring process prevents over-processing:
- Check your work frequently, especially when first starting
- Look for signs of excessive material removal or workpiece damage
- Adjust technique, tool selection, or approach as needed
- Use appropriate lighting and magnification for detailed inspection
Finish and Refine
After initial burr removal, address surface quality as needed:
- Progress from coarser to finer abrasives if a smooth finish is required
- Use polishing compounds or finishing tools for critical surfaces
- Check edges with a fingernail or deburring gauge to confirm complete burr removal
- Address any remaining high spots or inconsistencies
Clean and Inspect
Proper cleaning allows final quality verification:
- Remove all debris, dust, and processing residues
- Clean using appropriate methods for the material (solvent, air blast, ultrasonic, etc.)
- Perform final inspection under good lighting conditions
- Verify that all functional and aesthetic requirements are met
Final Testing
Confirm that deburring has achieved the desired functional outcome:
- Test part fit and function if applicable
- Verify that all sharp edges have been properly addressed
- Check against quality standards or specifications
- Document results for quality control purposes if required
Tool Care After Use
Extend the life of your burr removal tools with these post-use practices:
- Immediate Cleaning: Remove all chips, dust, and debris before storage
- Proper Storage: Store in a dry location, using protective covers when available
- Inspection: Check for damage or wear that might affect future performance
- Lubrication: Apply light oil to prevent corrosion on steel tools
- Organizational System: Develop a storage system that protects cutting edges and keeps tools accessible
Frequently Asked Questions
Effective burr removal follows these key practices:
- Tool Selection: Choose tools appropriate for the material and burr type, considering both the hardness of the material and the size/location of burrs
- Technique: Apply consistent, controlled pressure rather than excessive force, which can damage the workpiece or create new burrs
- Direction: Work in the direction that supports the cutting action of the tool, generally moving away from finished edges
- Progressive Approach: For precision work, start with coarser tools for bulk removal, then finish with finer tools
- Safety: Always use appropriate personal protective equipment including eye protection, gloves, and respiratory protection when necessary
- Workpiece Protection: Secure the workpiece properly and protect finished surfaces from damage during the deburring process
Yes, burrs can be safely removed from delicate materials by following these specialized approaches:
- Gentle Tools: Use extra-fine grit abrasives, specialized plastic deburring tools, or micro-finishing files designed for delicate work
- Controlled Pressure: Apply minimal pressure and let the tool do the work—excessive force is the primary cause of damage
- Support Backing: Provide adequate support behind thin materials to prevent deflection during deburring
- Chemical Methods: For some materials, chemical deburring solutions can remove burrs without mechanical stress
- Thermal Techniques: For certain plastics, carefully applied heat can melt and round edges without mechanical contact
- Precision Tools: Consider using magnification and high-precision tools designed specifically for micro-deburring operations
Several environmentally friendly deburring approaches exist:
- Mechanical Methods: Traditional filing, sanding, and brushing require no chemicals and produce only solid waste that can be recycled
- Cryogenic Deburring: Uses recycled CO₂ or nitrogen rather than chemical solvents
- Biodegradable Media: Abrasive blasting using walnut shells, corn cobs, or other organic materials
- Water-Based Solutions: Water-soluble, non-toxic chemical deburring compounds that break down naturally
- Thermal Deburring: Controlled combustion processes that produce minimal emissions
- Ultrasonic Deburring: Uses sound waves in water-based solutions without harsh chemicals
Deburring plays several critical roles in ensuring product quality:
- Dimensional Accuracy: Removing burrs ensures parts meet specified dimensions and tolerances
- Assembly Function: Properly deburred components fit together correctly without interference
- Surface Finish: Deburring improves aesthetic appearance and prevents sharp edges that could cause injury
- Mechanical Performance: Reduces stress concentrations that could lead to premature part failure
- Contamination Prevention: Eliminates loose burrs that could break free and cause damage to moving parts
- Corrosion Resistance: Removes areas where corrosion could initiate due to trapped moisture or chemicals
- Flow Characteristics: For fluid-handling components, deburring improves flow efficiency and reduces turbulence
Yes, burr removal tools can be customized in several ways to address specific application requirements:
- Custom Profiles: Tools can be manufactured with specialized shapes to match specific part geometries
- Material Selection: Cutting elements can be produced from specialized alloys or coatings optimized for specific workpiece materials
- Size Modifications: Standard tools can be modified to reach restricted areas or address unusual feature sizes
- Automated Solutions: Custom tool configurations can be developed for robotic or CNC deburring operations
- Multi-function Tools: Specialized tools can combine multiple operations (deburring, chamfering, finishing) in a single tool
- Application-Specific Holders: Custom fixtures or guides can ensure consistent deburring results for production applications